|
|||||||


| Show your rotary car build up. Show off your Rotary Car build! |
 |
|
|
Thread Tools | Display Modes |
|
|||||||
| Show your rotary car build up. Show off your Rotary Car build! |
|
|
|
Thread Tools | Display Modes |
|
|
 03-12-2012, 09:41 AM
|
#1 |
|
Rotary Fanatic
Join Date: Feb 2010
Posts: 183
Rep Power: 16  |
Had a somewhat productive weekend, although I didn't get as much done as I had wanted. Turns out i don't have the right style crimp tool to do the crimps needed for the injectors and fuel pumps. So I need to try to find a good one and order it today.
I did get the cat installed though, had to move the borla resonator back as far as I could, and then the cat fit perfectly. 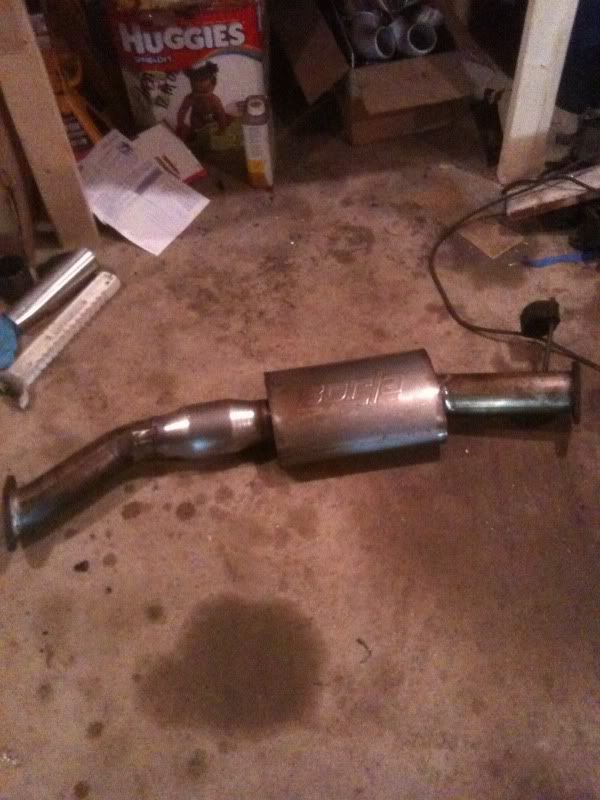 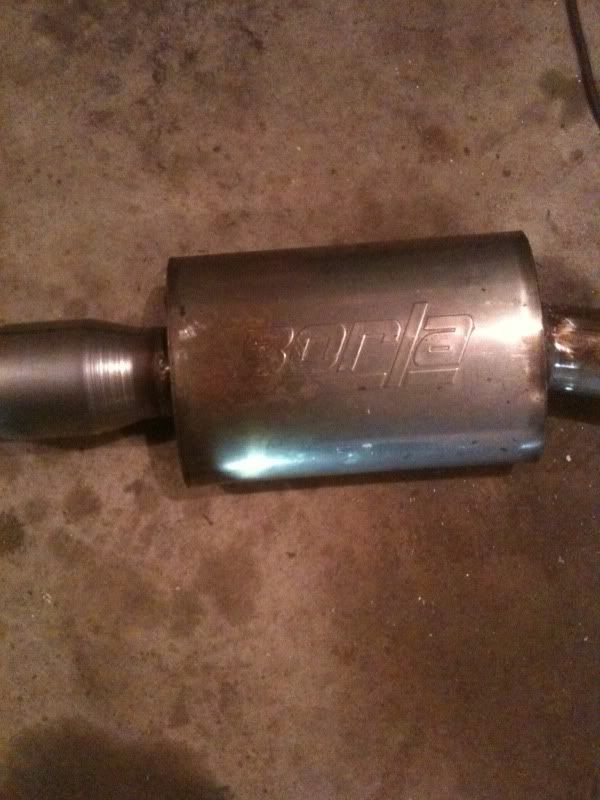 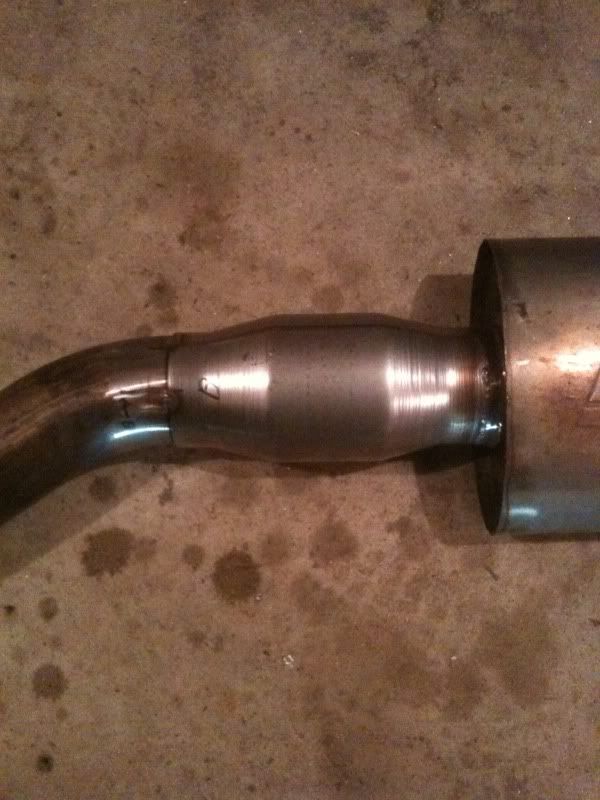 This will probably hurt my hp up top, but I don't think I'll have the usual negative impact of backpressure causing lag, my supercharger should offset that. |

|

|
|
03-12-2012, 09:49 AM
|
#2 |
|
Rotary Fanatic
Join Date: Feb 2010
Posts: 183
Rep Power: 16 |
I also redid the supercharger intake pipe. For last year's deals gap I was running out of time and kept having to hack this pipe up to clear the oil fill pedelstal. I ended up still not getting it to clear and having to bash the piece with a hamer to make it clear.
Now that I've relocated the oil fil, and have the extra clearance from removing the oil fil pedestal completely, and blocking the hole off with a freeze plug, I remade the piece the way it was originally supposed to be. The dipstick was another obstacle, but I made it around it. Even ported it all on the inside for nice smooth flow:  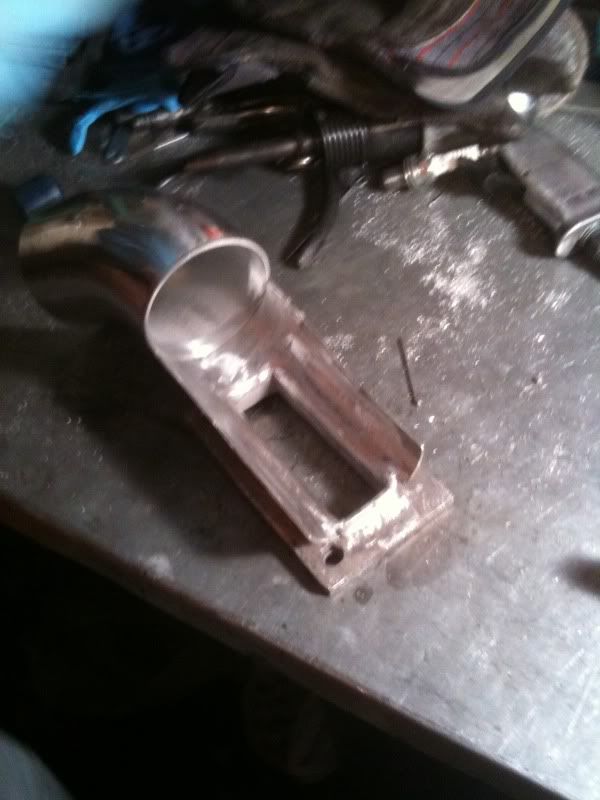 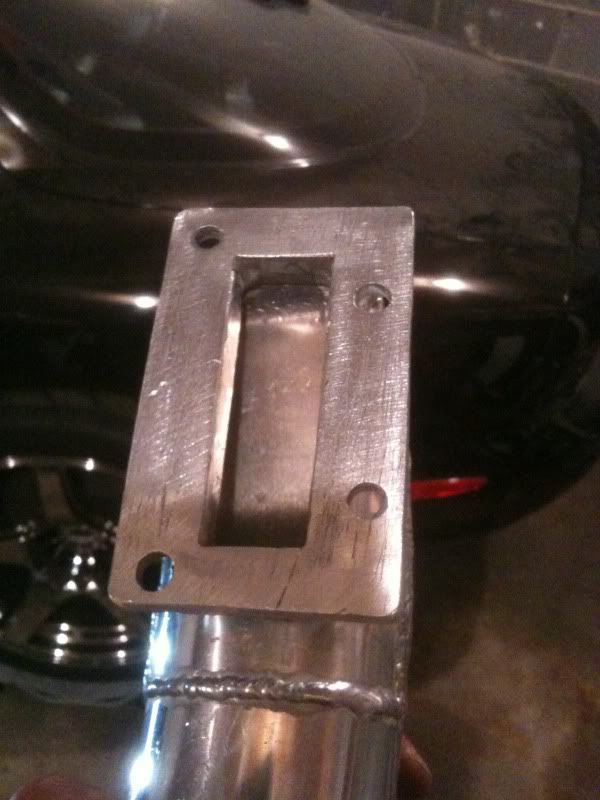 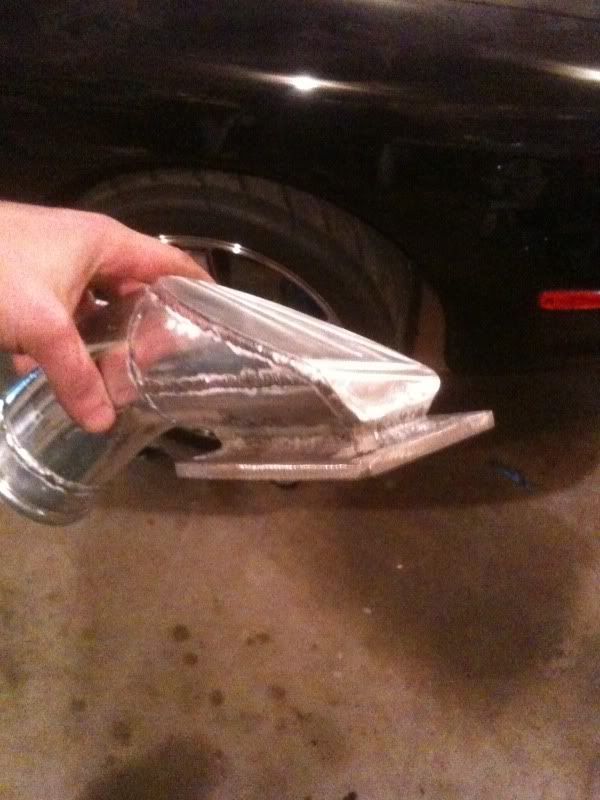 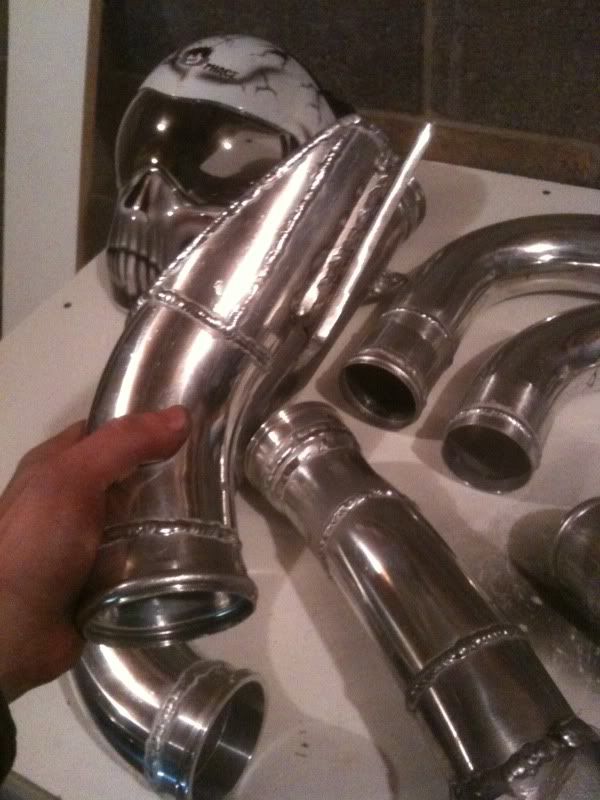 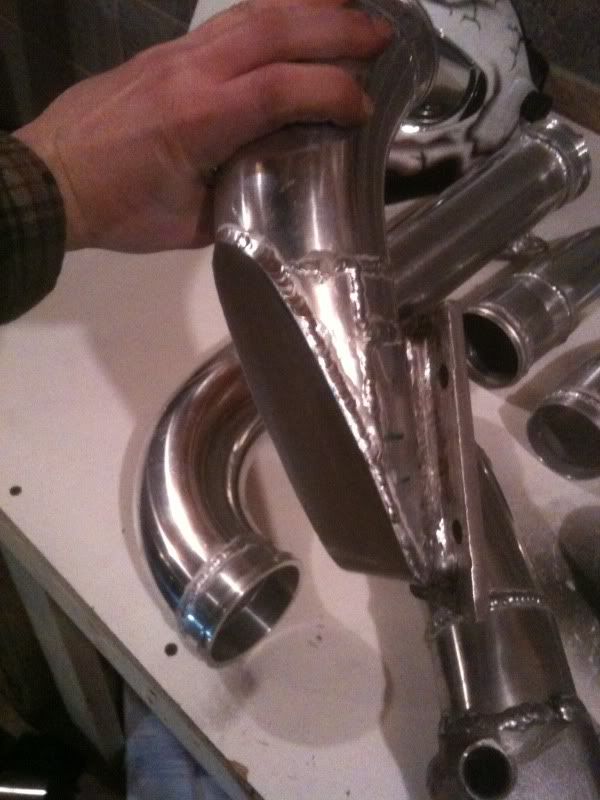 This piece was extremely complex. The clearance at the back of the supercharger was tough, and then the pipe has to curve up between the alternator and UIM to go to the turbo. Space is supper tight there, as the engine block gets in the way (the raised part on the front iron with the two bolt holes on it), as well as the secondary fuel rail being an issue. But I finally got it to work. I also finished the primary fuel rail/vacuum block. The rail is from CJ Motorsports, and I modified it's spacers to hold my vacuum block. This vacuum block has one -6 AN bung that connects to the UIM, from here, all -4AN lines spider out to everything else (boost controller, FPR, blow off valvle, etc...), and one -6 AN line to the brake booster. This started off as a 1 foot long 1.5" square piece of aluminum stock. All machining done by my trusty drill and sawzall and when that died i toughed it out with my hack saw haha. 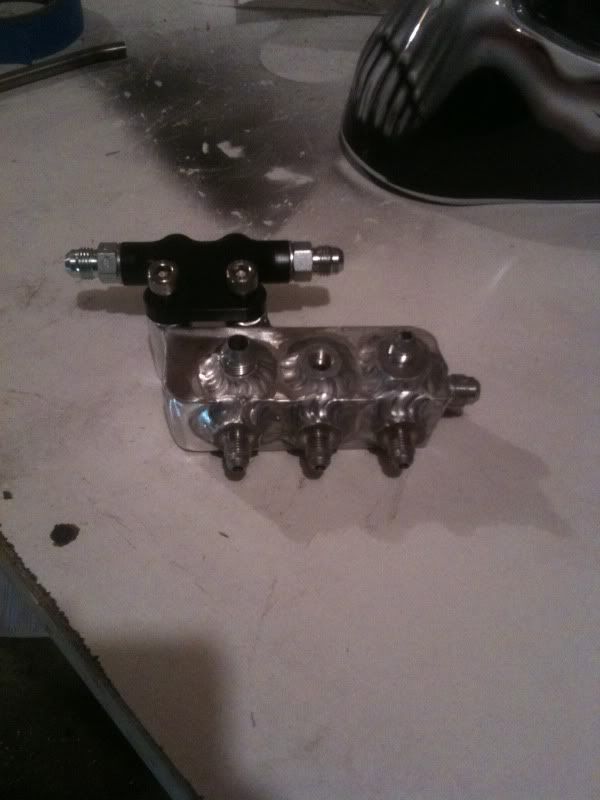 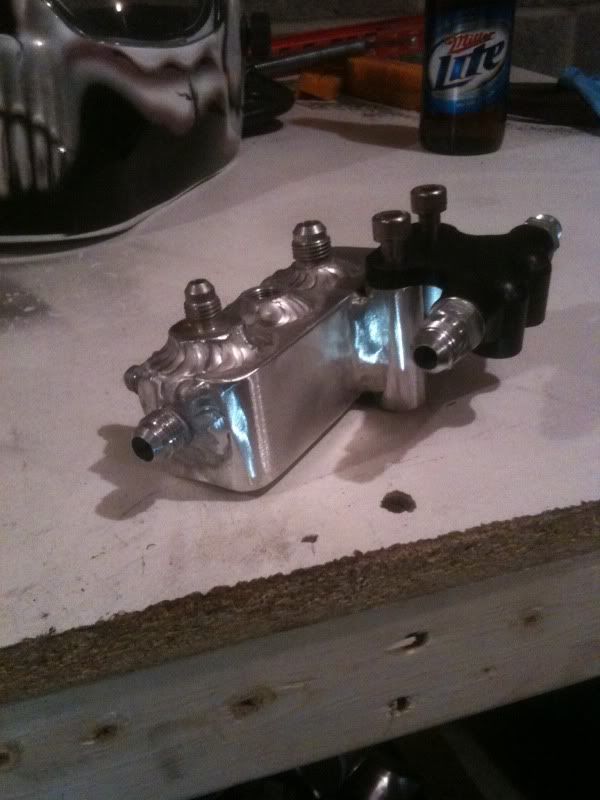
Last edited by RX SE7EN; 03-12-2012 at 09:53 AM. |
|
|
|
|
03-12-2012, 09:54 AM
|
#3 |
|
Rotary Fanatic
Join Date: Feb 2010
Posts: 183
Rep Power: 16 |
And the piping is done
 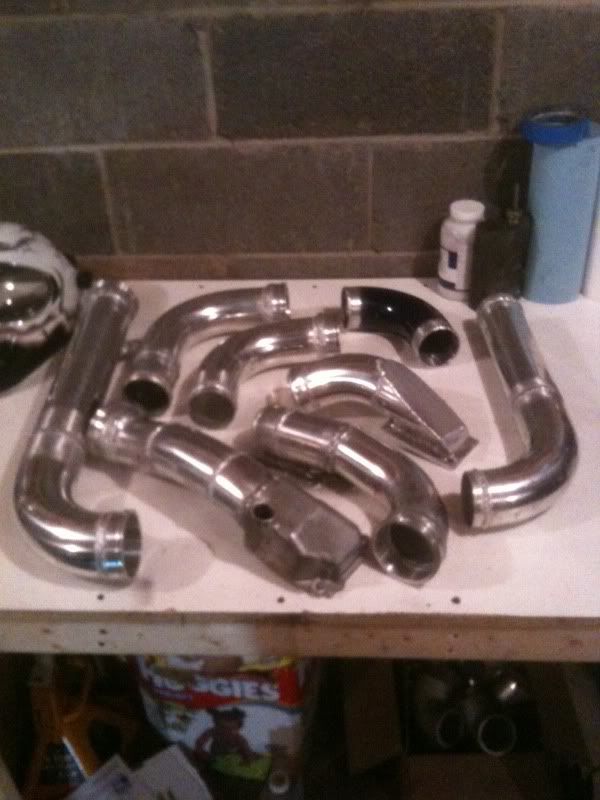 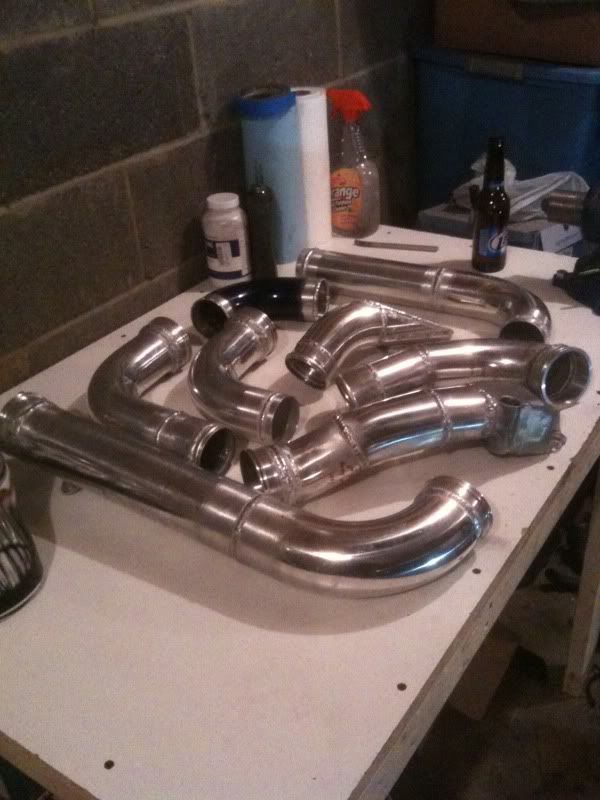 who wants a twincharger kit? haha |
|
|
|
|
03-13-2012, 09:03 AM
|
#4 |
|
RCC Loves Me Not You

Join Date: Mar 2008
Location: Colorado Springs, CO
Posts: 2,089
Rep Power: 20 |
So I assume you're nearing the end of this project, correct? I've been following the thread and this is one of those things I'd never have the guts to take on lol. Nice work and I can't wait to see it finished and see what it'll do.
|
|
|
|
|
03-13-2012, 07:04 PM
|
#5 |
|
Rotary Fanatic
Join Date: Feb 2010
Posts: 183
Rep Power: 16 |
Getting pretty close. The major fabrication is done. Now it's just some wiring, porting all the rough edges in the piping, making AN lines, brake lines, vacuum lines, cleaning stuff up and bolting it together.
Then a little body work on my r magic fenders too. i sure hope it works haha. |
|
|
|
|
04-01-2012, 01:18 AM
|
#6 |
|
Rotary Fanatic
Join Date: Feb 2010
Posts: 183
Rep Power: 16 |
Made some decent progress today. Dropped the powdercoated alternator housing off at IRP and their alternator supplier is putting 140amp internals into it next week.
Finished my oil fill and catch can, I love it: 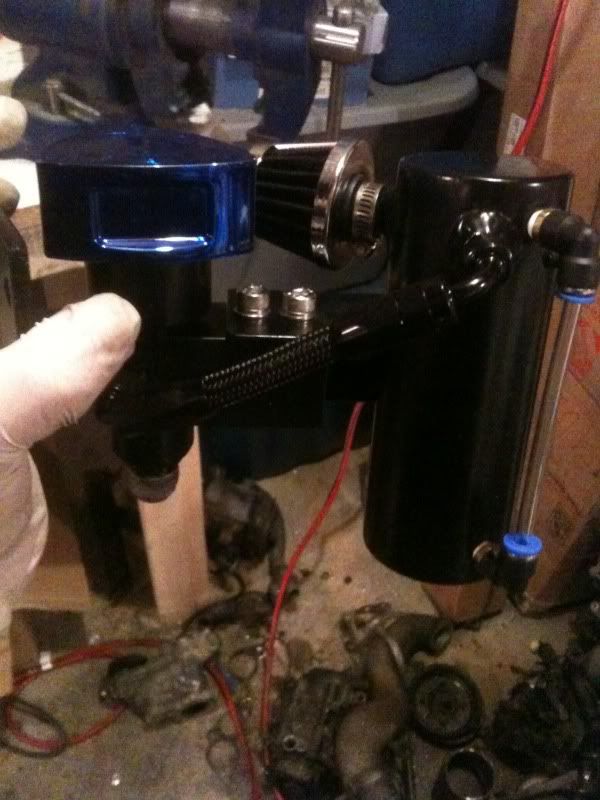 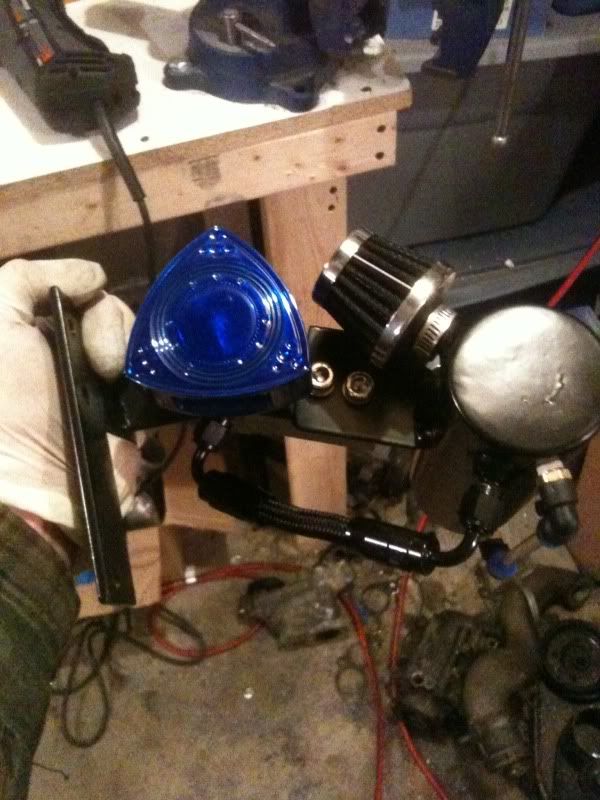 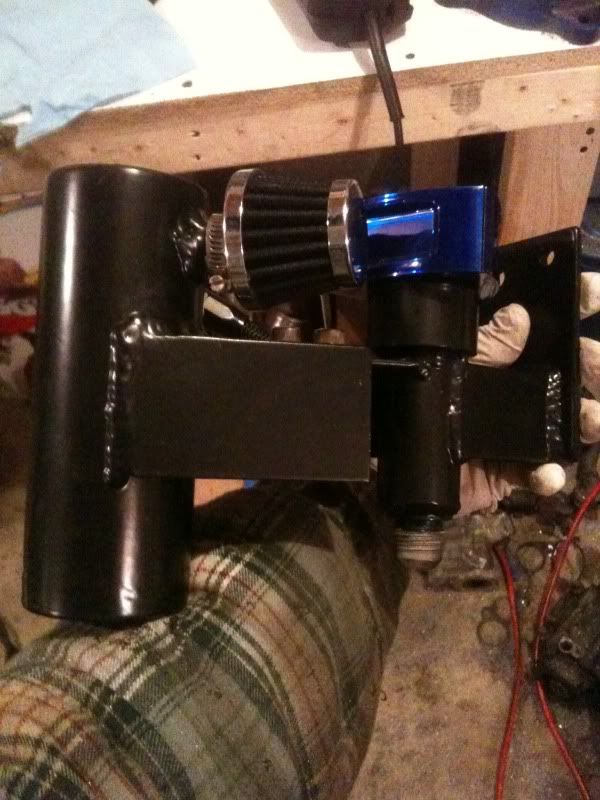 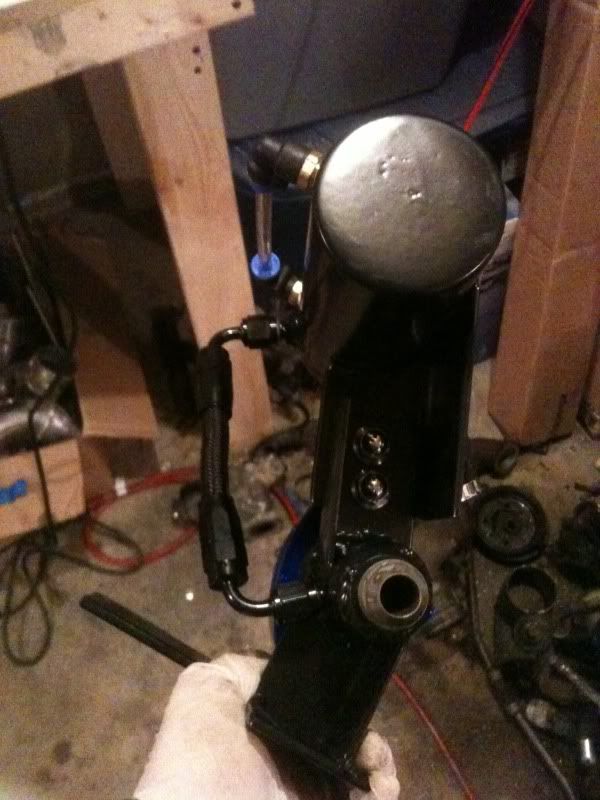 Cleaned the brake booster up, drilled out the vacuum nipple, painted it, and installed the -6AN check valve for a much cleaner look: Drilled, Cleaned, and Primed: 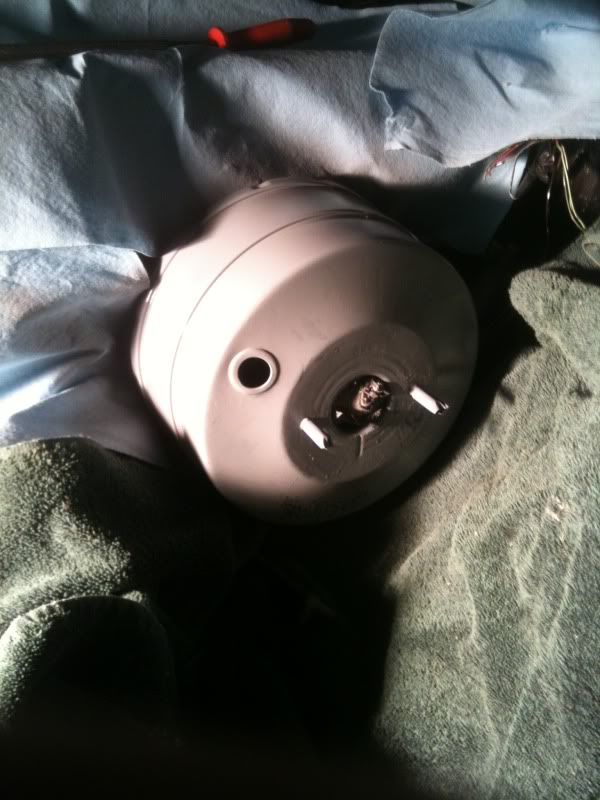 Painted: 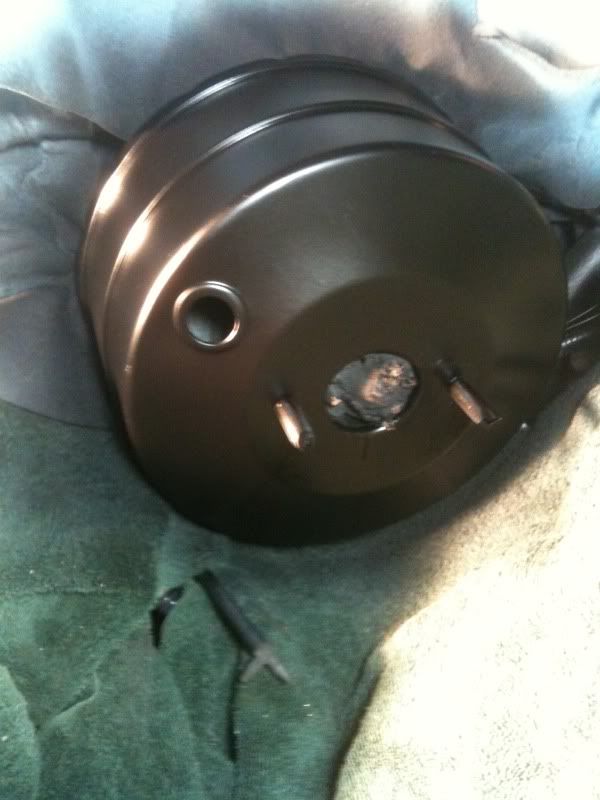 -6AN check valve installed: 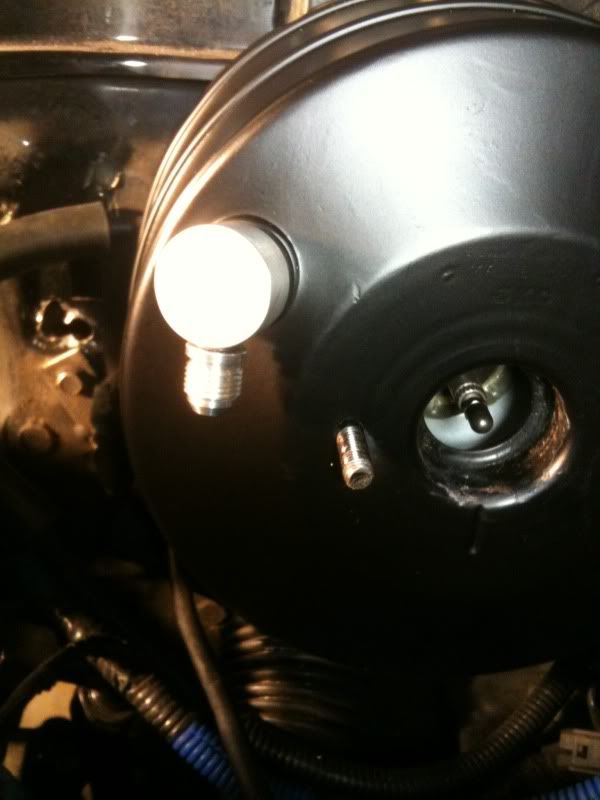 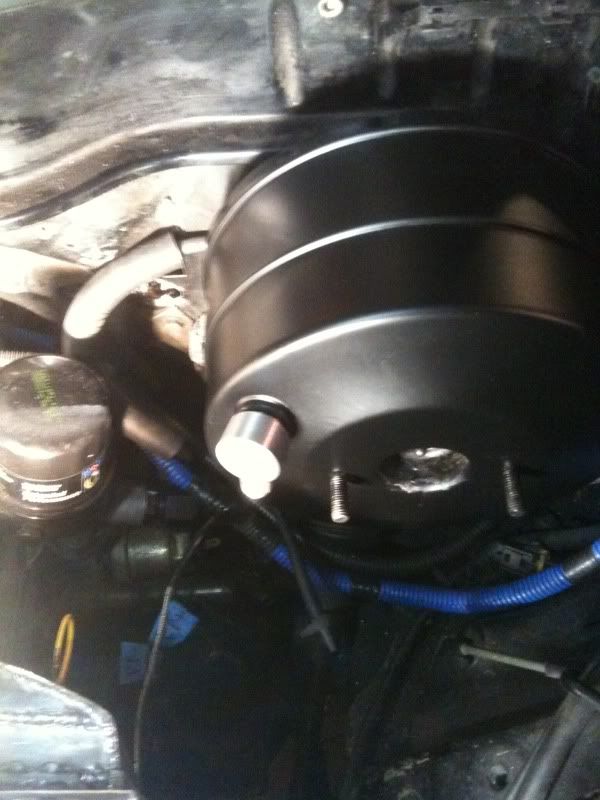 Worked on the fuel system, manged to get the old spacers and diffusers out, and swapped in these fancy O-ring style spacers from CJ Motorsports. Using the same for the secondaries too: 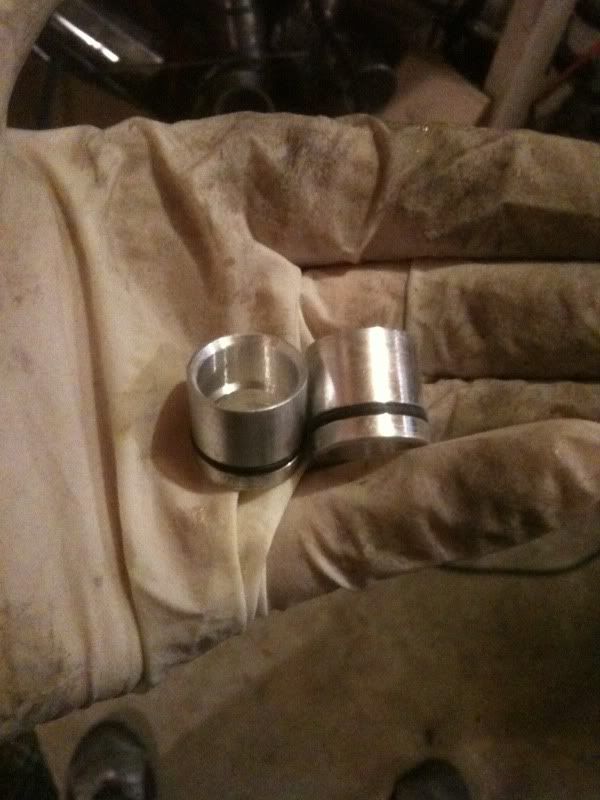 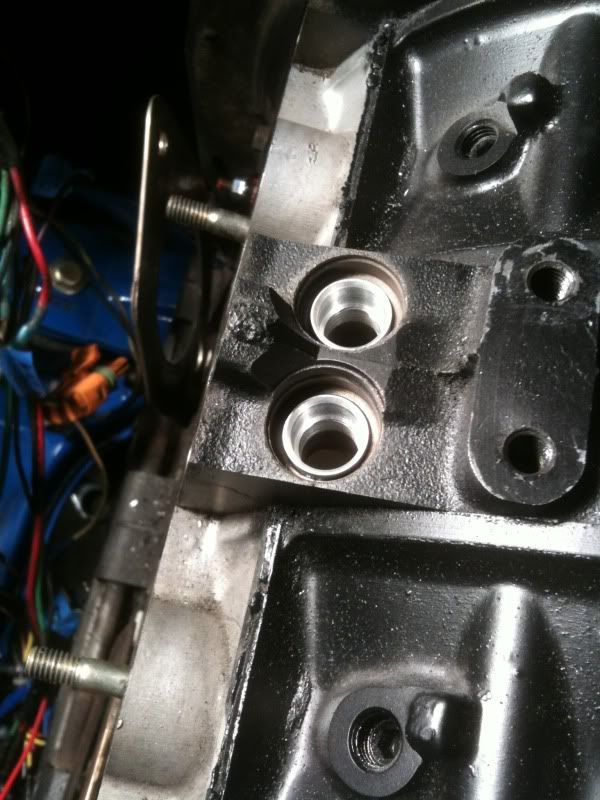
|
|
|
|
|
04-01-2012, 01:23 AM
|
#7 |
|
Rotary Fanatic
Join Date: Feb 2010
Posts: 183
Rep Power: 16 |
Out with the old and in with the new (new is the twin setup, old is the Aeromotive Tsunami). This moves me from 500whp capacity to about 700.
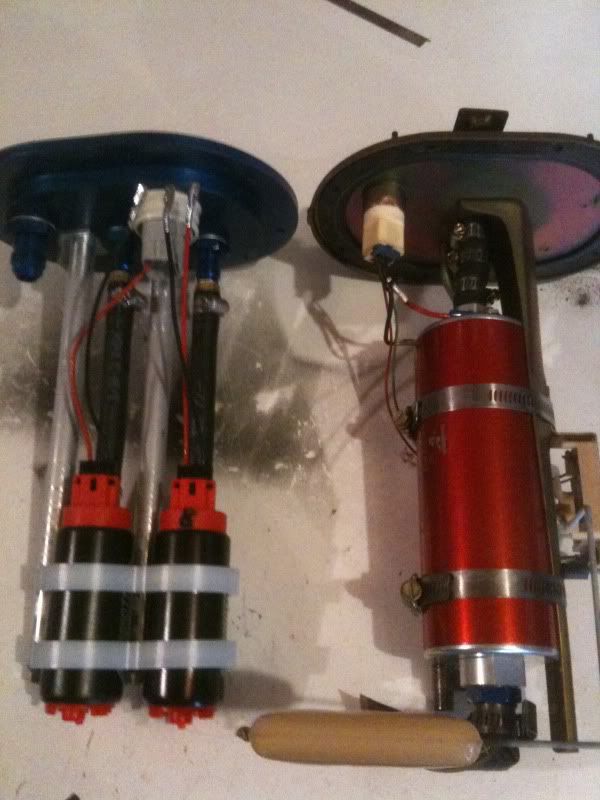 Pics of the Hyperion fuel anti-surge cover: 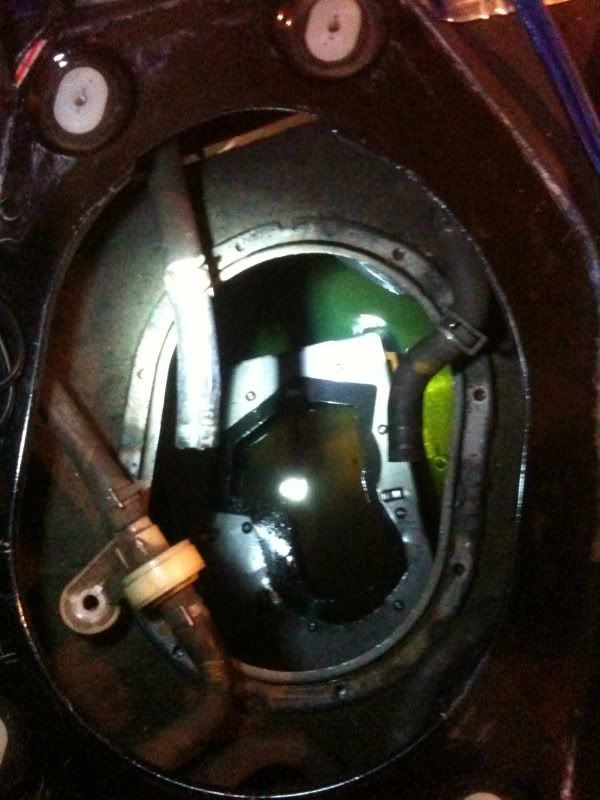 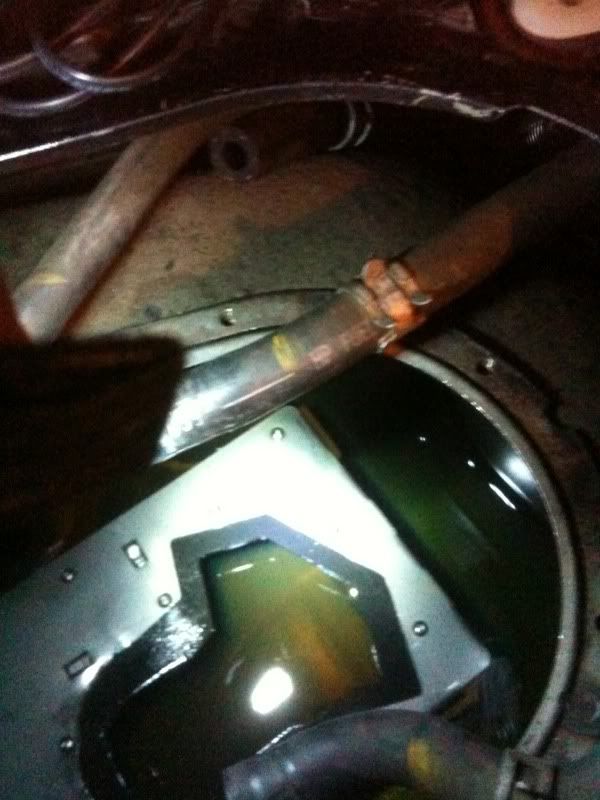 Should do the trick when I finally make it to the track. |
|
|
|
|
04-05-2012, 12:04 AM
|
#8 |
|
Rotary Fanatic
Join Date: Feb 2010
Posts: 183
Rep Power: 16 |
It's crunch time for deals gap, so I've been pulling some long nights during the week. The engine bay is pretty much back together.
The new LIM is installed and looking pretty, here is a side by side comparison of what I turned the stock one into: 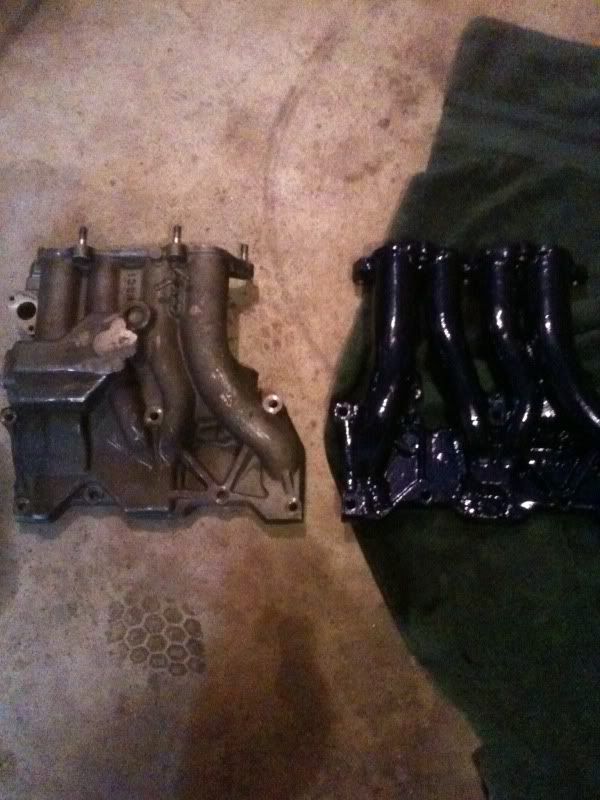 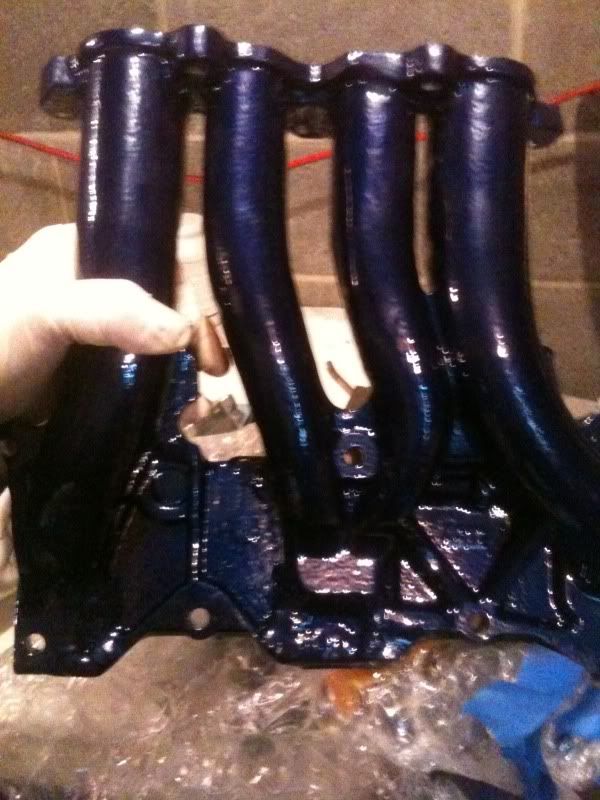 Also, here is my version of a sweet vacuum line. This is a -6AN line for the brake booster, all other lines will be -4AN. Please note that you can't just use any braided hose, it has to be rated for vacuum (not many are). Bare hose: 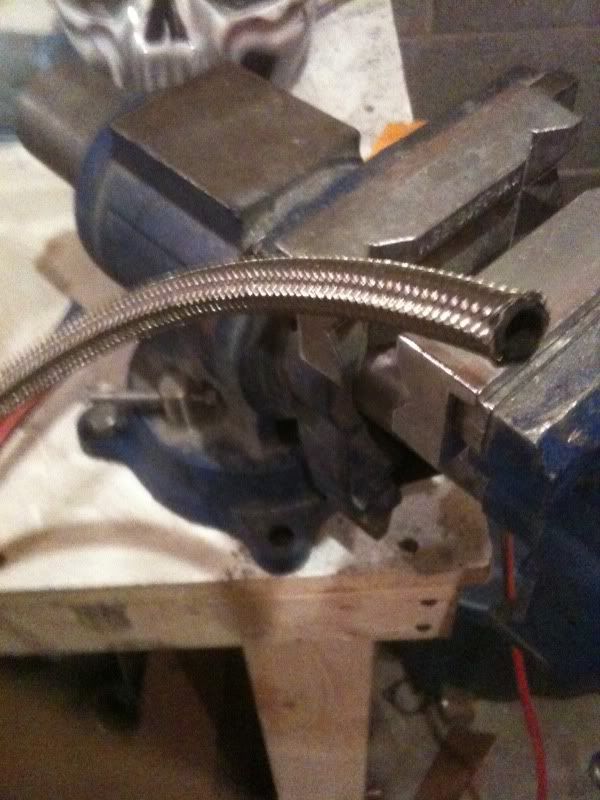 Raychem (deisel retardent milspec heat shrink for wire harnesses), this will make sure the SS hose never rubs through anything, and also keeps the theme by being black (using Raychem is overkill, but I have a lot of it, and this is non-name brand anyways). I had to use SS because the braided nylon hoses available are not raided for vacuum. 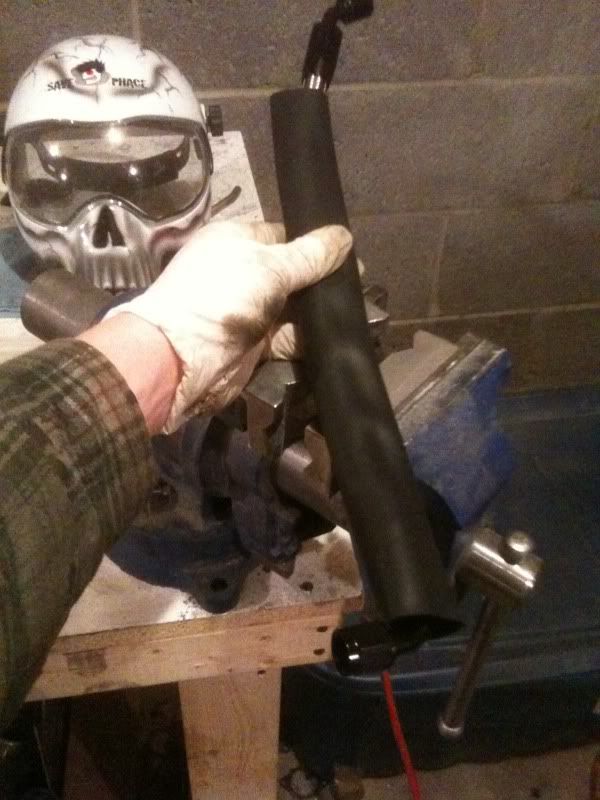 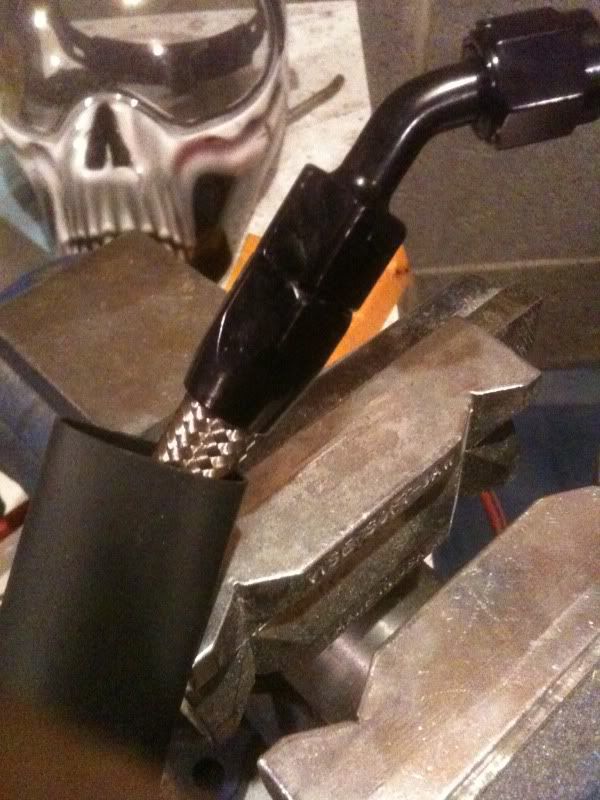 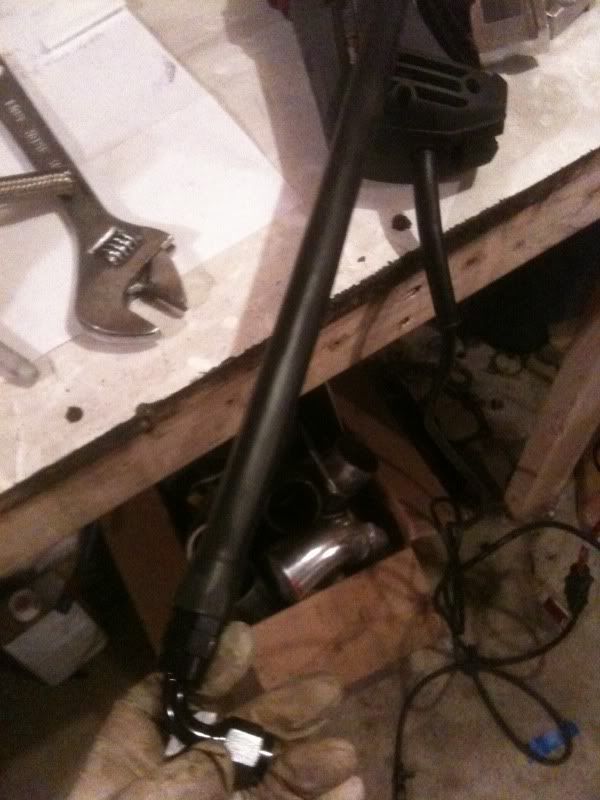 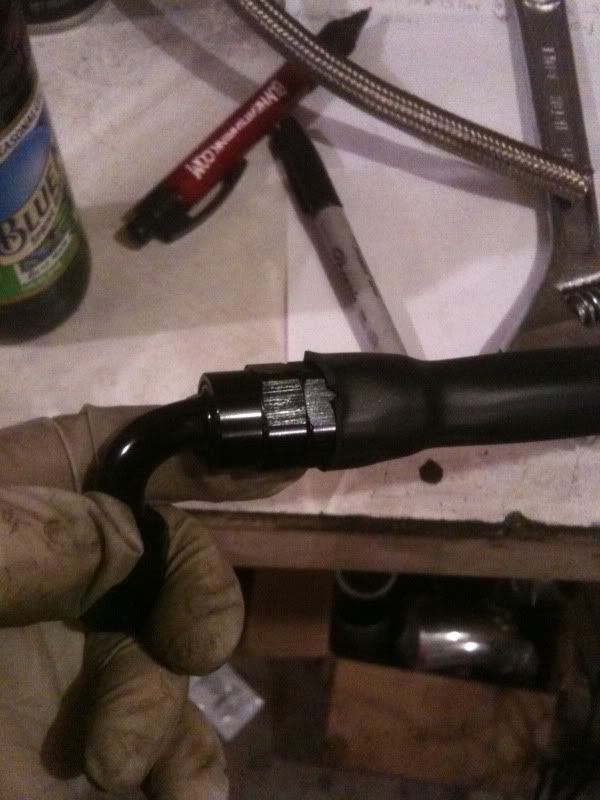 Seal the ends with 4:1 adhesive lined heat shrink: 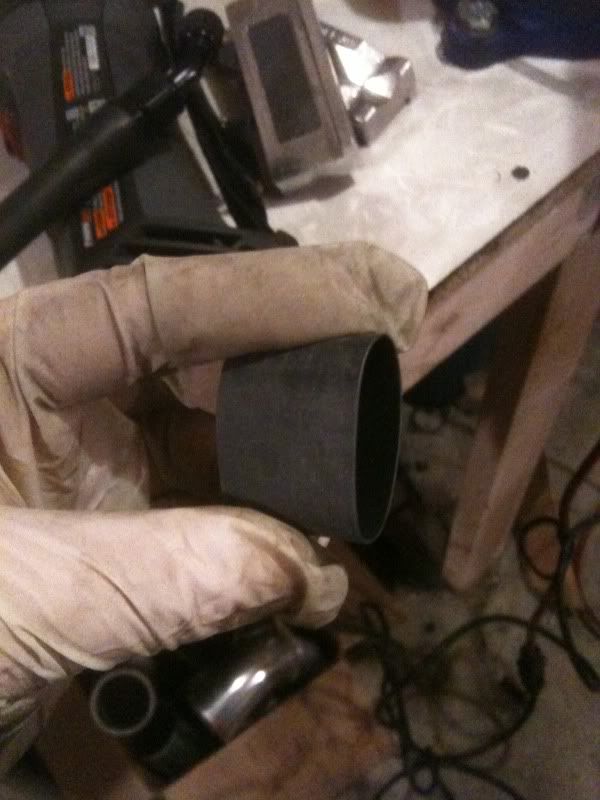 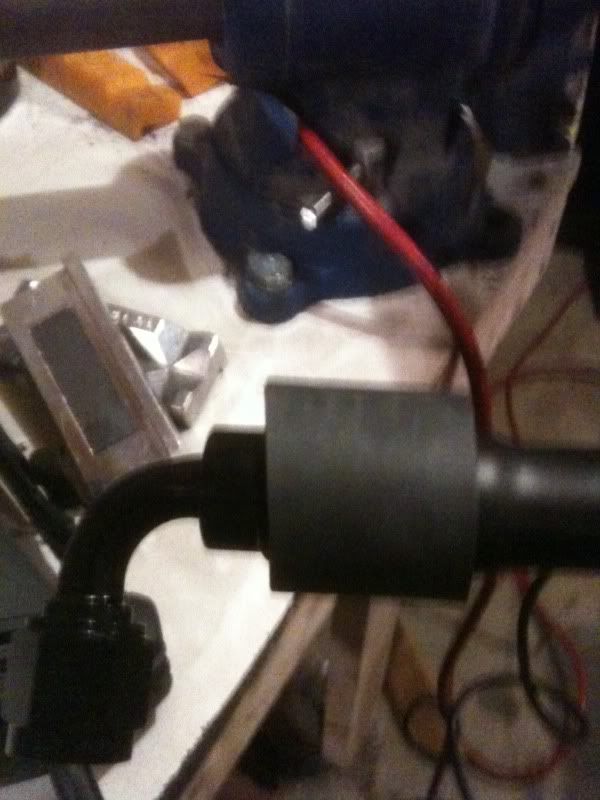 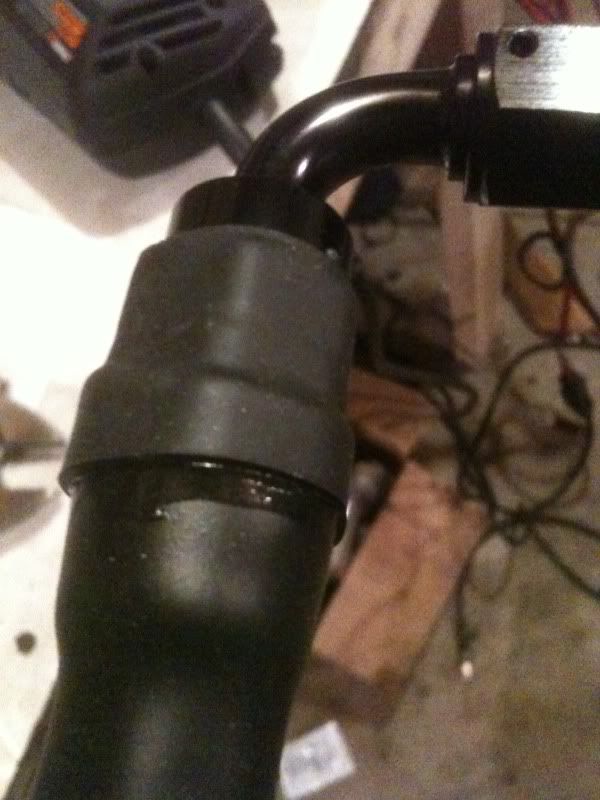 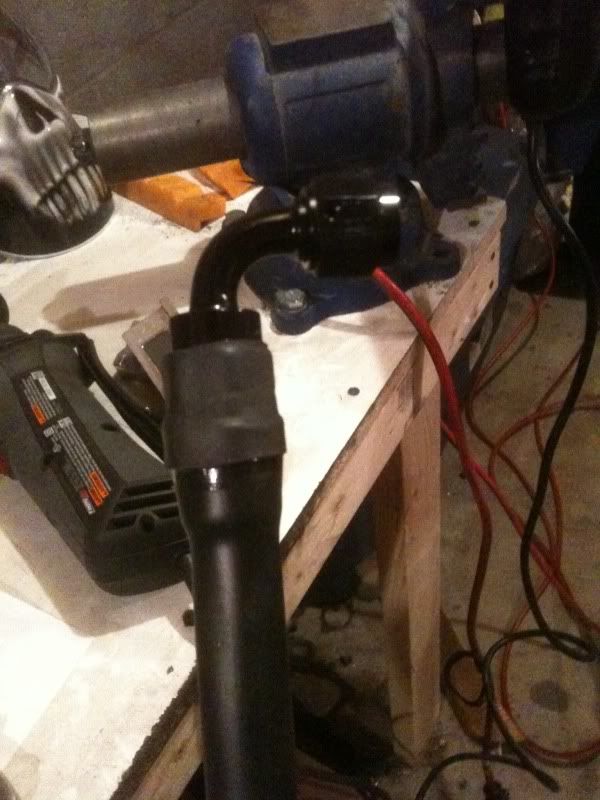 This is good prep for making the wiring harness this weekend haha. |
|
|
|
|
04-05-2012, 12:08 AM
|
#9 |
|
Rotary Fanatic
Join Date: Feb 2010
Posts: 183
Rep Power: 16 |
Also cleaned up the radiator and it's brackets. Then I painted them black with VHT Epoxy paint. I wish I had found this type of spray paint a long long time ago, it's soo much tougher than anything else I've used.
This will all be powdercoated eventually, but don't have time before deals gap. 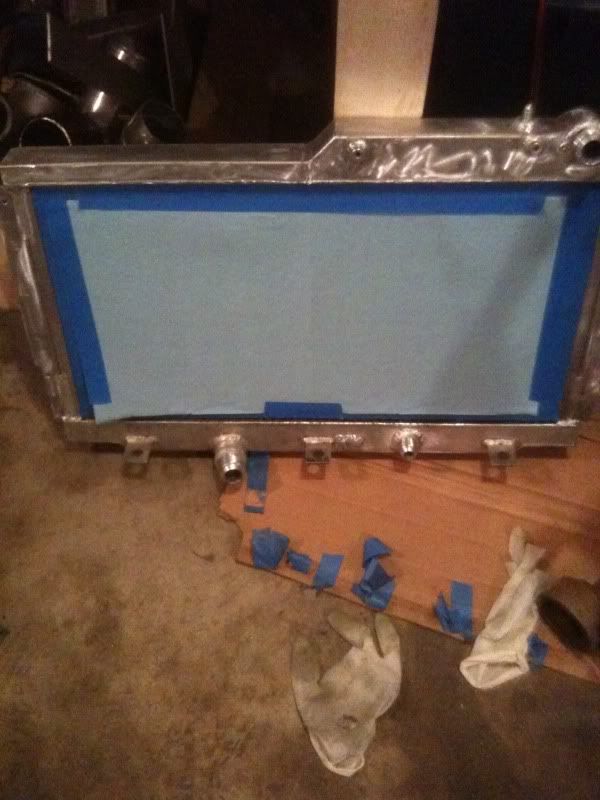 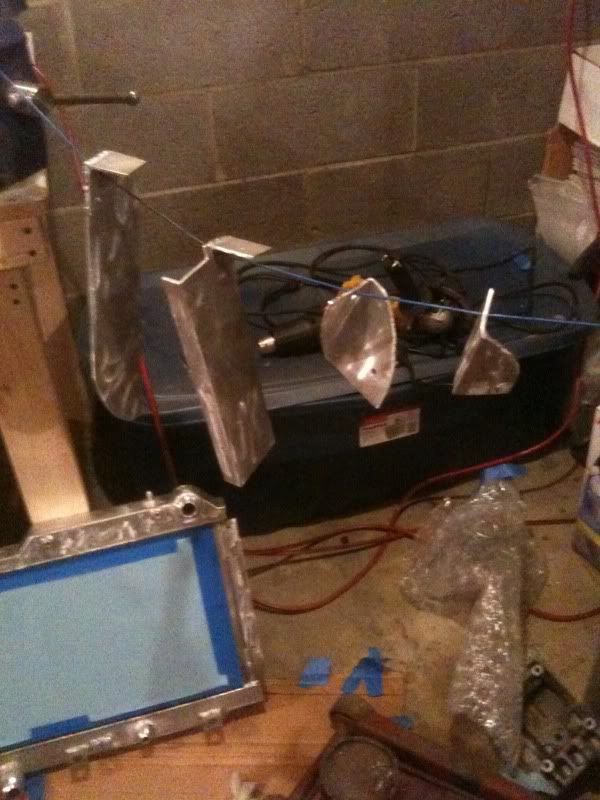 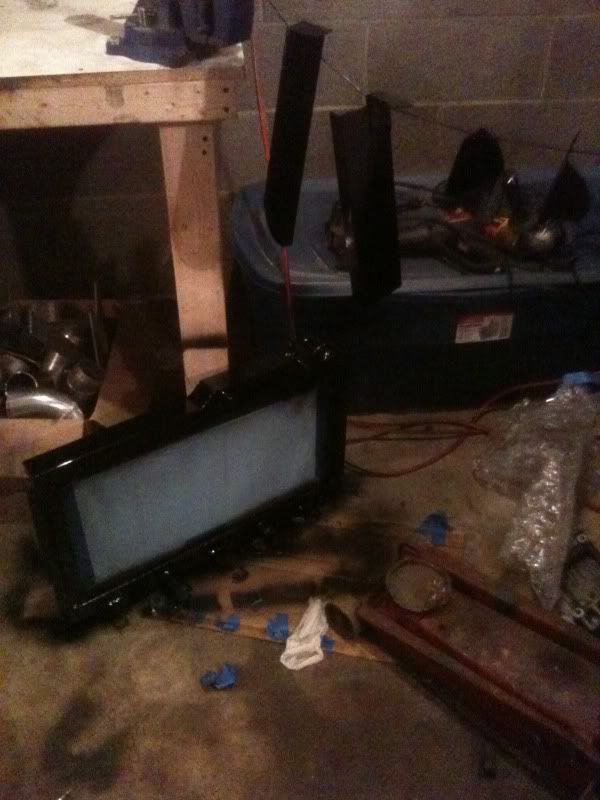 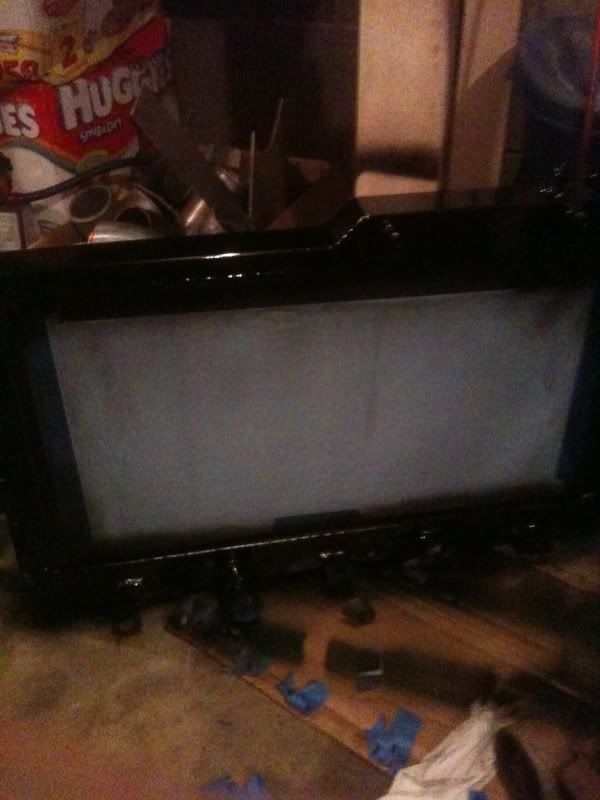
|
|
|
|
|
04-05-2012, 09:47 AM
|
#10 |
|
I-had-a-bad-experience...

Join Date: Feb 2008
Location: M'boro
Posts: 1,046
Rep Power: 19 |
That epoxy is good stuff... I touched up some rust on my truck with it and it matches the 20yr old (now satin) paint perfectly. I also used it on chassis components like the sway bar and skid plate, etc. Really nice clean looking black without being to glossy.
__________________
 '15 Juke Nismo '06 MX-5 GT SOLD '04 S Silver RX-8 GT Track Day Use SOLD '90 Black TII vert w/ Sprint RE stock port/turbo DD dyno (242.6whp@5500rpm @12psi 8psi@redline) and (250ftlbtq@4800rpm @13psi) SOLD '89 GTUs 6p TII SOLD, '87 sport SOLD, '79 SA stock SOLD '91 B2600i 4x4 w/ Rx-8 LSD SOLD Last edited by FerociousP; 04-05-2012 at 09:51 AM. |
|
|
|
|
04-07-2012, 11:10 AM
|
#11 |
|
Rotary Fanatic
Join Date: Feb 2010
Posts: 183
Rep Power: 16 |
Got my 929 master cylinder. Machined the one port flat so I can use banjo bolts on both of them (to save space in the area). Then painted black of course.
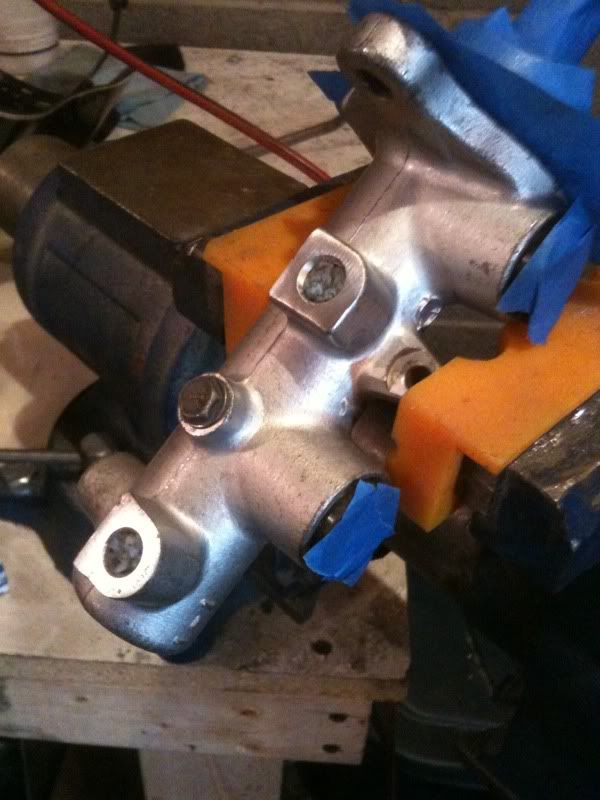 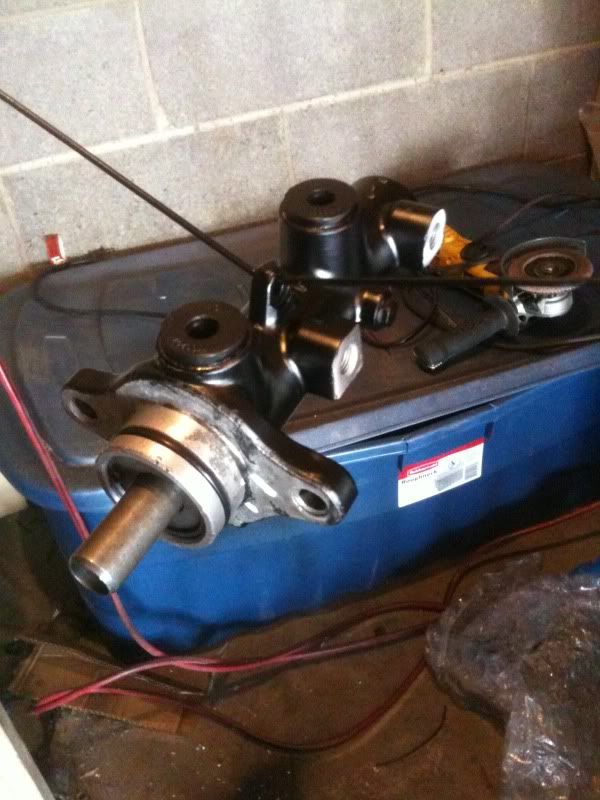 This will keep the pedal feeling good for the BBK |
|
|
|
|
04-07-2012, 05:18 PM
|
#12 |
|
Rotary Tuner in Training

Join Date: Jan 2009
Location: Beaverton, OR
Posts: 69
Rep Power: 18 |
Great work and progress! Where could I find one of those check valves for the brake booster?
|
|
|
|
|
04-07-2012, 11:04 PM
|
#13 |
|
Rotary Fanatic
Join Date: Feb 2010
Posts: 183
Rep Power: 16 |
Jegs has them.
|
|
|
|
|
04-08-2012, 10:43 PM
|
#14 |
|
Rotary Fanatic
Join Date: Feb 2010
Posts: 183
Rep Power: 16 |
Worked on the fuel lines today. Had to get special low profile 90 degree -6 and -8 hose ends for them to clear under the fuel panel in the back.
Then I went to work on covering them so they can't rub on anything. This is all E85 safe SS fuel line. Two -6 feeds and a -8 return. Plain line: 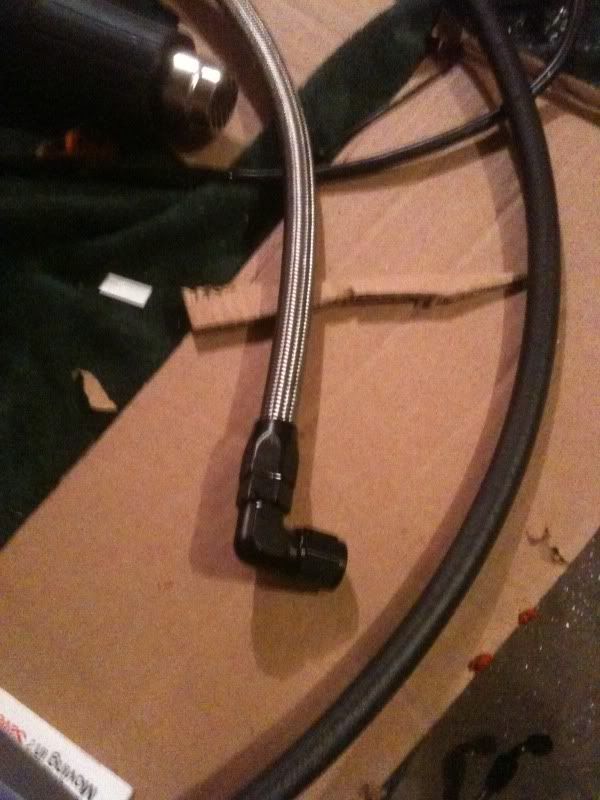 Black heat shrink for protection, then labeled for future convenience, and clear adhesive tubing over the ends and labels: 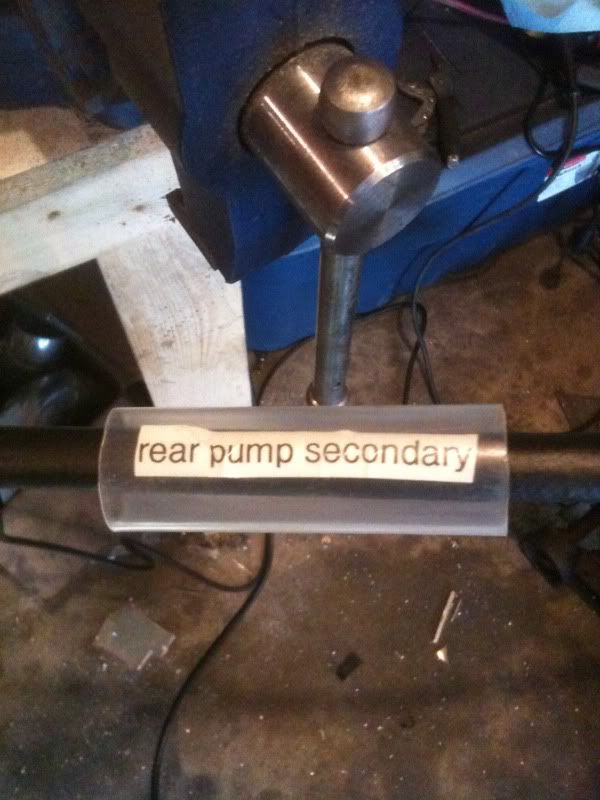  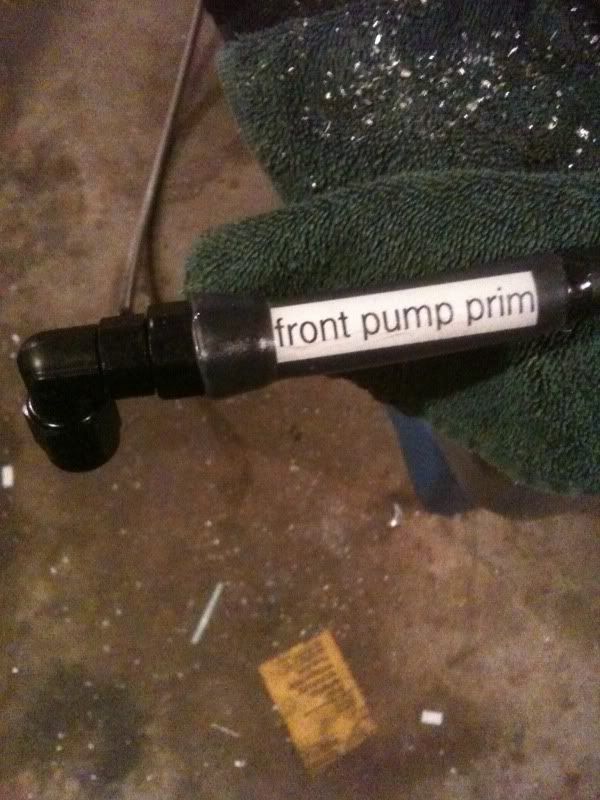  Also made the duct for the radiator. Fits the bumper perfect, and then tapers to the radiator. the FMIC sits square in the middle of the bumper, so anything that gets around the sides goes straight to the radiator. I'll redo this later on with a single piece of aluminum. It will be easy to make now that I've got this as a template. 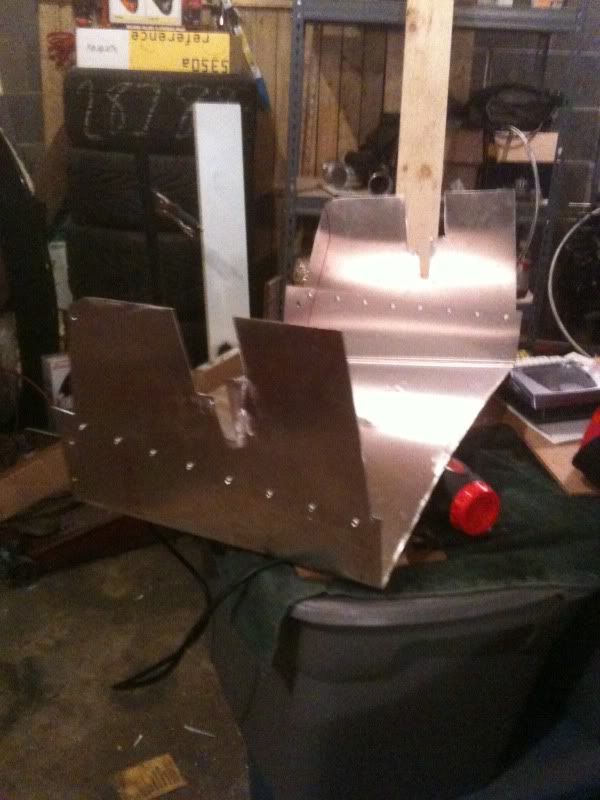 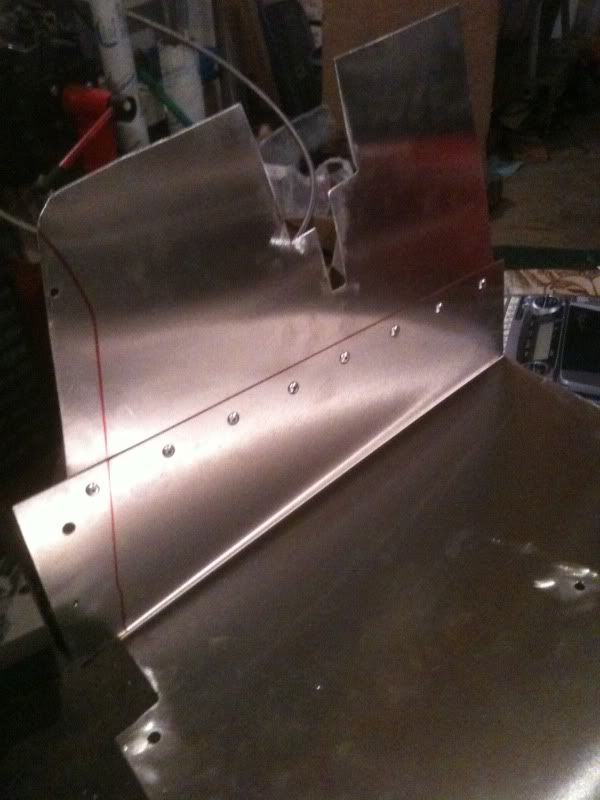 Not many front mounts of a decent size let fresh air get to the radiator
|
|
|
|
|
04-09-2012, 12:17 PM
|
#15 | |
|
Rotary Fanatic

Join Date: Mar 2008
Posts: 142
Rep Power: 18 |
Quote:
 Ducting looks good, and I love the labeled lines
__________________

|
|
|
|
|
|
| Bookmarks |
| Thread Tools | |
| Display Modes | |
|
|


 Hybrid Mode
