View Single Post
Old 11-20-2011, 02:04 AM   #2
Brent
Sua Sponte
 
Brent's Avatar
 
Join Date: Feb 2008
Location: Killeen, TX
Posts: 839
Rep Power: 18
Brent is on a distinguished road
Quote:
Originally Posted by Brent Dalton View Post


Coming into the front compartment(they will be covered):

Here is the unfinished cover:

Brackets that Dan made:


Through the firewall:

And into the engine bay:
Quote:
Originally Posted by Brent Dalton View Post
The engine harness showed up this week. Even though it took a couple of weeks to get here, it was money well spent I think. It is essentially the same thing as the painless, at less than half the price. Everything is nice and labeled and went in without any trouble. The only thing I'm not a huge fan of is the split wire loom.


Installed in the car:

Used the factory Mazda grommet to fit it through the firewall:

And into the driver compartment:

We have alot of excess slack.

Brakes:
I posted pretty much everything before, but here is a little better picture of the inside. The red line you see is the line for the brake proportioning:


Time for the tranny to go back in:

It had bolts that were the wrong size head with crush washers on them previously, so we upgraded to the correct size with the flare head and serrated back.


Engine, tranny, and driveshaft back in... now we are caught back up


In all seriousness, the car is getting closer and closer. At this point, it is a million minor things we have to do. Like wiring... to include the EFDC's:


I'll be at Road Atlanta next weekend, but that will be my last track weekend for a while. Hopefully it'll be finished before the start of next season.

Brent
Quote:
Originally Posted by Brent Dalton View Post
Progress:

Dan used a stock FD throttle cable on the car and its a nice fit. I don't have any pictures of it.

The exhaust is now hung. It clears the fuel cell. We have to have a pipe welded onto the ypipe and flange welded onto it to connect it to the catback portion and it'll be finished:


Today started off with Brian making a really nice bracket for the fan relays:


We were playing around with the accusump mounting location. We had basically decided on the passenger side area, but hadn't locked down the location. After looking a little more, I found a couple of parallel 10mm studs that looked like they would work perfect for the mounting brackets for the t bolt clamps for the accusump. It worked out:


I have looked at a few different custom dashes that others have made for their track cars and they looked REALLY nice! One thing I noticed about most is that they are made out of sheet metal/aluminum. When you see their track pictures, they have their dashes taped up due to the glare from the sun. Dan decided to make the dash out of 3/8th inch ABS plastic. It's a wrinkle type finish. He made a mock up of the dash using cardboard. Once he finished the mock up, he traced out the top piece:


Then cut it with the jigsaw:


After a few more trims, some filing, and sanding it was a perfect fit:

Quote:
Originally Posted by Brent Dalton View Post
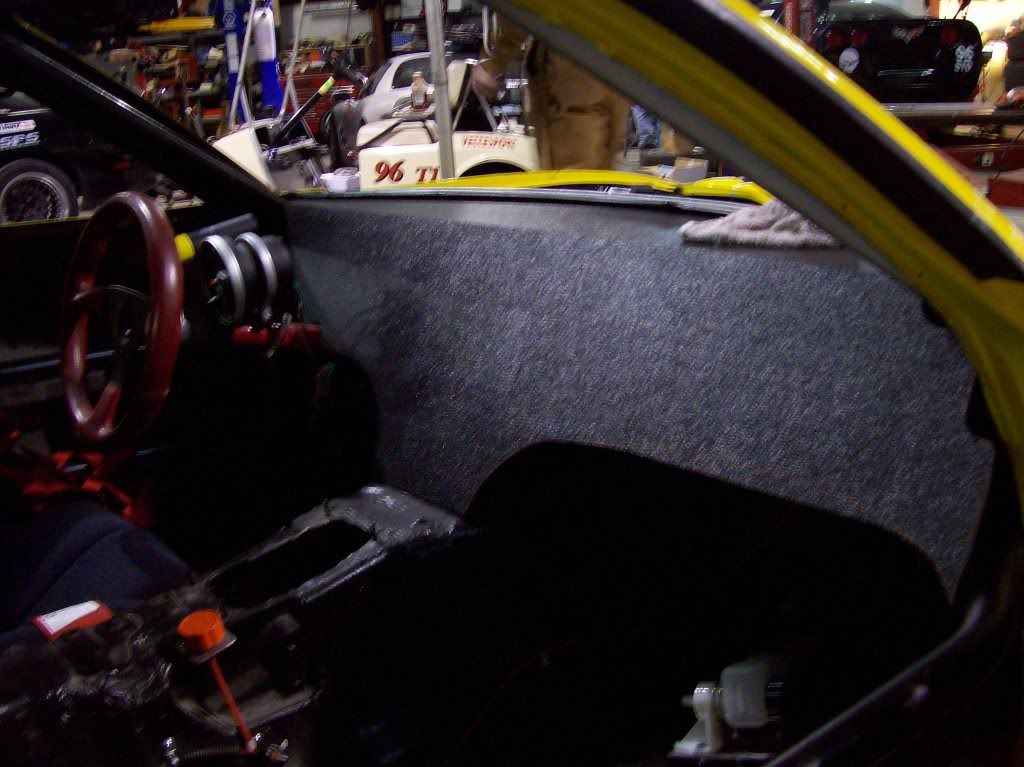
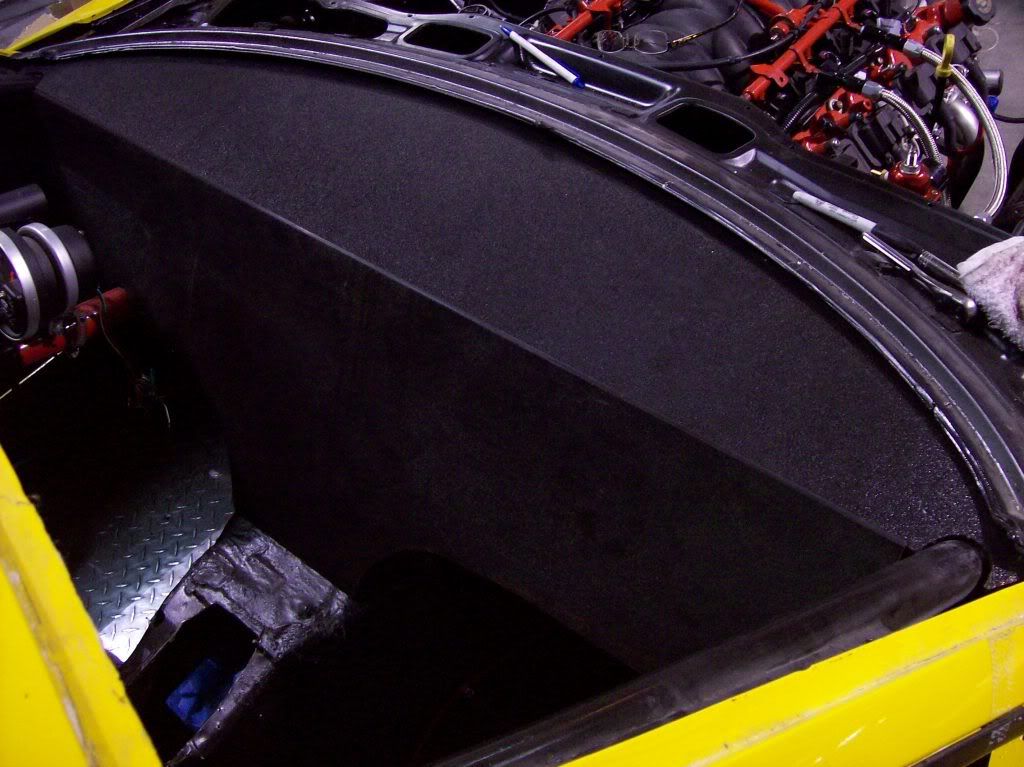
A piece of angled metal will be bonded to the bottom of the piece posted above to be able to secure the other piece of the dash. The other side will be screwed/bolted to the metal so it can be removed with ease. This is our blank easel


Now if I could only afford that expensive Racepak. I don't see me dropping the change though, so you'll most likely just see my normal gauges.

The only other thing is I picked up a Optima Red Top. I ended up going with it for a few reasons. The first is I have the worst luck with batteries. If something happens to this one in the next three years, I take it back to the parts store and get a replacement on the spot opposed to having to weight. It's also readily available almost anywhere that sells batteries. So the convenience factor is huge! I'm sure some of you are wondering why I went with such a heavy battery instead of getting a braille or something lighter. Well, I've decided that I'm going to run the car in TTS next year which is a 8.7:1 power to weight ratio. I was originally thinking of running TTU which is a 5.5:1 ratio. That would mean that if the car was 2600lbs with me in it and half a tank, I would need 470rwhp. While I haven't seen what kind of power the engine makes yet, I'm quite certain that it won't be close to that. I also don't want to try to push the engine as far as I can. I'd rather do a very conservative and reliable 300hp or so and not have to worry about weight anymore and have the car *knock on wood* last for a long time without issue.

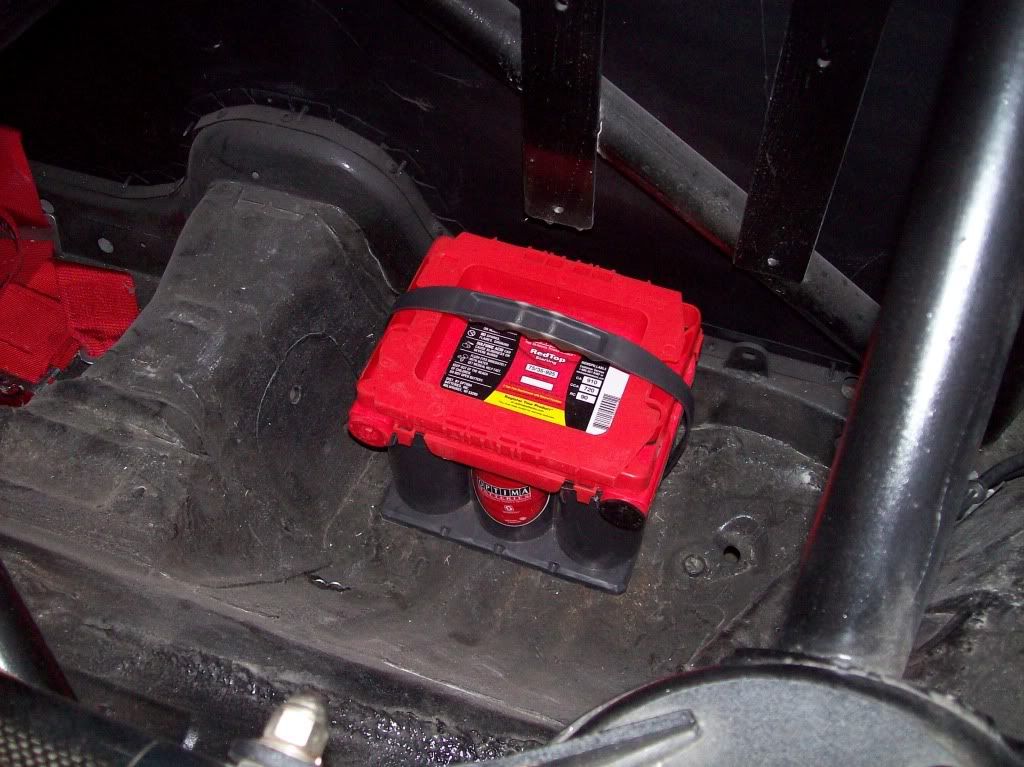
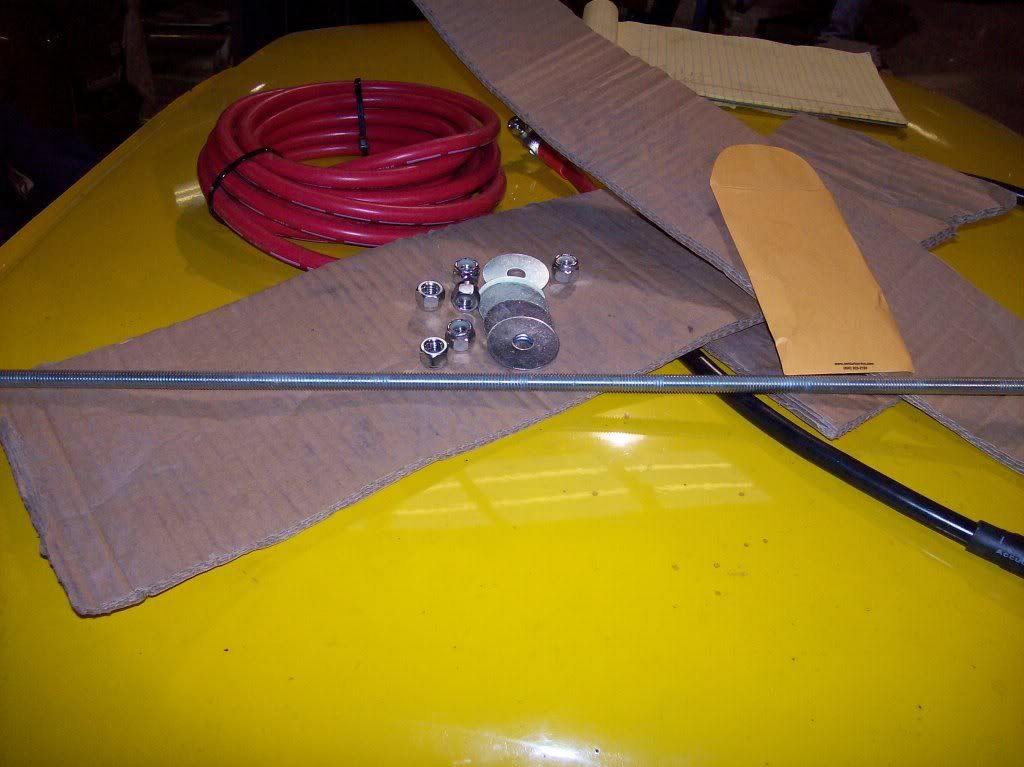
I had picked up a battery box from summit but it was ridiculously huge and wouldn't fit where the bins use to be with the bulkhead where it is. So we are just going to make a tie down for the battery. 2ft of 3/8th all thread, 6 fender washers, and 6 nuts with nylon inserts:


I'm going to pick up an all view mirror, it's comes highly recommended by some club racers I know. http://www.allviewmirror.com/

I also sat the bumper and hood on today:


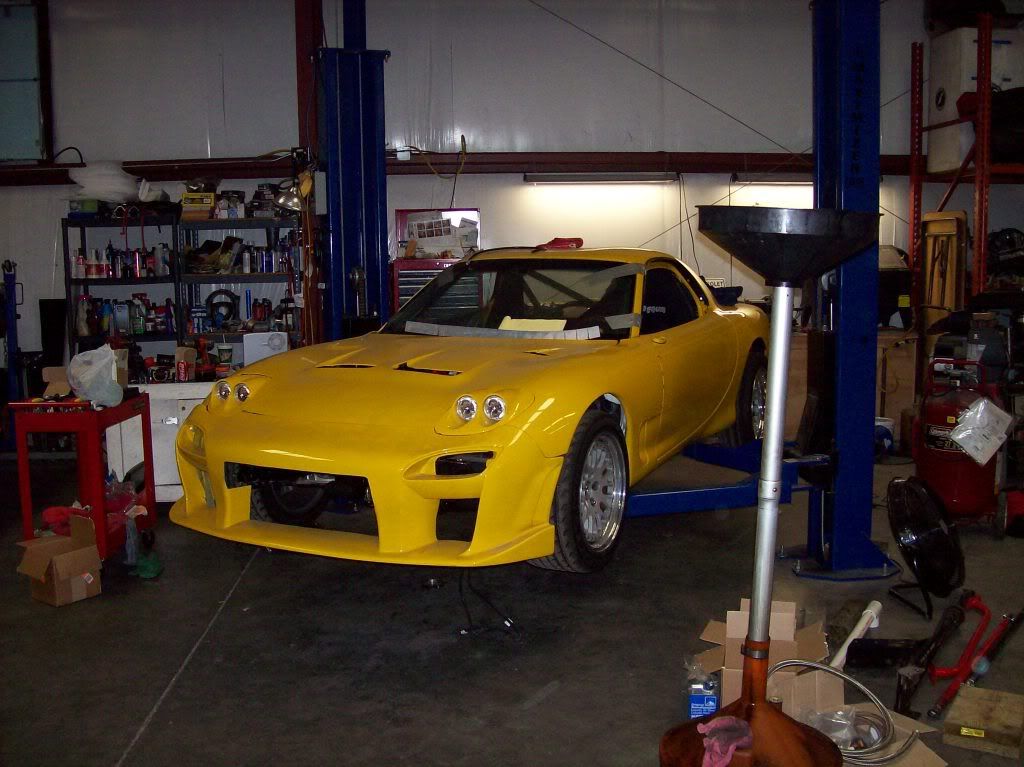
I'm really not sure how the exterior will end up. The pettit flares still need to go on. If the car is track ready by the 23rd, I'll prob. just run my 18x10's that day. The GTC replica bumper I think sat in the heat somewhere prior to me buying the car because it fits like crap. I have a couple of different bumpers in storage and I'm taking one to the shop tomorrow to see how it fits. May end up with a different bumper. The Corvette guy that is another shop partner with Dan has been prepping his C6Z for a while now. He has a race at Sebring in a few days and is planning on leaving on Tuesday. It's going to be down to the last minute and he has been putting in the hours over at the shop. While we were there yesterday, the guy that puts wraps on bodies came I did almost a full one on his car. It is modeled after the C6R Vette like this one:


Here is his car, it has come a long way since he bought it and looks amazing with the new wrap:

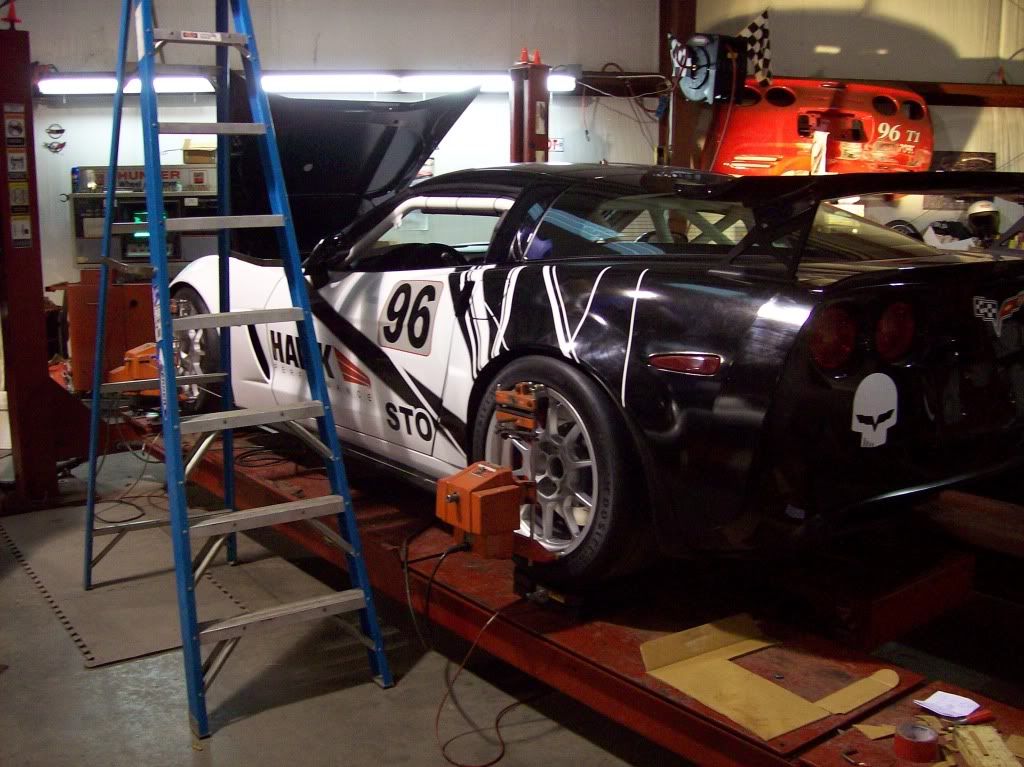
Can you tell who his brake sponsor is


Soooo after I saw that his car was modeled after the YELLOW C6R, I was joking around about how funny it would be to get my car replicated with the C6R graphics as well. I wouldn't do that, but I would love to see the Vette guys reaction to it. I do have my jake decals though that will go on the the rear bumper at least.

That's it for today. More to come tomorrow.

Brent
Quote:
Originally Posted by Brent Dalton View Post
I think they picked it up from a local place here in Nashville. You could search the internet and prob. come up with something.

As far as my last update post... sorry about some incoherent sentences. I had typed it all out and accidentally hit the back button when I was almost finished and lost it all. The second time I was wasn't really paying attention to what I was typing as I was watching a movie as well. Also, a couple of corrections... the abs plastic is 1/4 inch and Dan made the relay bracket.

As for today. I'm not really sure what all was accomplished today. It was a busy day for me and I was only able to get to the shop for an hour or two. Dan and Brian made the battery tie down and it turned out really well, but then again... would you expect anything else? Here's a picture of the finished product:


I brought my Sparco Evo L with me today to sit in the car as it will be my driver's seat.

I also brought a set of R1/2 oil coolers as I am using them on my car. The car came with some other ones, but I think these will be more than sufficient. Not to mention, they bolt right in place and line up with the bumper. I went ahead and bolted them in place to make sure I had all the hardware. I'm missing one bracket and I'll order that from Mazda on Monday.

I also brought a JKL Racing SS1 Front Bumper with me that is prob. going to end up on the car. More info. here:
http://shop.jklre.com/products/fd-ss1
It's going to fit no problem. I like the design of it, not crazy about the looks. As long as it's functional, I don't mind. Here is a picture with the oil coolers back on:


And the bumper sitting on:


The CF undersweep and canards:


If I end up using this bumper, I'll put my RE-Amemiya sleek lights in since I'll have to paint the bumper as well.

Getting a little closer and a little closer.
Quote:
Originally Posted by Brent Dalton View Post
I am not running Power Steering as I like the feedback I get from a manual rack while on the track. I also believe in keeping it as simple as possible. Well, since I'm not running Power Steering, this created a belt routing problem. I searched around and didn't see anything that was already in production to solve my problem. Luckily, I was in good hands as we have all seen by the TweakIt Racing Air Pump Idler pulley. They worked their magic again to come up with a solution. Where the Power Steering normally goes:

The fix(prototype):


The tensioner(the belt was a nice fit):


As stated, this is the prototype. The actual bracket will be made of aluminum. I'm sure Dan and Brian can answer any questions.

Oil Routing:

My oil cooler adapter plate:


Installed with fittings:

I didn't get any pictures, but the line leaves the adapter plate and goes to the driver's side oil cooler.
.
__________________
Road Atlanta August 2011 NASA TT 1:33
http://www.youtube.com/watch?v=IFY00PAK_Ps
Traqmate's video of my car from the 2011 UTCC at VIR
http://www.youtube.com/watch?v=2Zcn6...layer_embedded
Video of Yellow LS1 FD at NASA TT at VIR
http://www.youtube.com/watch?v=e6k0lJkcwrM

Last edited by Brent; 11-20-2011 at 02:33 AM.
Brent is offline   Reply With Quote