|
|||||||


| Show your rotary car build up. Show off your Rotary Car build! |
 |
|
|
Thread Tools | Display Modes |
|
|||||||
| Show your rotary car build up. Show off your Rotary Car build! |
|
|
|
Thread Tools | Display Modes |
|
|
 03-30-2015, 12:22 PM
|
#1 |
|
The Newbie
Join Date: Nov 2012
Posts: 29
Rep Power: 0  |
FD budget..ish track day build
My friend recommend this forum and after looking around a bit I decided I liked it, has a nice laid back feel compared to rx7club. Anyways, I think I'm gonna stick around, so I might as well post a build thread. I'll start with the history/copy over earlier build threads and bring it up to modern day.
I bought the FD in 2011 I picked up the FD for 3000$, it idled a little ruff and isn't the most beautiful specimen, I started out with a full rebuild using the atkins rebuild kit. I also deleted and simplified as much as I could(some regrets here). anyways here's the car  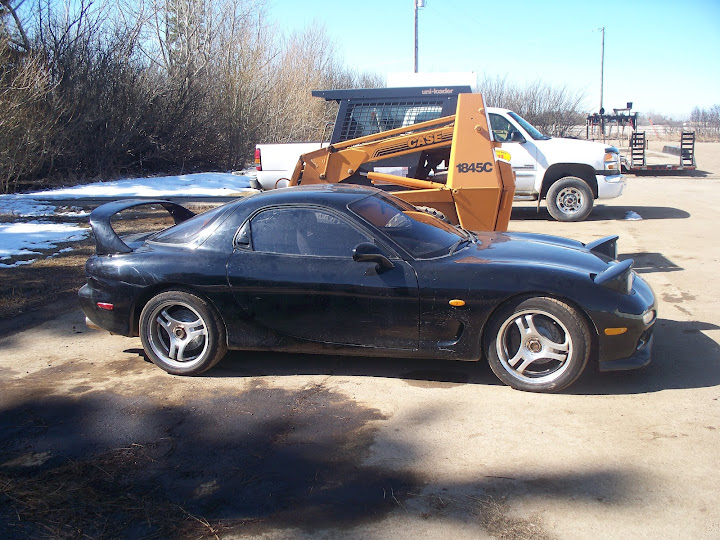 Started pulling it apart and pulling the engine early summer 2012. 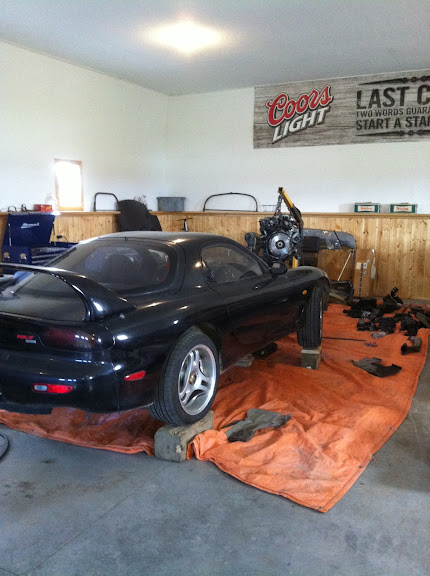  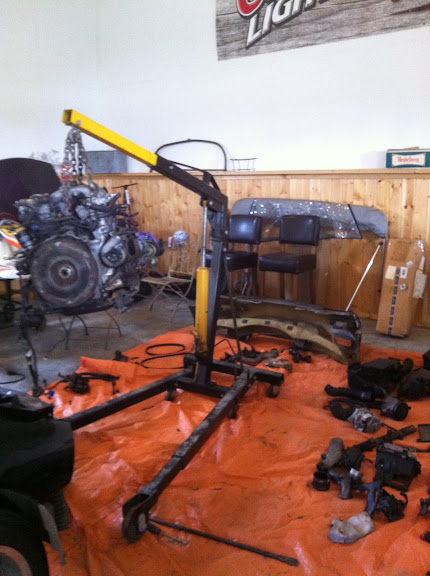  The project got pushed to the side for most of the summer as I ended working on my truck alot more than I wanted. In September I got to pulling the engine apart.      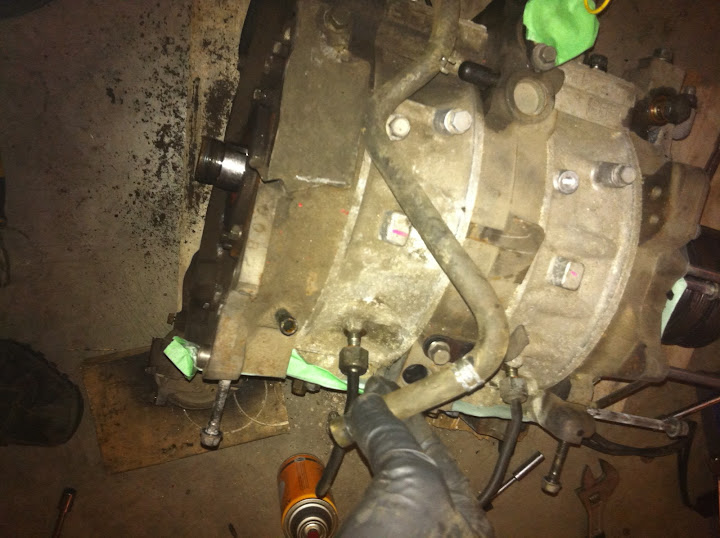 at the end of September I disassembled the engine The iron's 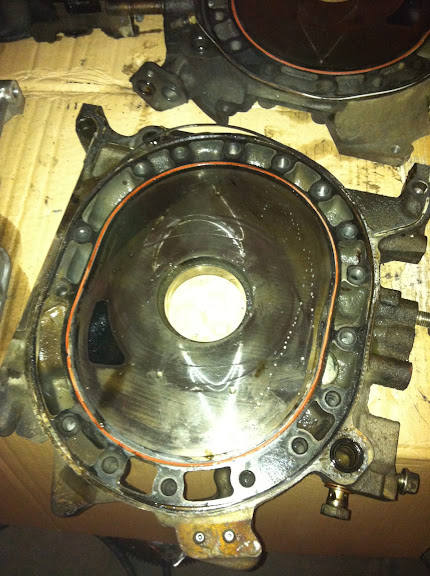  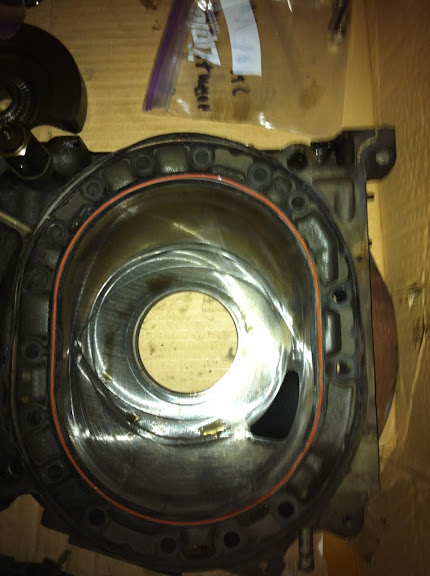 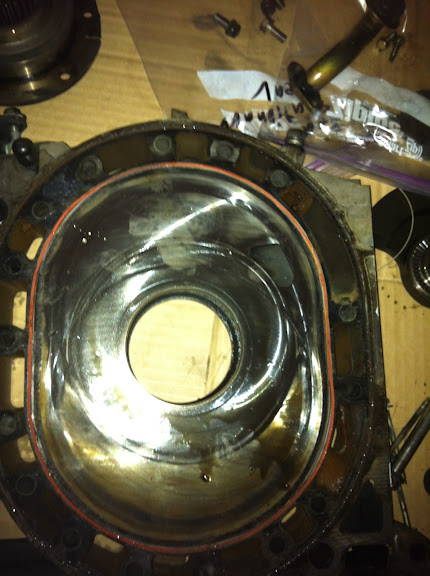 Some serious carbon build up on the rotors 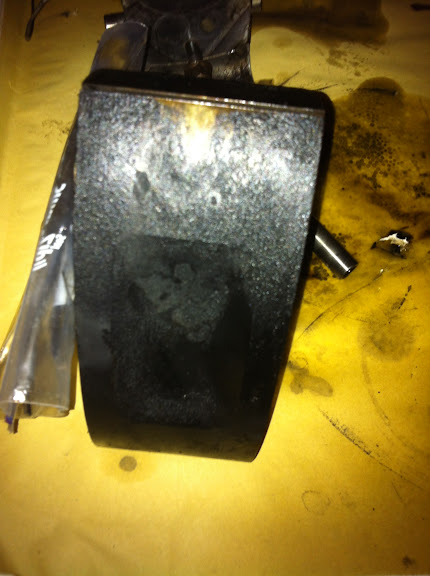 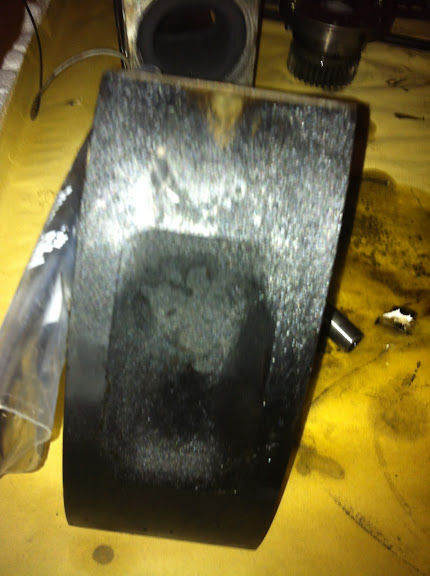 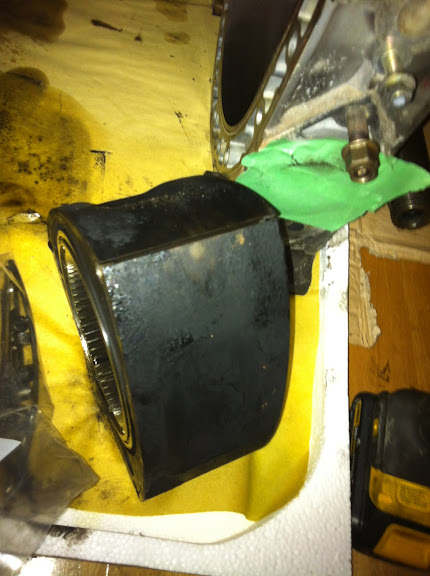 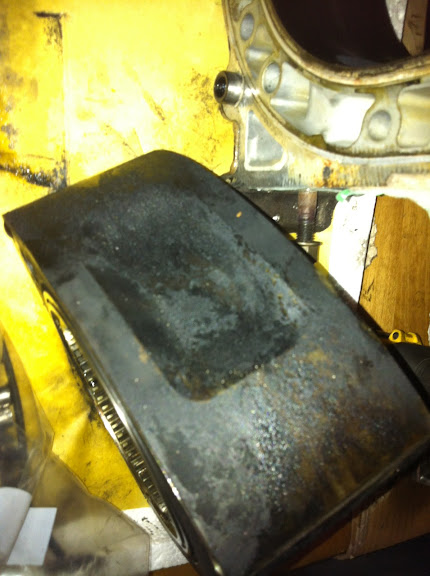 And the housings     and the engine in pieces 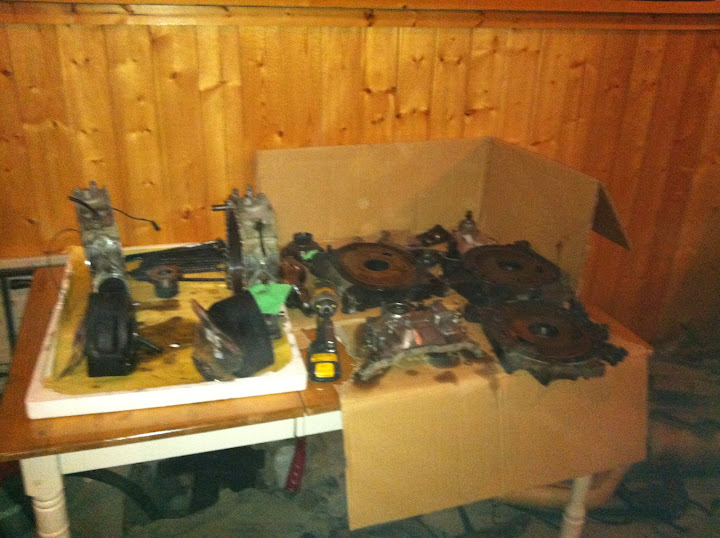 here's the pictures from cleaning still needs some more cleaning but starting too look alot better   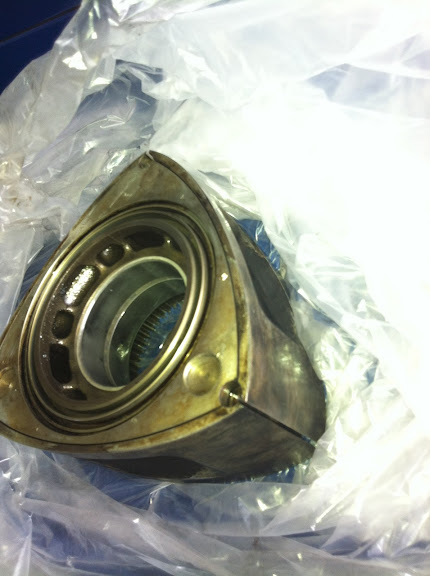  mostly just cleaned the crap off the outside at this point  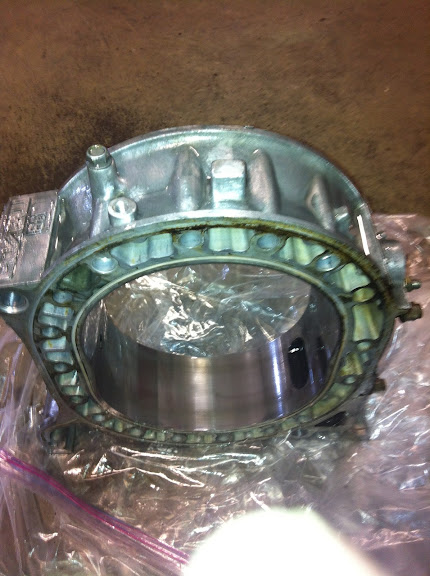 and two months later with next to no work on the car finally got back at it. finished cleaning the engine, assembling the rotors and painting the engine in one weekend. Started by moving all the parts and parts washer from the unheated barn into the heated shop. 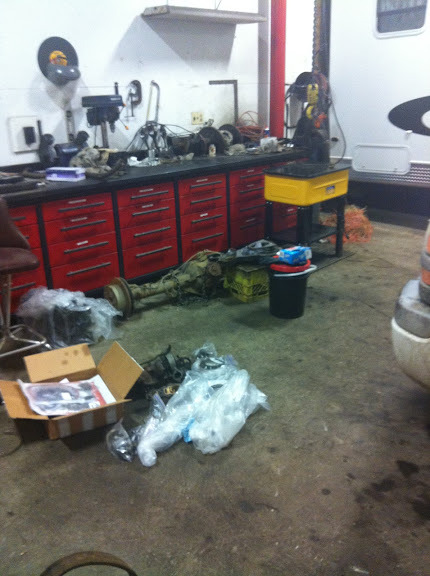 Prepping the rotors. Side seals ruffed into place on the front rotor  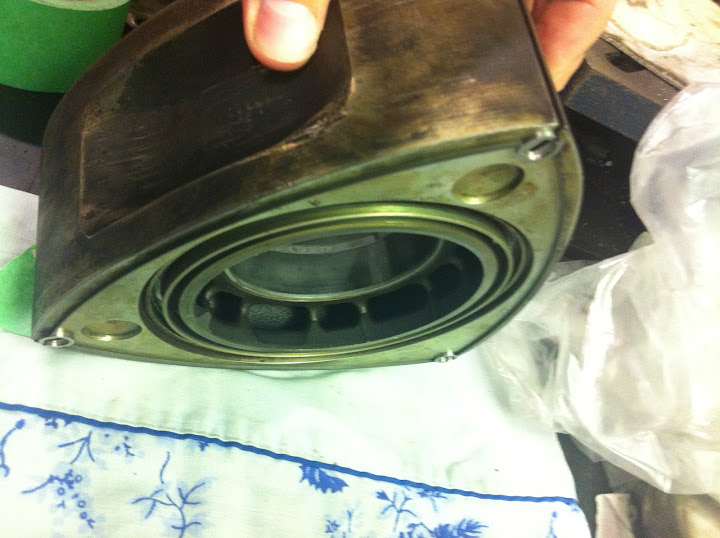 Then both rotors 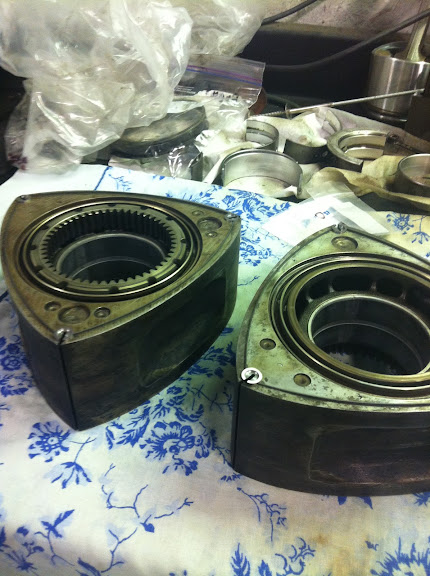 Then grinding the side seals  oil control rings installed in the front rotor  Then both rotors  all seals lubed up and apex seals and springs set in place on the front rotor. basically ready to drop into the engine  Then both rotors 
|

|

|
|
03-30-2015, 12:23 PM
|
#2 |
|
The Newbie
Join Date: Nov 2012
Posts: 29
Rep Power: 0 |
Front iron painted, that's alot of taping for very little painting.
  stopping point for that day, front housing taped off and ready for paint the next day  got the front housing painted  centre iron painted 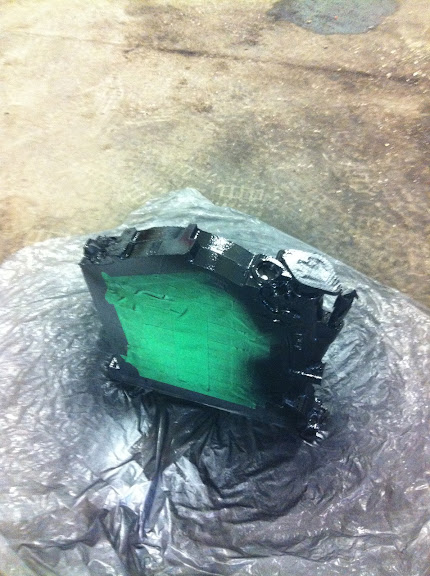 rear iron taped up and ready for paint  front iron with the tape removed  And a preview of what it could look like once finished.  Weekend Later I started assembly of the engine. Parts laid out 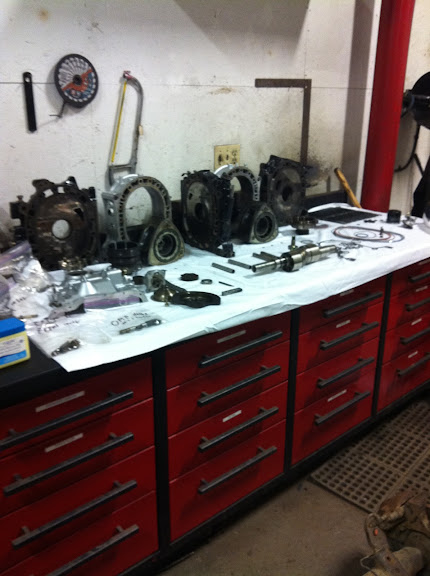 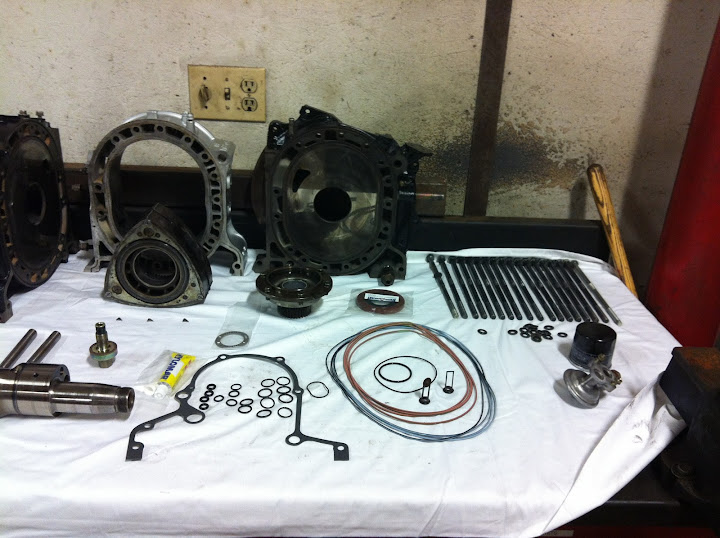 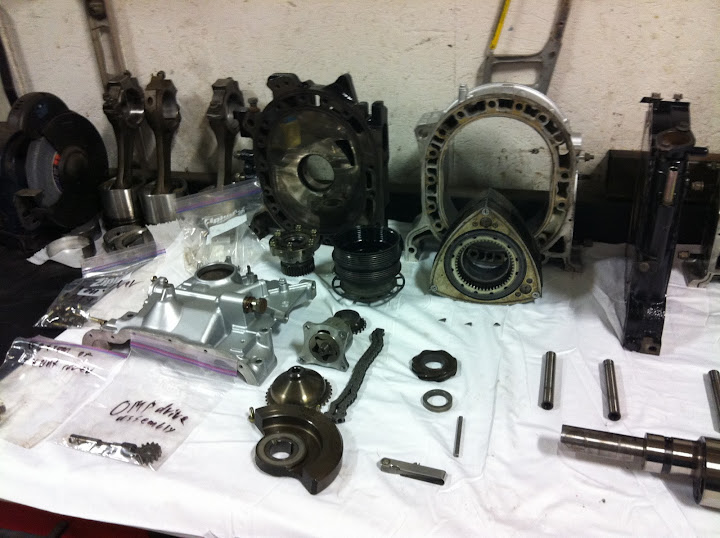 First housing on and rotor dropped in  Few less parts in the pile  E shaft dropped in  Top housing on and rotor dropped in   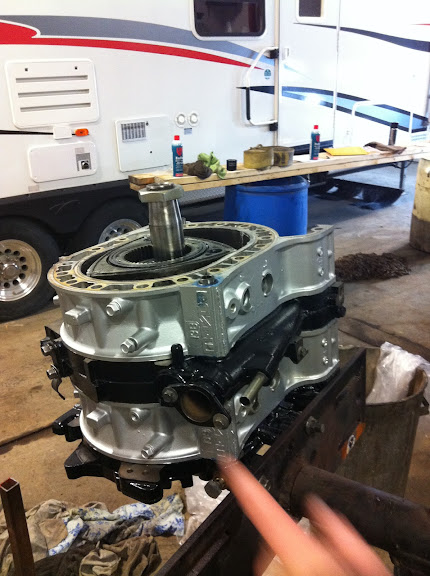 Even fewer parts left on the table  last iron on  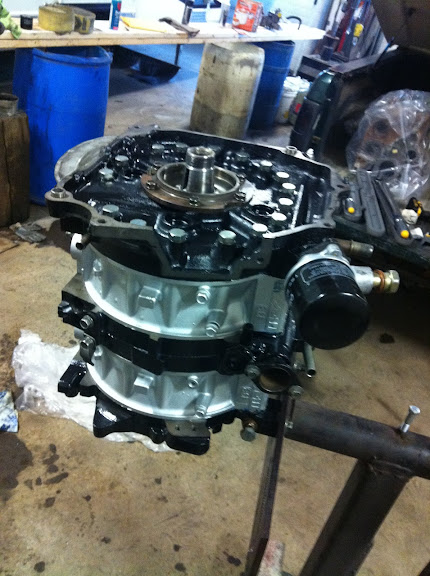 Starting to run out of engine parts  oil pump on 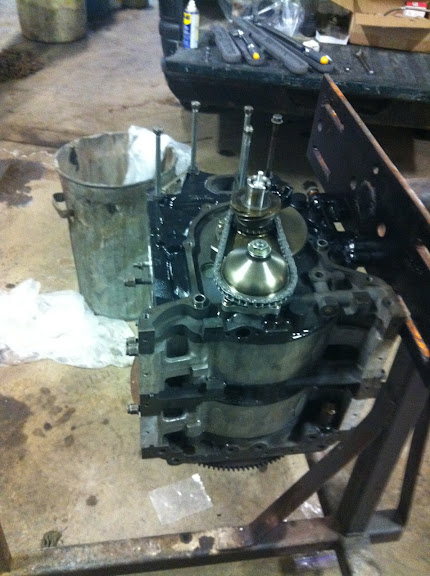 front cover on and water pump studs in  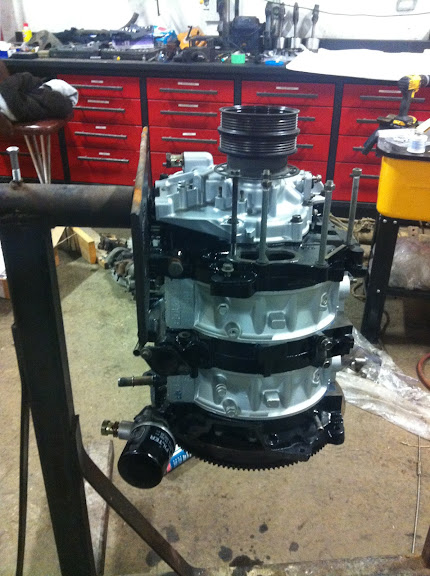 Oil pan on  Water pump painted 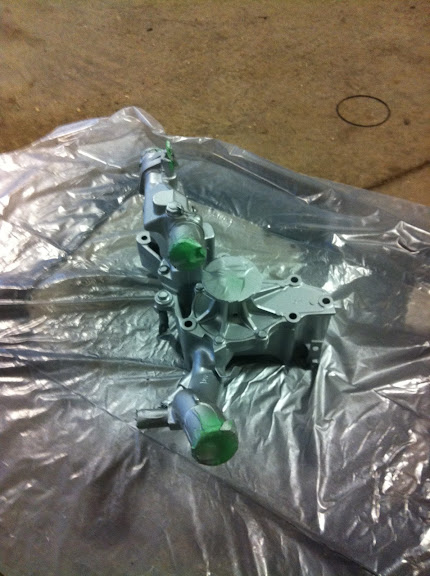 water pump on and put on my longer term engine stand. I didn't like leaving the engine hanging off two bolts. started my non sequential mods. These are the twins I picked up from a friend. The previous owner said the second turbo wasn't boosting. based off of the condition of the vacuum hoses the turbos likely weren't the problem but at least this way I know the turbo's work. plugging the holes with some bolts just cause I'm lazy.   UIM cleaned off a bit 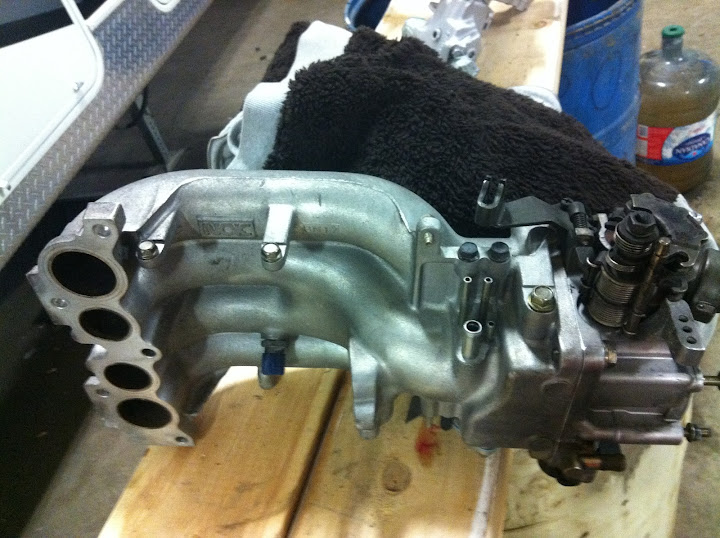 double throttle or whatever its called deleted as well as the thermo whatever. 
|
|
|
|
|
03-30-2015, 12:30 PM
|
#3 |
|
The Newbie
Join Date: Nov 2012
Posts: 29
Rep Power: 0 |
finished assembling the turbo's on the engine.
used some midpipe, never cared what brand. and an aftermarket intake as well as a Mishimoto rad    I got it running on a power FC and ran it with no waste gate restriction for most of last year at a bunch of local events, with no restriction it ran about 6psi of boost. Here's some pictures and a video link or two      http://www.youtube.com/watch?v=I5EL4...ature=youtu.be |
|
|
|
|
03-30-2015, 12:37 PM
|
#4 |
|
The Newbie
Join Date: Nov 2012
Posts: 29
Rep Power: 0 |
So far this brings us to the end of 2012 I was always running hot, even at 6psi, on the track, I would regularly see 100 degrees C coolant temps and air temps into the 60 and 70's.
This lead to that winters project of upgrading the intercooler with a greddy front mount kit I picked up from a friend, the idea was that bringing the air temps from 60-70 down to a more reasonable 30 or so should reduce the overall combustion temp and hopefully help the coolant system. anyways here some more stuff. Here's the start point, a friend of mine stole a bunch of parts.   my battery blew up during 2012 track day season, you can see the mess the battery made. lots of cleaning and repainting to do   Alright, got back at it again. Started by tearing the car apart. Dropped the wheels and took the front bumper off Here's the future home behind/in the crash bumper. I already installed this intercooler on a friends car before he decided to go wild with his build. We had to cut into the crash bumper so I will probably have to again, I'll see what I can do though.   Crash bumper taken off and rad taken out, spilled some coolant   I'll miss you my friend, maybe even ore if it had worked right in the first place.  This is the rad I was using before, I'll stand it up more straight rather than having it at the stock tilt.  Power steering cooler gone  Power steering pump gone  AC compressor gone    Pulled out the steering rack to de-power it   One of the boots was fucked  Steering rack de-powered and almost put together, needs a new boot before I put it all the way back together.  Started test fitting the intercooler.   The brackets I gotta fab up and weld on  
|
|
|
|
|
03-30-2015, 12:41 PM
|
#5 |
|
The Newbie
Join Date: Nov 2012
Posts: 29
Rep Power: 0 |
here's some pics I dug up of the install into my friends car.
It was done pretty quick, I think I can do a better job 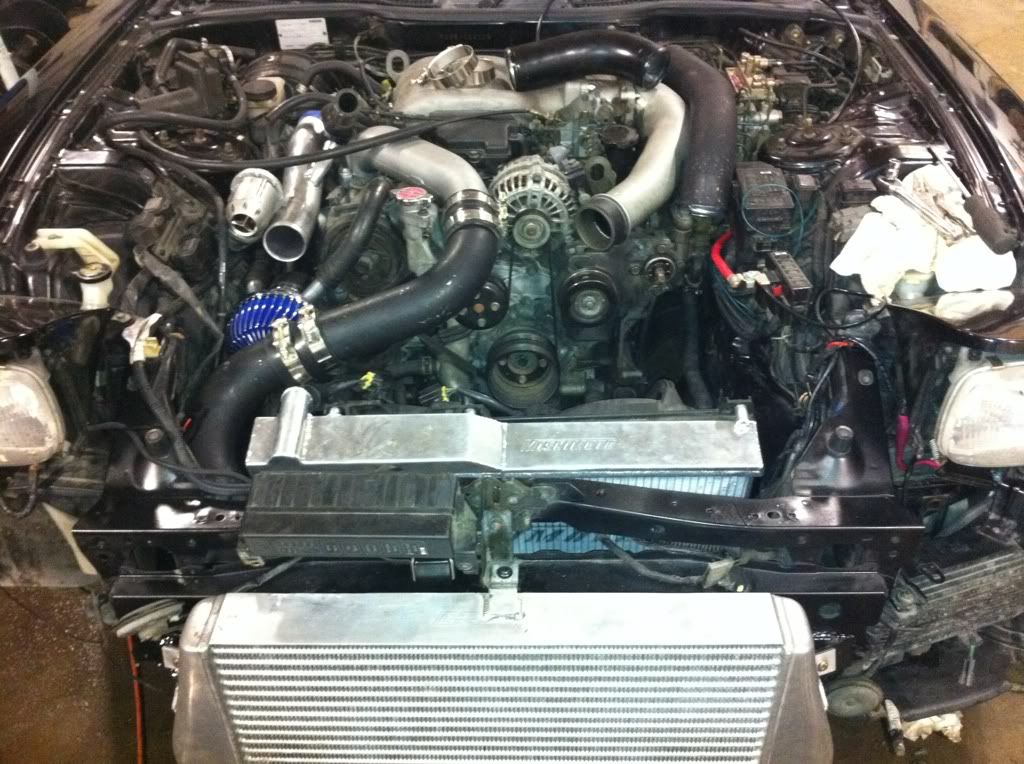 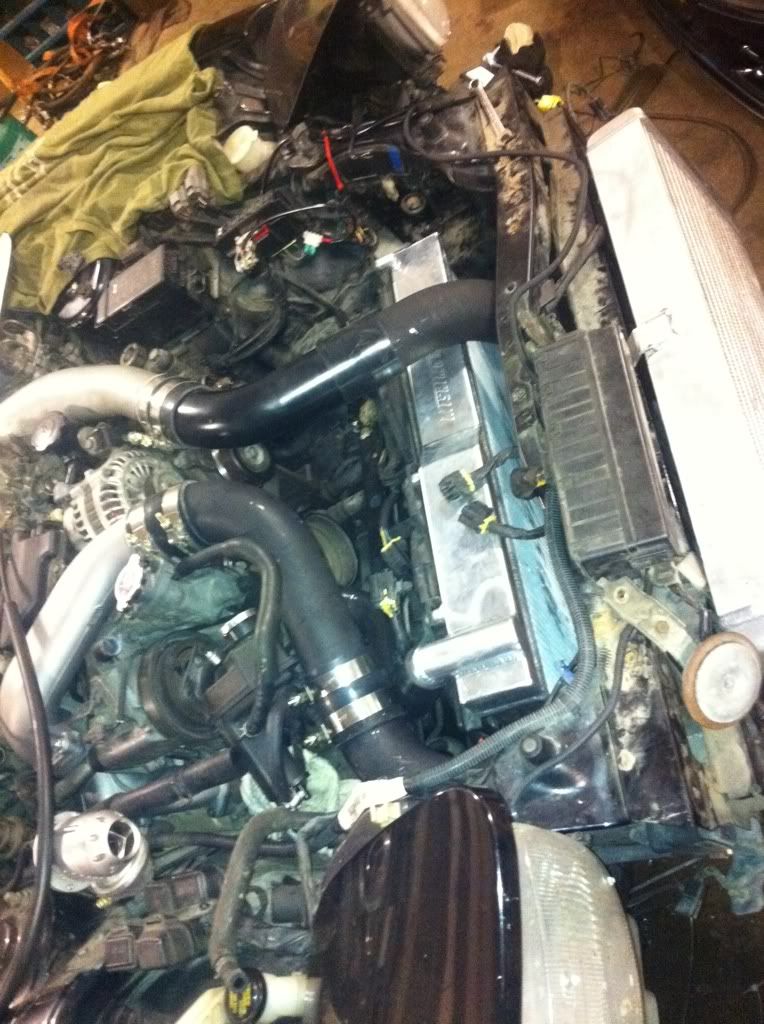 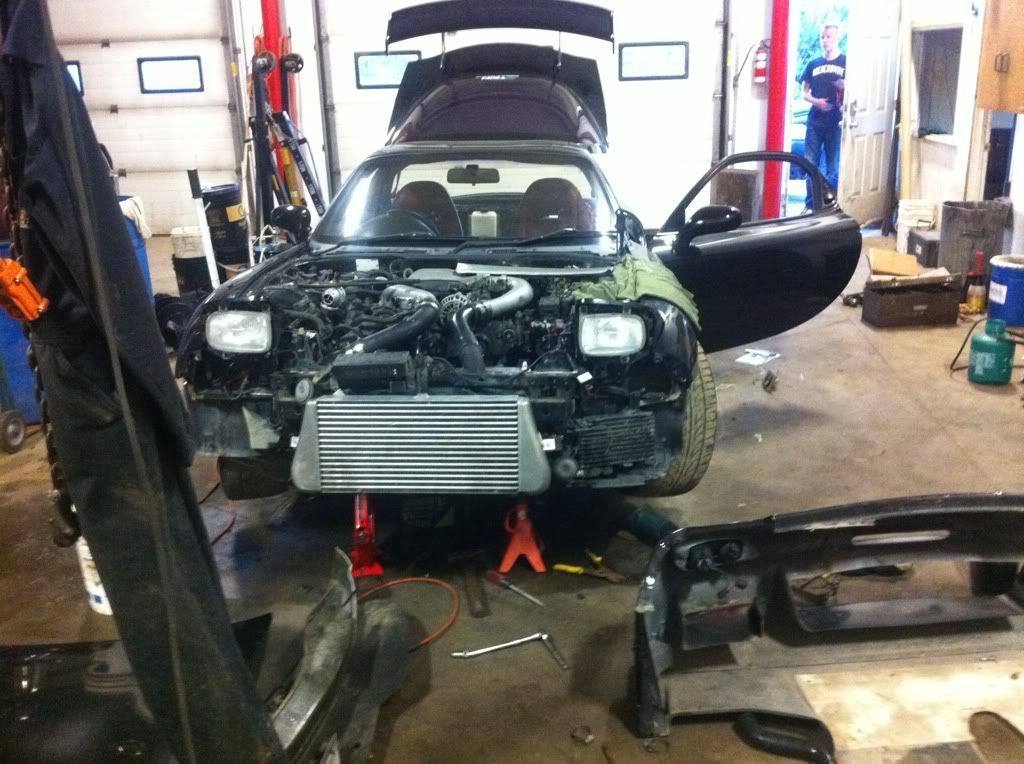 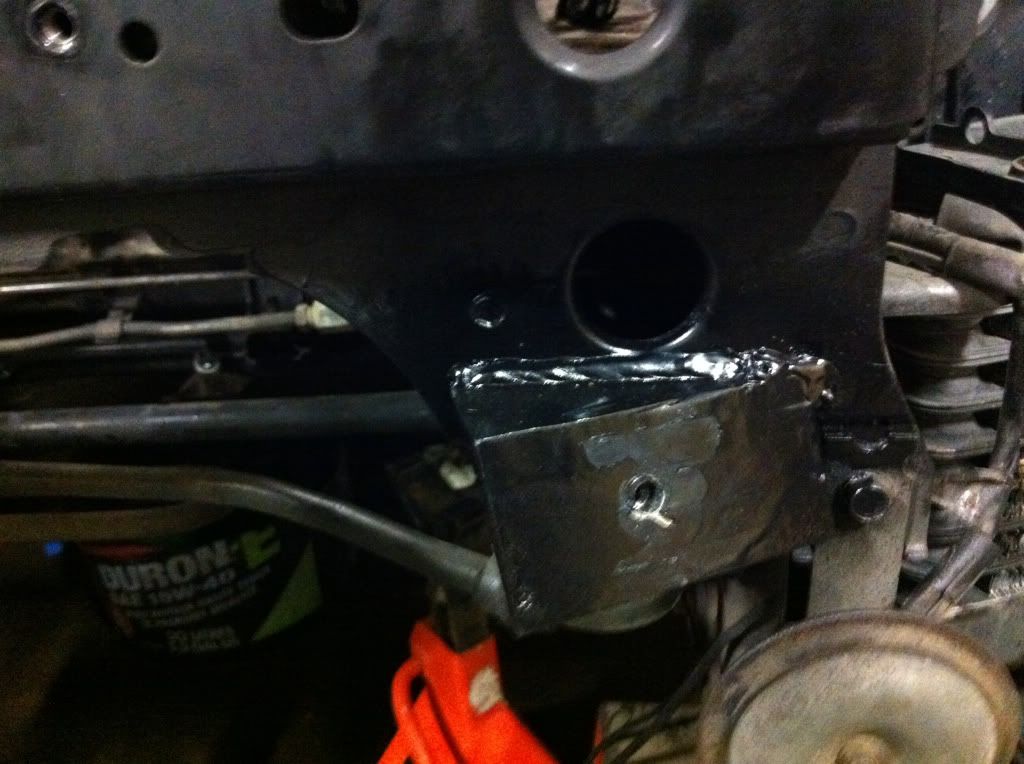 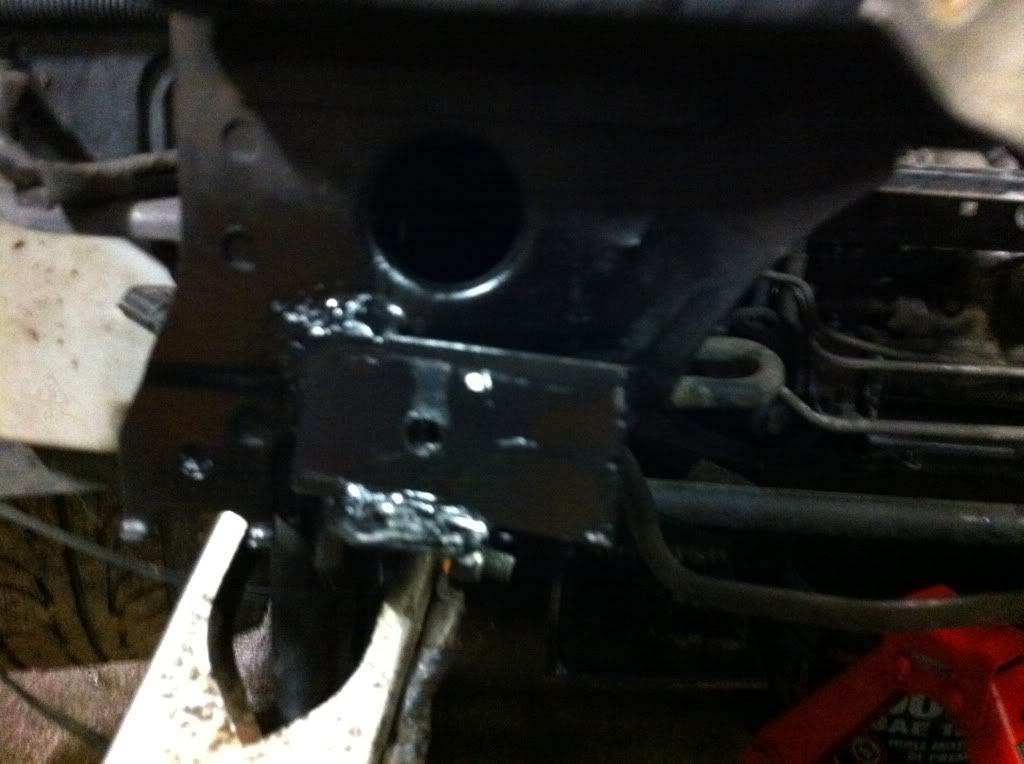  Back to my build started cleaning and painting various battery acid tainted parts.  not my best work but they will hold the intercooler well enough and they are hidden so, good enough. they are ugly but the pictures make them look far worse.   I figure with the power steering and AC gone this could be a good place for a battery, is it bad for a battery to be that close to the engine/ heat? Present time edit: I went with a better plan for the battery  got the bumper mostly cut away to fit, might still take a little trimming. I don't like how small the bumpers airflow path is, it only exposes a small chunk of the intercooler to airflow and the rad is even taller. Tempted to just cut away alot of the bumper lol, but that would be haggard and look like shit.    got a new boot and the steering rack put back in. I think it needs an alignment pretty bad now lol. spent the rest of today trying to get my rad mounts figured out. got them tacked in place then decided I didn't like how low it was so I raised them at the last minute and welded everything in. they are still lower then the bottom of the front bumper but they are higher then the rest of the bottom of the car.    with the start of next week, well maybe even tomorrow afternoon, I have to get back to real life,school etc. So tomorrow will probably be putting as much together as I can and rolling it out the door followed by a massive clean up. I'm the guy who pulls stuff out when I need it and doesn't put anything back until I'm done, so I have tools spread out everywhere as well as both useless and needed parts.   hopefully tomorrow I can get the top rad brackets and rad hoses figured out. |
|
|
|
|
03-30-2015, 12:46 PM
|
#6 |
|
The Newbie
Join Date: Nov 2012
Posts: 29
Rep Power: 0 |
didn't really get a whole lot done today. lots of cleaning, painted the rad mounts and got the bumper finished up and put on.
the rad is still missing top brackets. the charge air piping I'm not a big fan of as they don't line up real good. Something for me to try to figure out later though. They definitely need to be cleaned up and repainted though.  the charge air piping aren't the best but here it is all together  Front bumper cut away and back on  The upper rad hose solution. a cut stock hose.  the lower rad solution, or at least temporary solution, will be these two pieces cut and joined in the middle.  a little higher then the rest of the car but I will need to figure out a new under-tray solution as the stock one will no longer work.  a picture from below as I was down there   lots of room between the rad and the engine  Now that I'm finally done finals and school for 8 months its time to get back to work. didn't get a whole lot done this weekend, basically just got the stock undertray modified to work with the new setup and got the bottom rad hose made up. to do list before its driving: -Upper rad mount -Battery mount (questions and discussion below) -Add coolant -Some fine tuning of the intake piping -Need to figure out the intake setup to do list for after its driving: -Idle air valve -boost controller -Stereo and speakers -buy spoiler -Rims(RPF1's) and tires -probably some other stuff. Alright on to getting this thing running. the next major hurdle is the battery in my mind. I see two decent options that should be fairly clean. Option 1 mount the battery between the engine and rad against the LH frame rail. this is fairly close to the stock position, I still foresee some fucking around to get the power cable hooked up but shouldn't be the end of the world. The easiest way I see to make something like this work would be to use something along these lines.  And where it would go    This would be fairly easy to implement, the only difficulty would be extending the wiring but 'a necessity with either option. Negatives would be the heat the battery would see. Could maybe use an optima battery arn't they supposed to take heat better? Option 2 mounted right behind the rear seat in the trunk, as close to the seat as possible.   Wires would have to be extended through the car and stuff which is a pain. and I probably would be to lazy to vent it outside unless you guys convince me to, I've never really researched it I just know they are supposed to vent outside but tons of people seem to without issue. as for the actual mounting There are these 4 bolts that go through to mount stuff underneath. I'm picturing building a plate to connect them all and then welding on some studs to go up from the plate through the rug to the battery box.   I would replace their brackets with my plate. something like this would work good.  making some parts for a friends FD   back to my build Spent the last two night fabricating a bracket to hold the battery and this is the final result.  the bottom bit bolts to the two rear seat supports, and the batter tray will bolt to it with the rug between the two. the tray will also hide the holes in the rug so it will look fairly clean. The battery cable should be in tomorrow plan is to route the negative to the strut bar mount for grounding.   the positive will also run by there and up through the car hidden pulling the panels off I pulled one of the back speakers as the first project after its back on the road is installing deck and speakers. it was in pretty rough shape.   also found some mystery wire. this was not the wire connected to the speaker lol  the bottom of the back seat was in pretty rough shape as well. some of the wires on one edge had rusted away. where would someone find these or get these redone? I imagine it would take someone with the right tool 15 seconds to do.  
|
|
|
|
|
| Bookmarks |
|
|

 Hybrid Mode
