|
|||||||


| Piston Engine Conversion Have you replaced your rotary with a V8 or any other type of piston engine? Tell us about it! |
 |
|
|
Thread Tools | Display Modes |
|
|||||||
| Piston Engine Conversion Have you replaced your rotary with a V8 or any other type of piston engine? Tell us about it! |
|
|
|
Thread Tools | Display Modes |
|
|
 02-25-2013, 01:05 AM
|
#1 |
|
Rotary Fan in Training
Join Date: Nov 2012
Posts: 58
Rep Power: 13  |
The next pic in the camera was this, but it jumps past some other stuff. I guess I forgot to take some pics, get over it I guess.
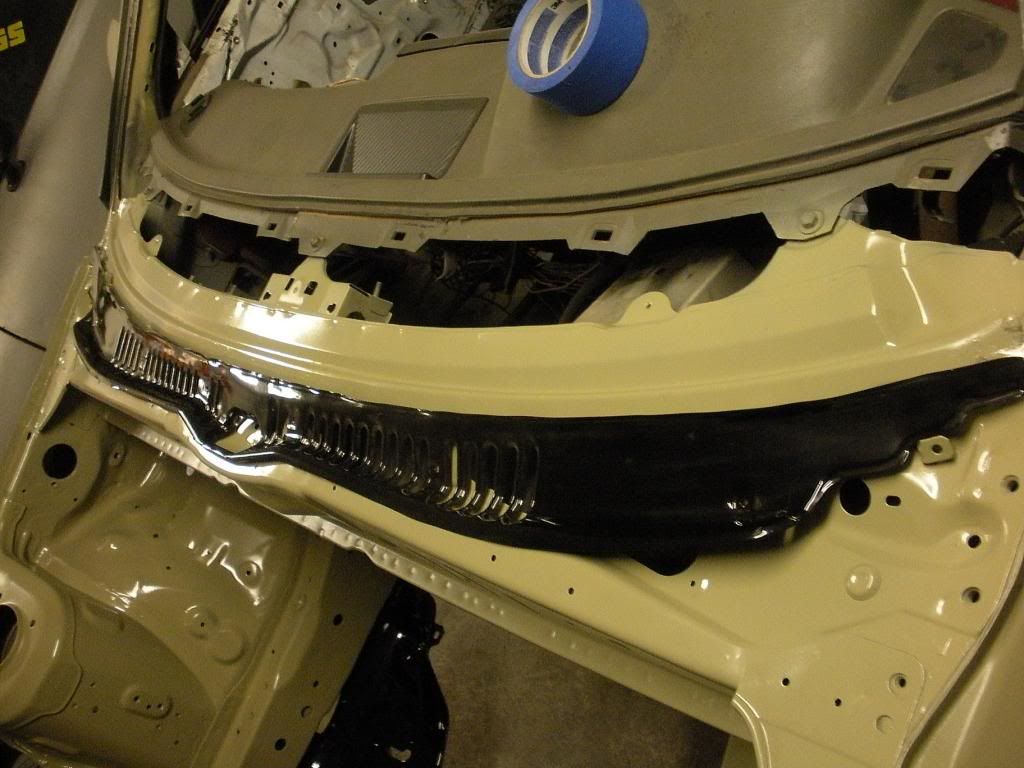
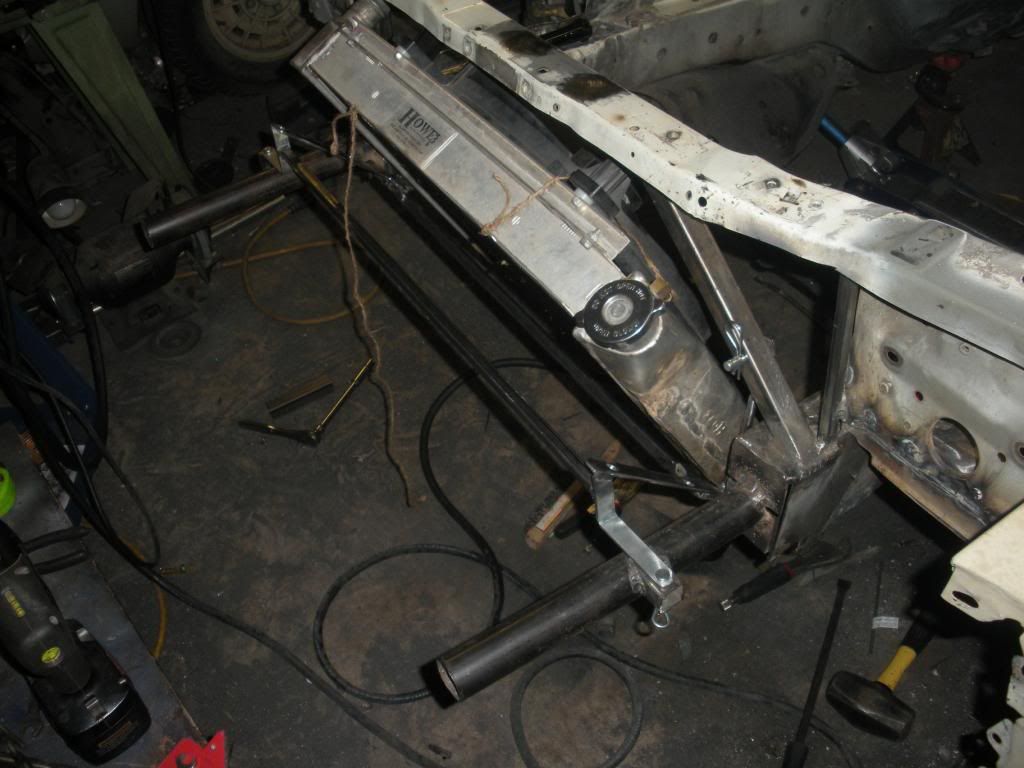 You can see the radiator bracket changed quite a bit. Still had the bent rod passing through the diagonal square tubes at this point. That was again revised. I have heard you never dead head pipe into a frame rail......so I did that first thing as my approach to extending the frame rails lol......oops. Well I did leave some other stuff welded less so it can crush. We will come back to that. Added the mount tabs for the radiator bracket to the round frame extensions. The radiator is just hanging there in the pic trapped not actually mounted in any way. Got this stuff powdercoated. 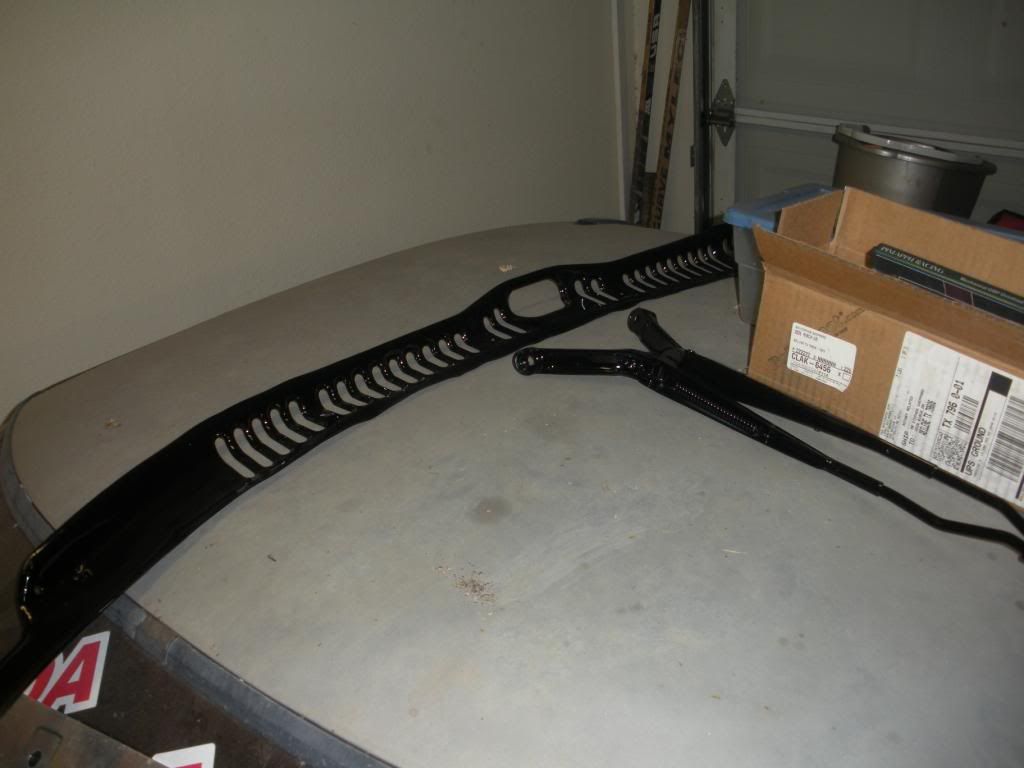
|

|

|
|
02-25-2013, 01:19 AM
|
#2 |
|
Rotary Fan in Training
Join Date: Nov 2012
Posts: 58
Rep Power: 13 |
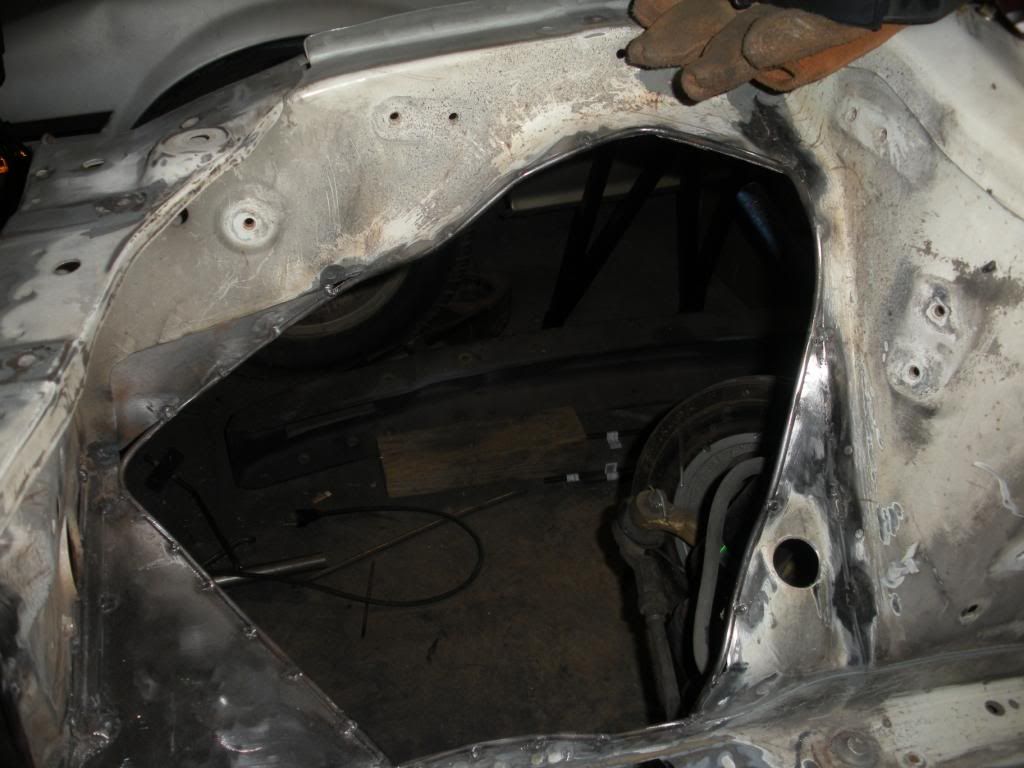
Added some round stock to the inside edge of the fender well holes since I'm leaving the hole open and I don't feel like getting cut everytime I touch any of that.
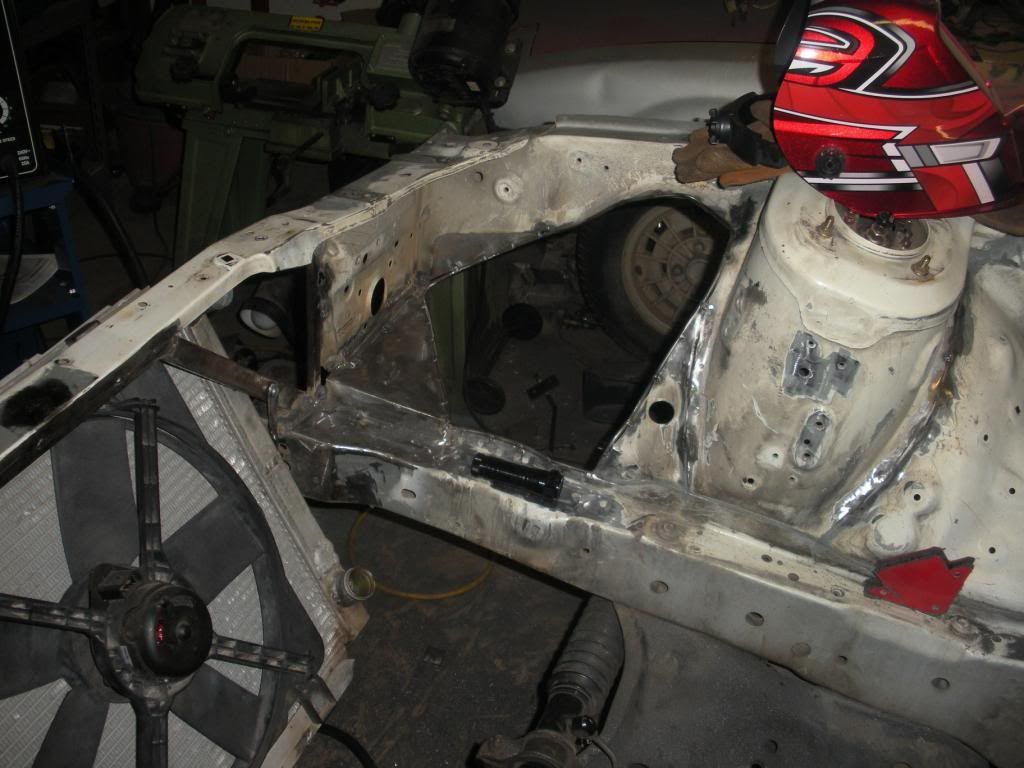  Had the subframe powdercoated. 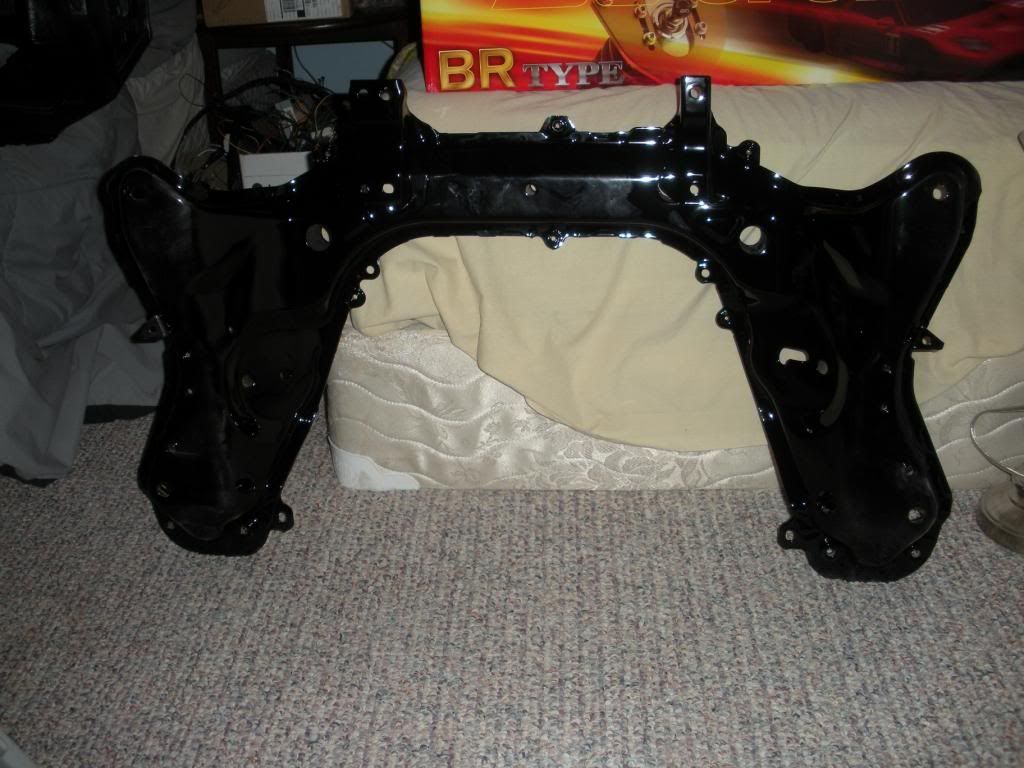 Pretty sure this is the pic just before I started prepping the engien bay for paint. Took everything off the chassis, then sanded, and sanded, and wire wheeled and basically it took forever since I can't dedicate huge amounts of time to teh car all at once. You can see there was a couple improvements made to the frame rail extensions. 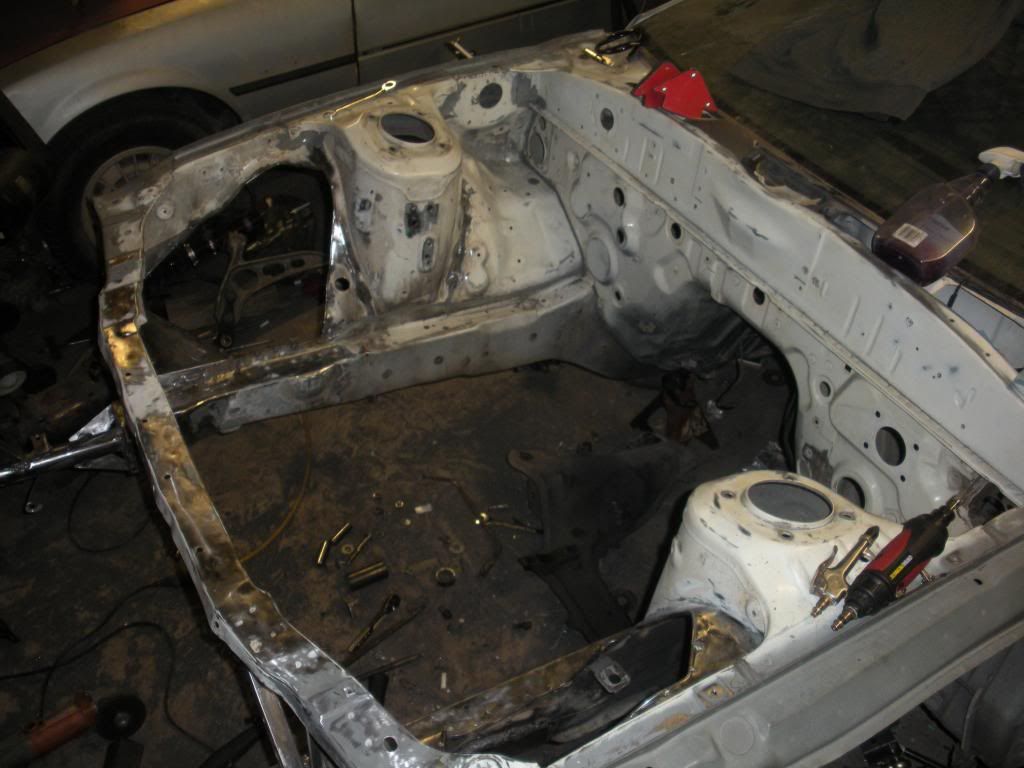 Seam sealer and some primer happened. 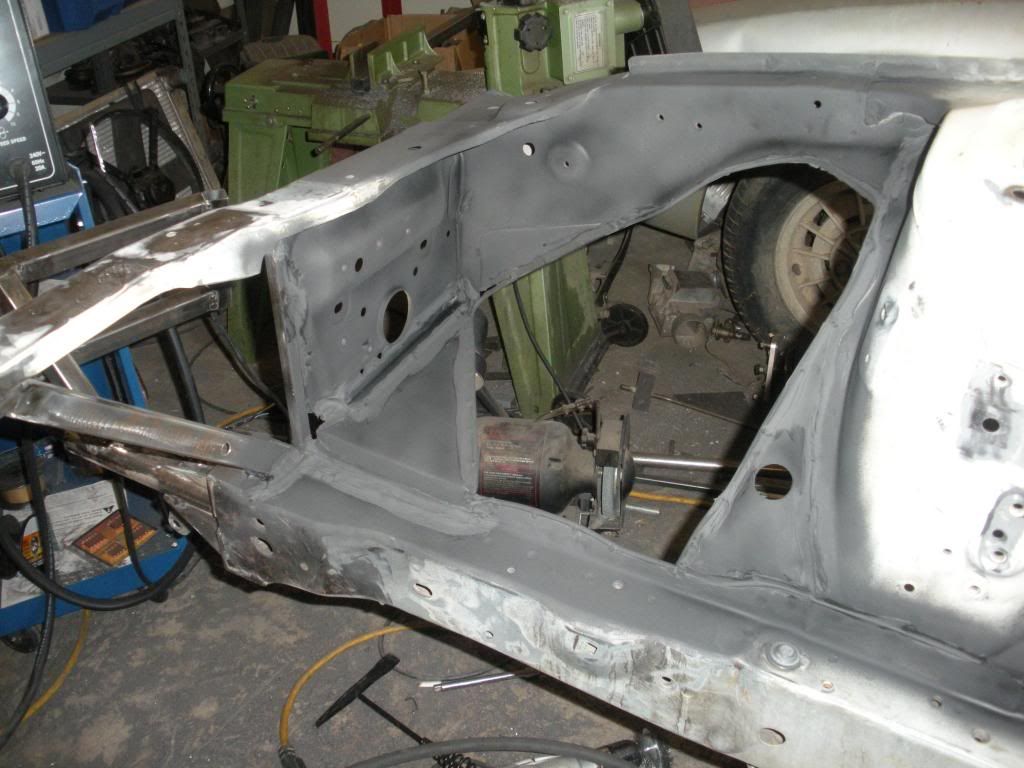 Bought a couple hundred dollars of stainless steel 3/16" tubing and fittings for the brake system. Bought more later lol. 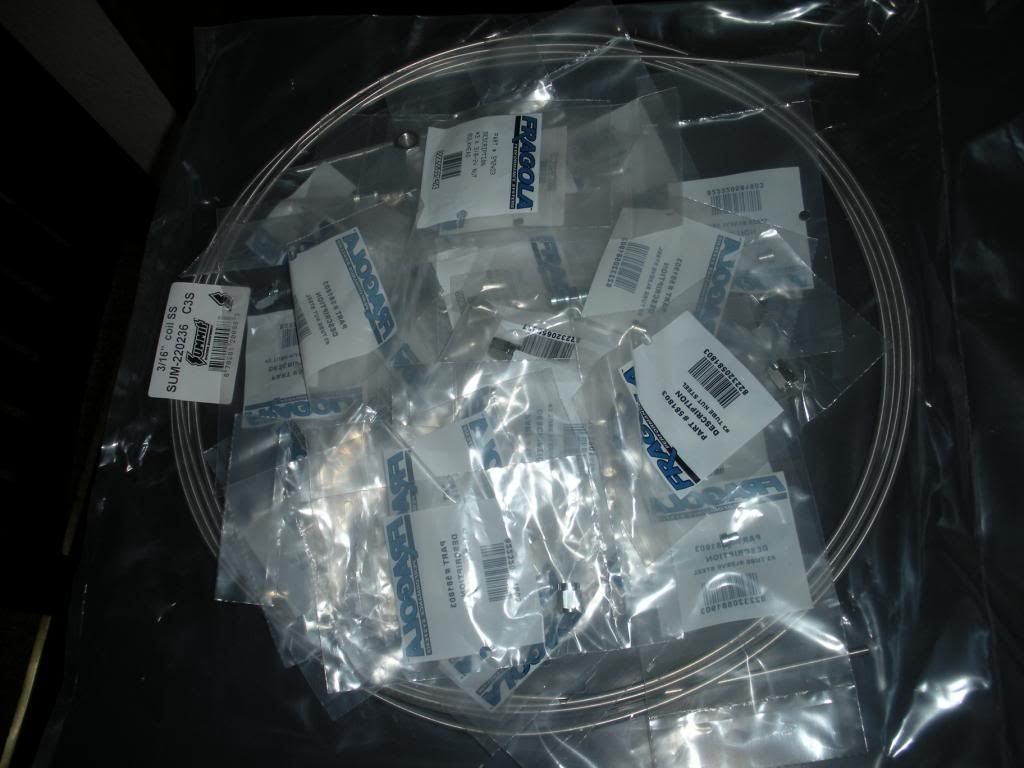 Bought an ASD hydro E-brake 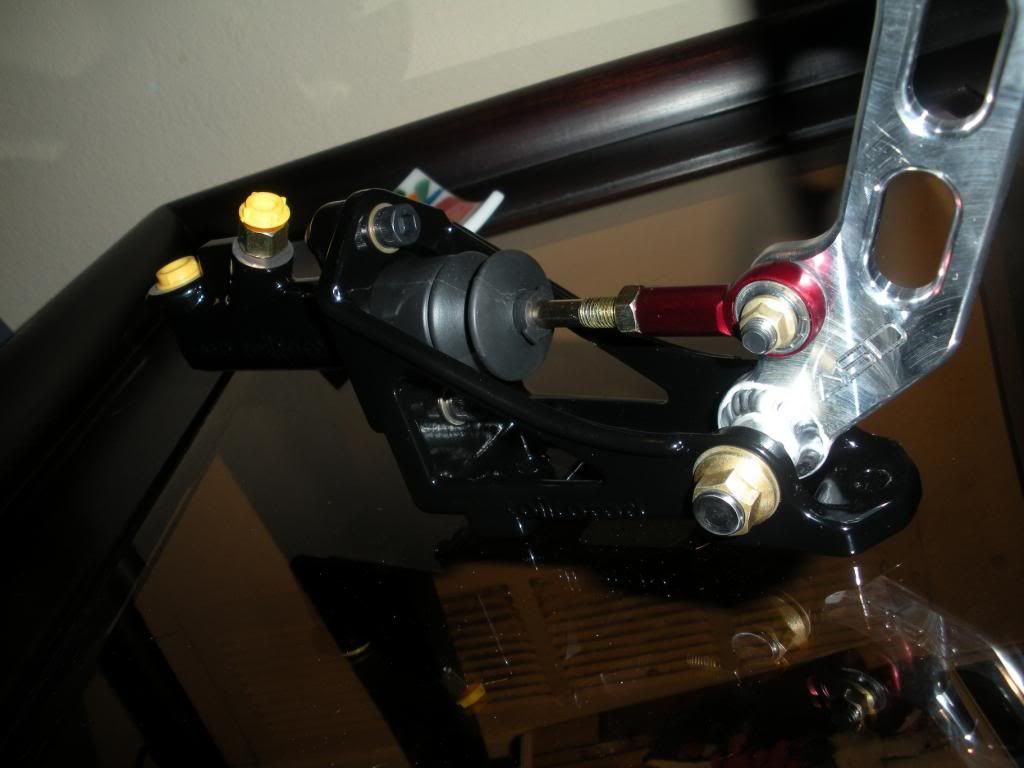 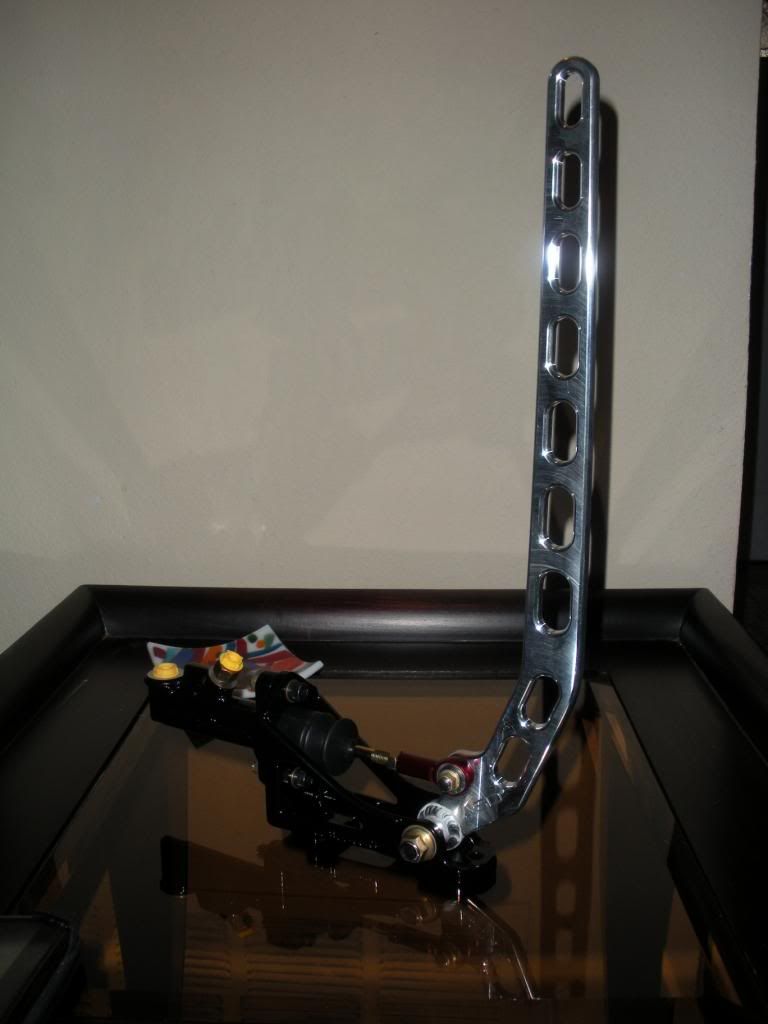 Cut my broken windshield out and finished primering the engine bay. 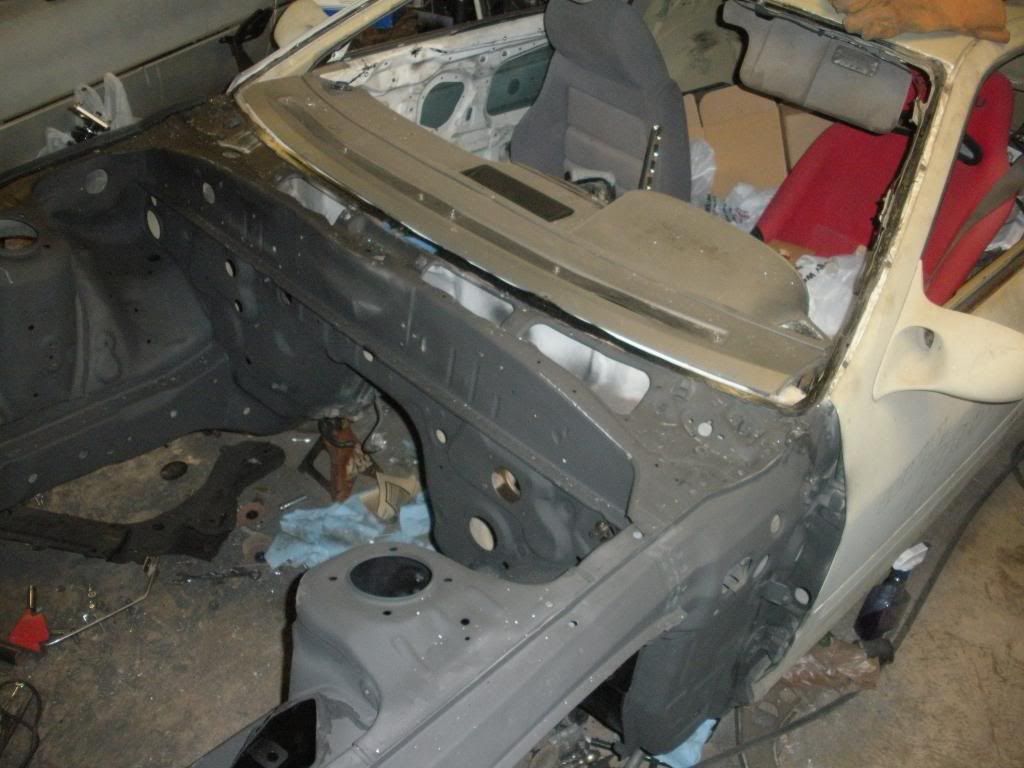 This stuff comes off super easy with a razor blade and then a soft wirewheel in a drill.  No windshield status 
|
|
|
|
|
02-25-2013, 01:33 AM
|
#3 |
|
Rotary Fan in Training
Join Date: Nov 2012
Posts: 58
Rep Power: 13 |
Then we skip ahead in time again.
And........................................ Painted. 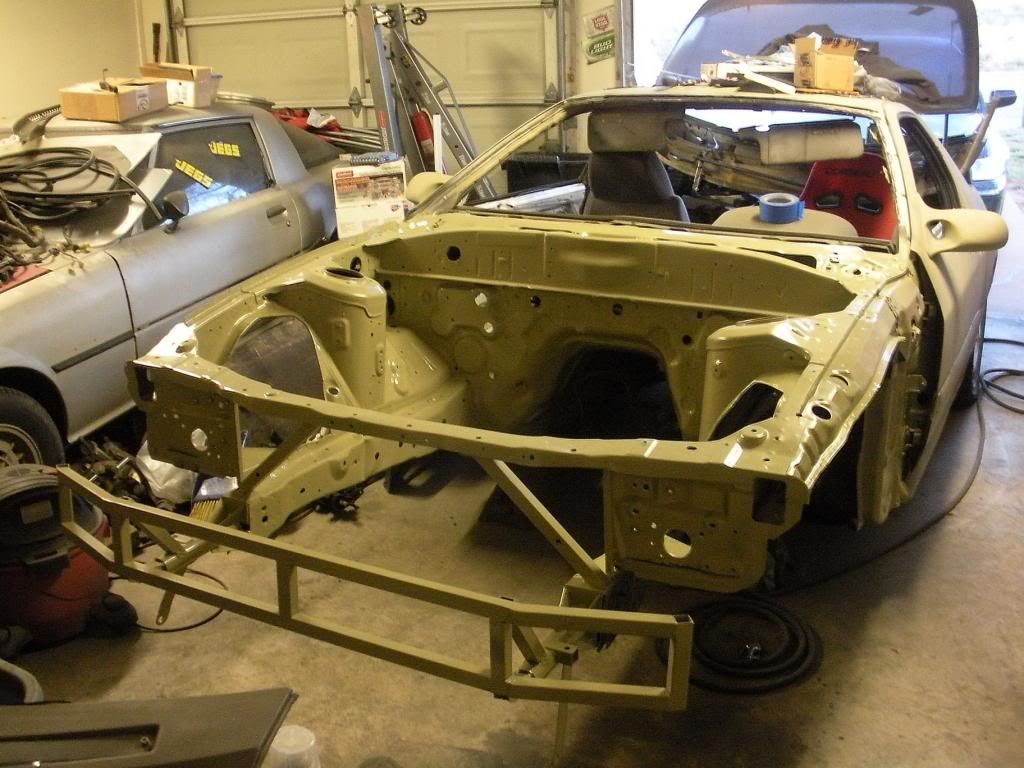  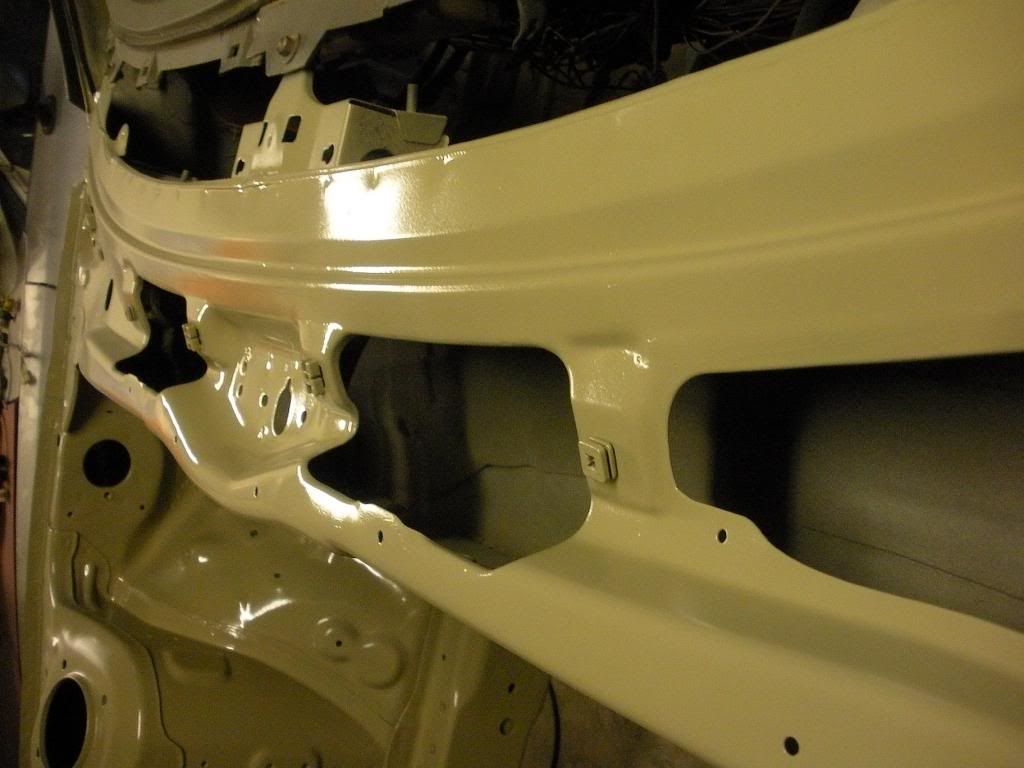 Paint came out pretty nice. I dig it. The whole car will be painted that color when it's all said and done. One the "bumper" I tried to stay away from doing too much heavy welding in hopes that this stuff will be destroyed in case of a say 20mph or more impact. hopefully it's a sound thought process. Also hopefully I never find out. To be realistic it is a drift car so the coolers will probably be destroyed in a decent speed collision. Painted the wheelwells also. They will get all scratched up of course but figured it could start by looking decent and then I won't care about what happens later really. 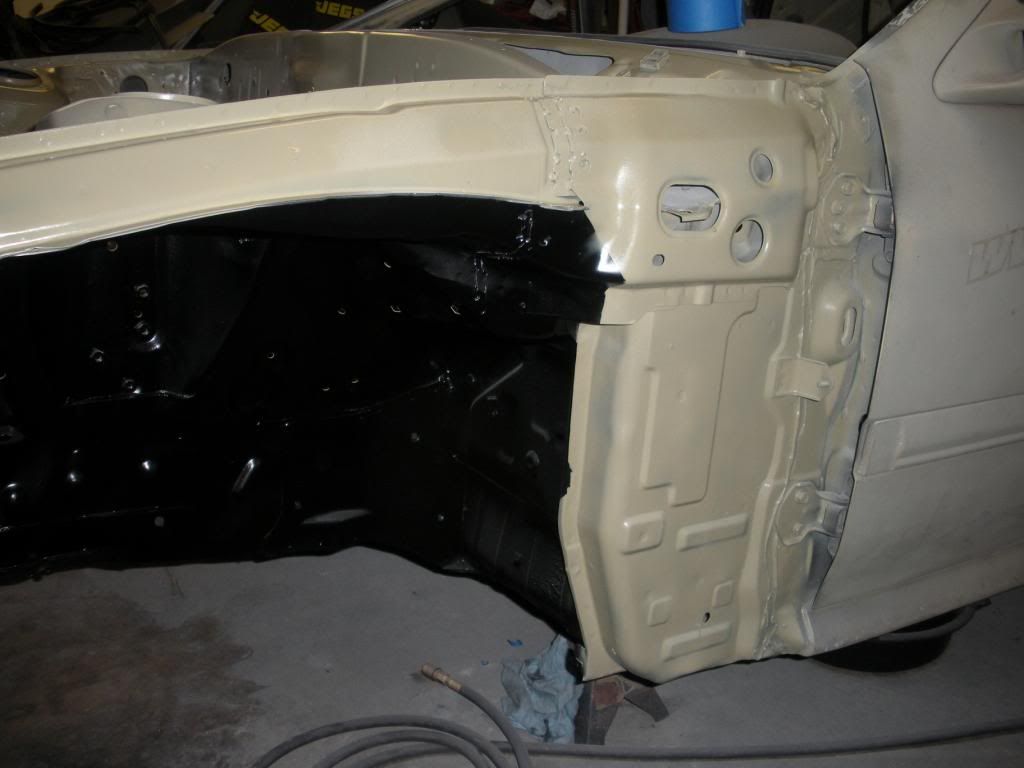 Installed the subframe 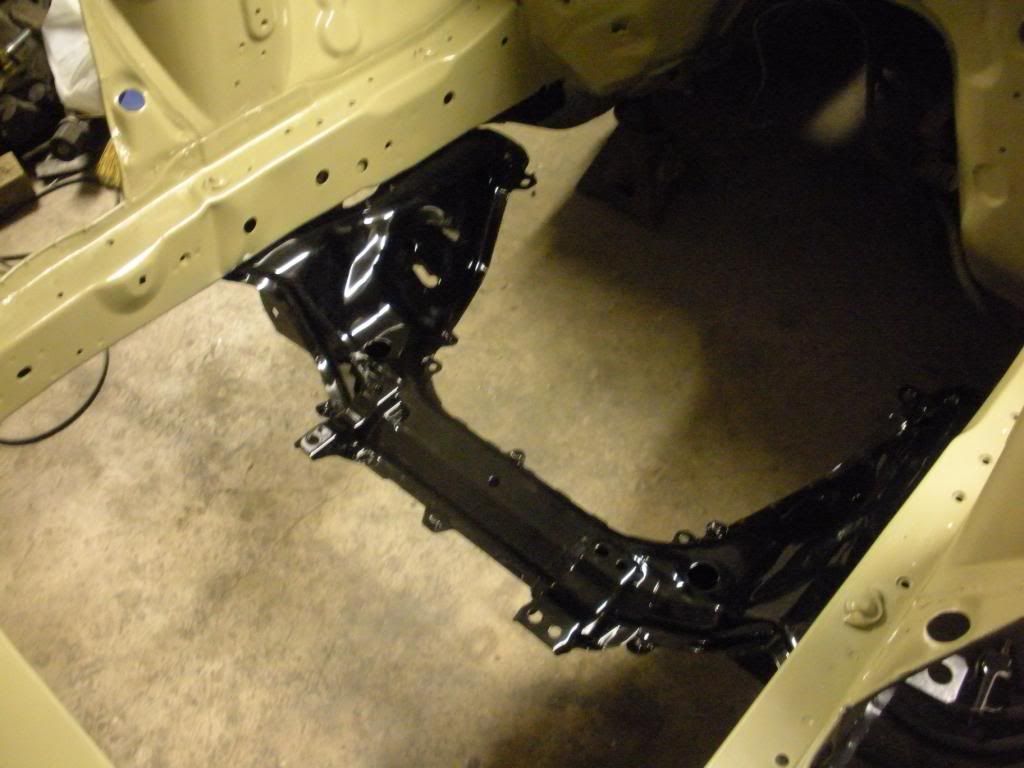
|
|
|
|
|
02-25-2013, 01:47 AM
|
#4 |
|
Rotary Fan in Training
Join Date: Nov 2012
Posts: 58
Rep Power: 13 |
Something happened here
 More stuff goes to be powdercoated. The x-brace, the radiator bracket (revised for the third time), the slave cylinder mount, the steering rack brackets, the front LCA brackets, the engine cradle, and the trans bracket. Maybe some other stuff I don't know it's hard to keep track off honestly. 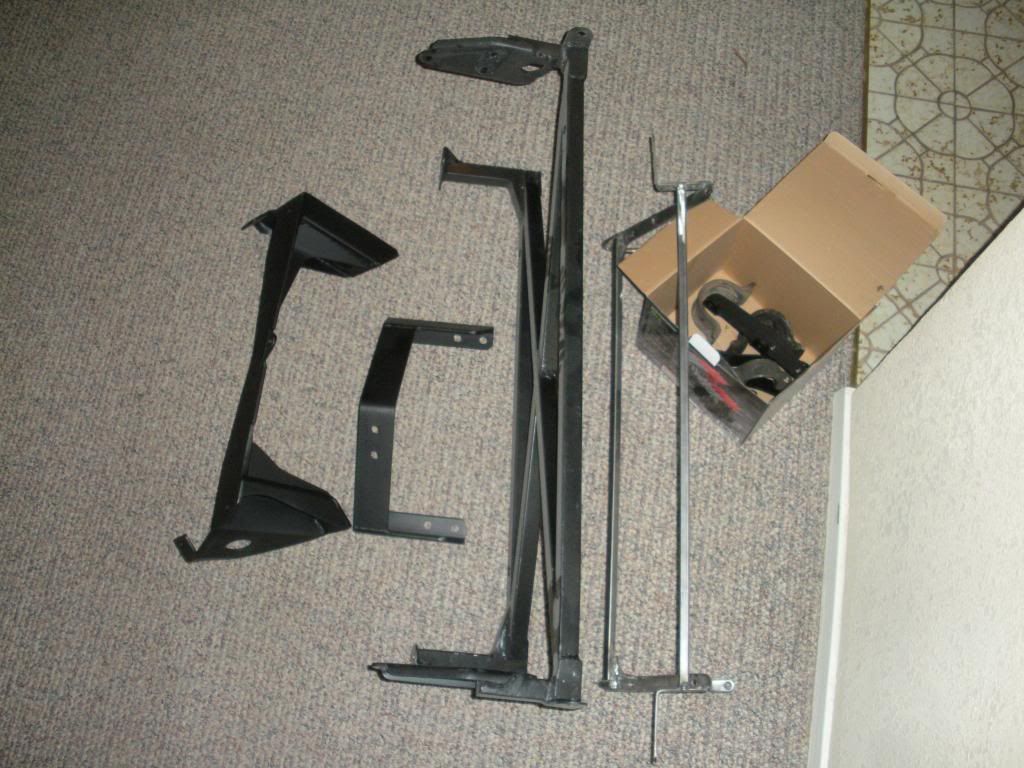 A neat picture with tubing nuts and sleeves lol 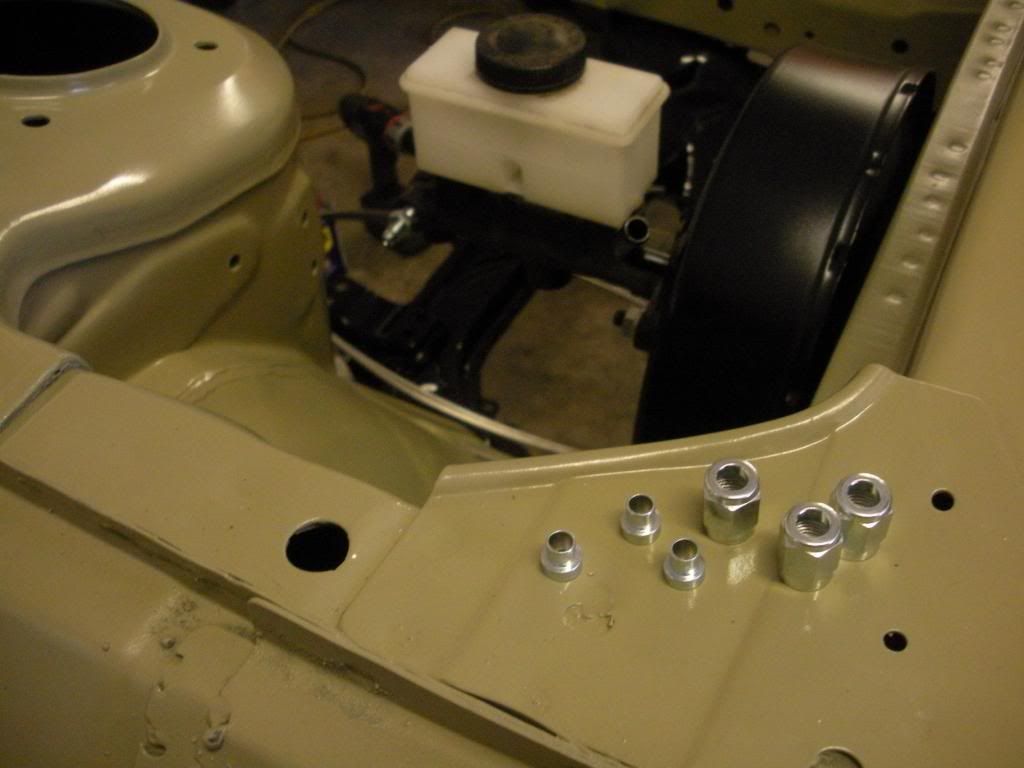 Painted the brake booster and loosely mounted it and the brake master cylinder. Began the process of building the MC lines to the firewall bulkheads. The proportioning valve will be inside the car. One problem with the FC factory MC is that it has two front outputs right off the MC. I had to buy a plug for one of the outputs so that there would be just the one. The fronts brakes divide after the proportioning valve now, more on that later. 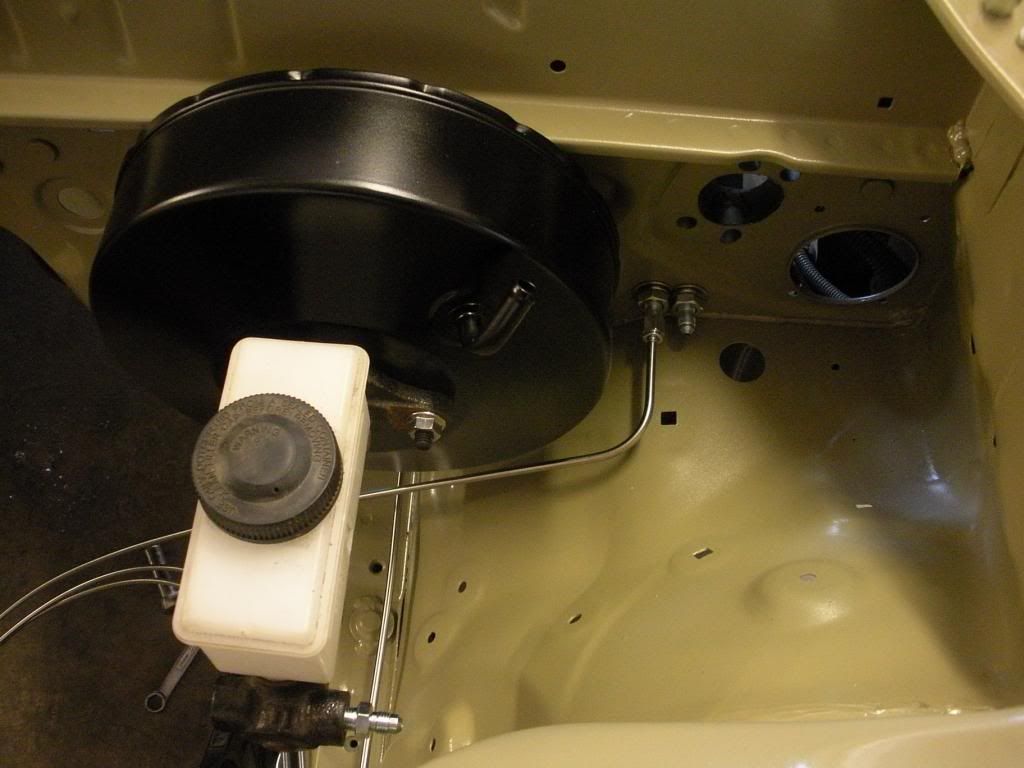 Built the front brake lines up to teh bulkheads in the firewall as well. almost a finished product at this point. 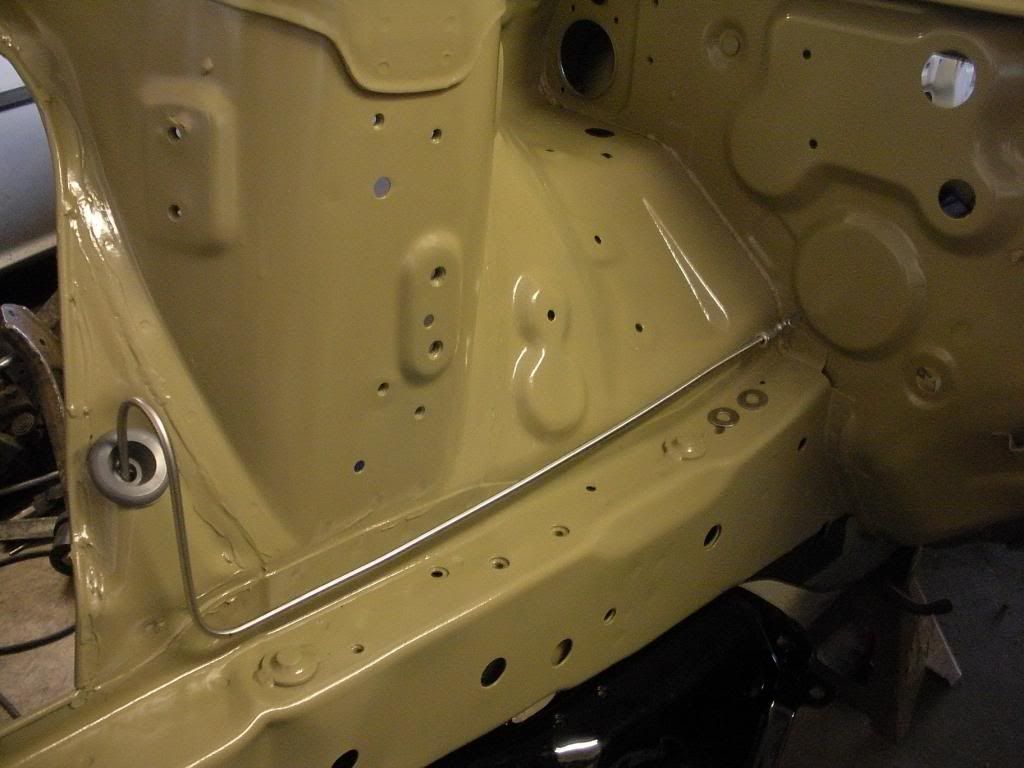 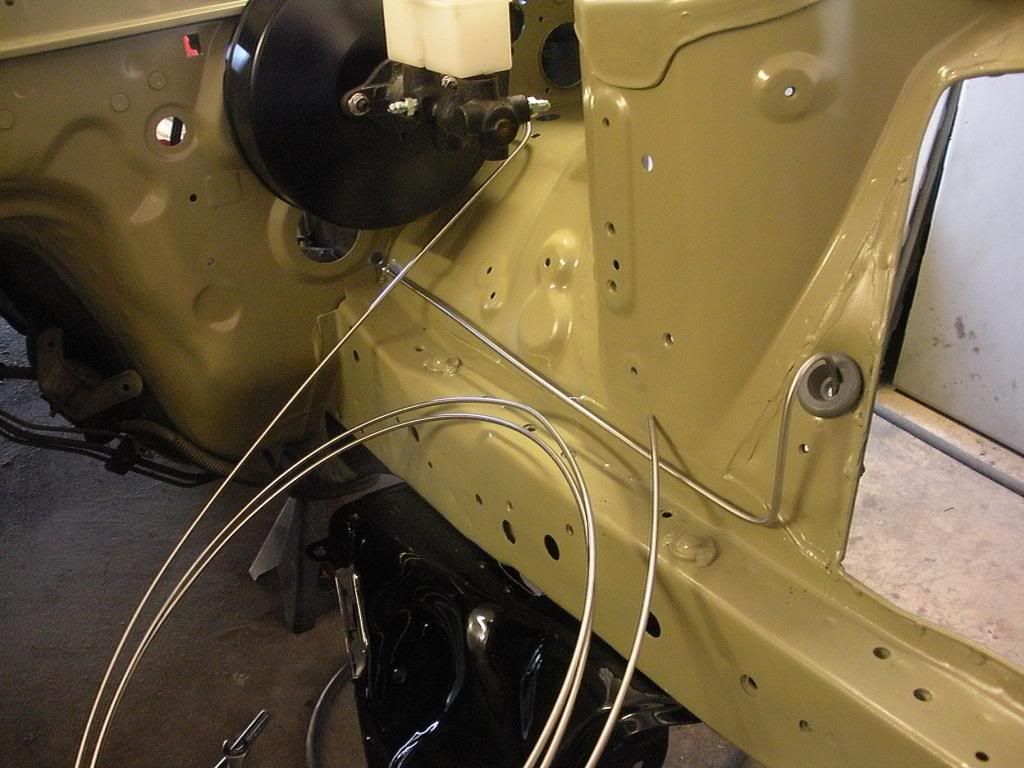 I didn't like how the rear MC brake line was laying out so I started over lol. 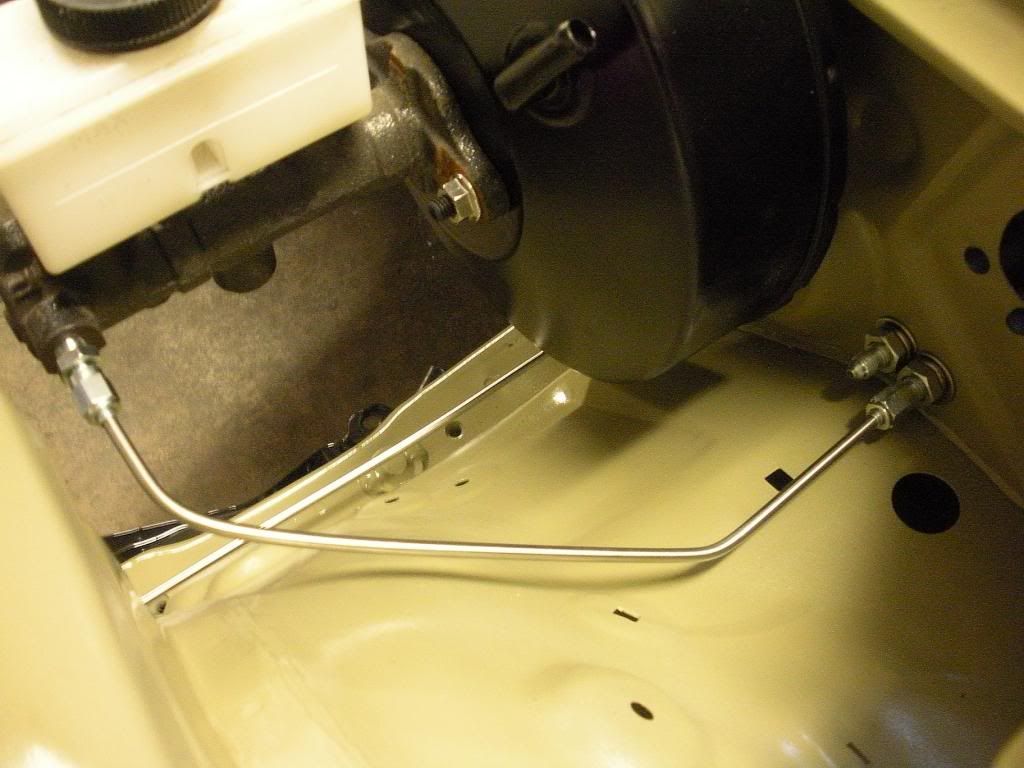 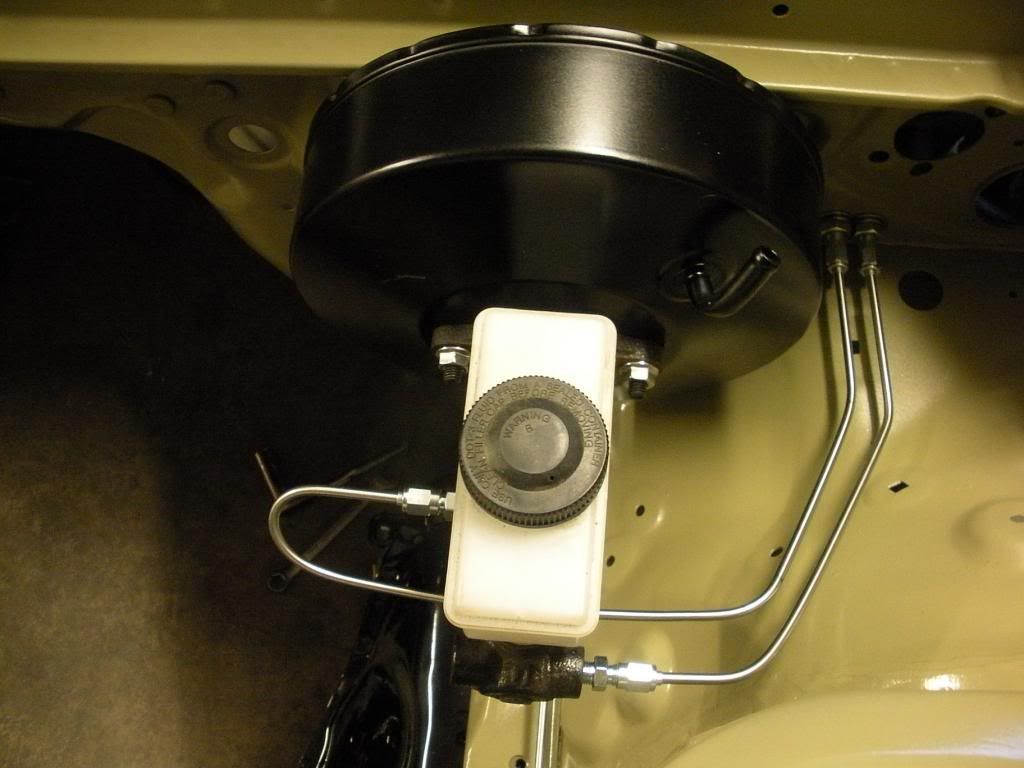 Front line is on the right in the picture at the firewall. Here's what's in the wheelwells. I used a staright -3AN bulkhead and bolted that through the brake line holder. All the brake stuff is now -3AN no more inverted flare stuff or any of that. Doing 37 degree flares is far faster and easier then doing double 45 degree flares, plus it looks cooler. I chose steel stuff due to the fact that is far more resilient than aluminium stuff. I don't need a brake line failure because a little rock popped a hole in something. Also the stainless stuff weighs such a small amount more it's not even worth mentioning really. 
|
|
|
|
|
02-25-2013, 02:01 AM
|
#5 |
|
Rotary Fan in Training
Join Date: Nov 2012
Posts: 58
Rep Power: 13 |
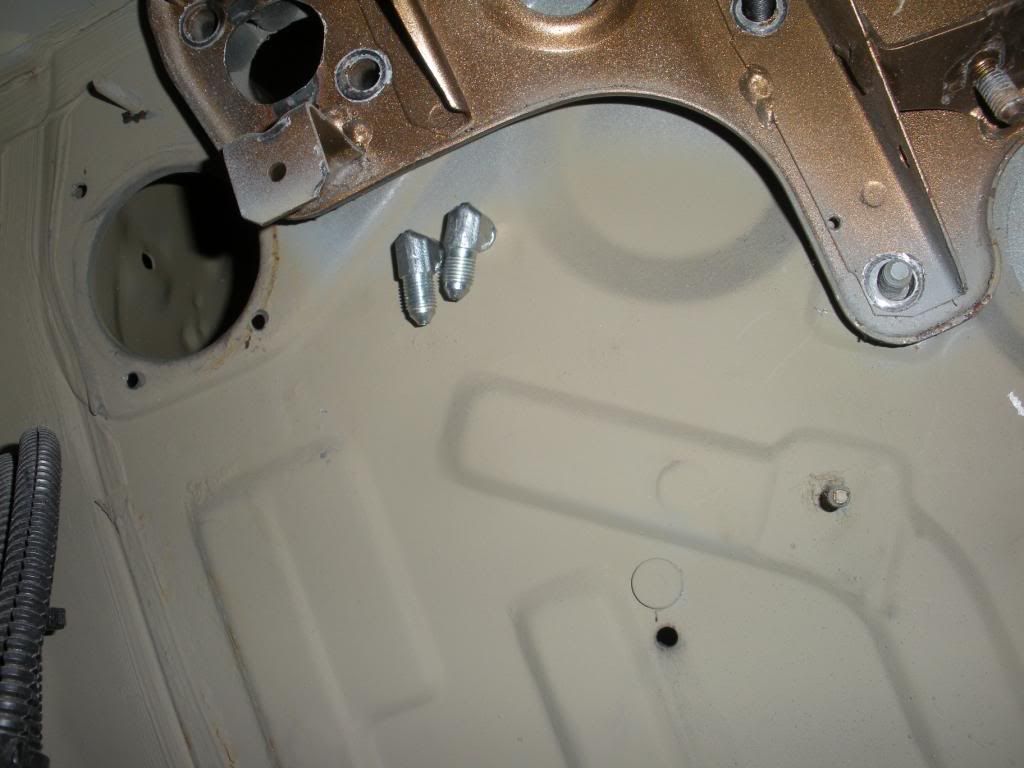
Here's what it looks like on the inside of the firewall in case you were wondering. The bulkheads are 90 degree jams. In this picture they are not pointed in the right direction though. Yes there's tons of clearance to any moving parts.
 Before and after sand blasting the LCAs 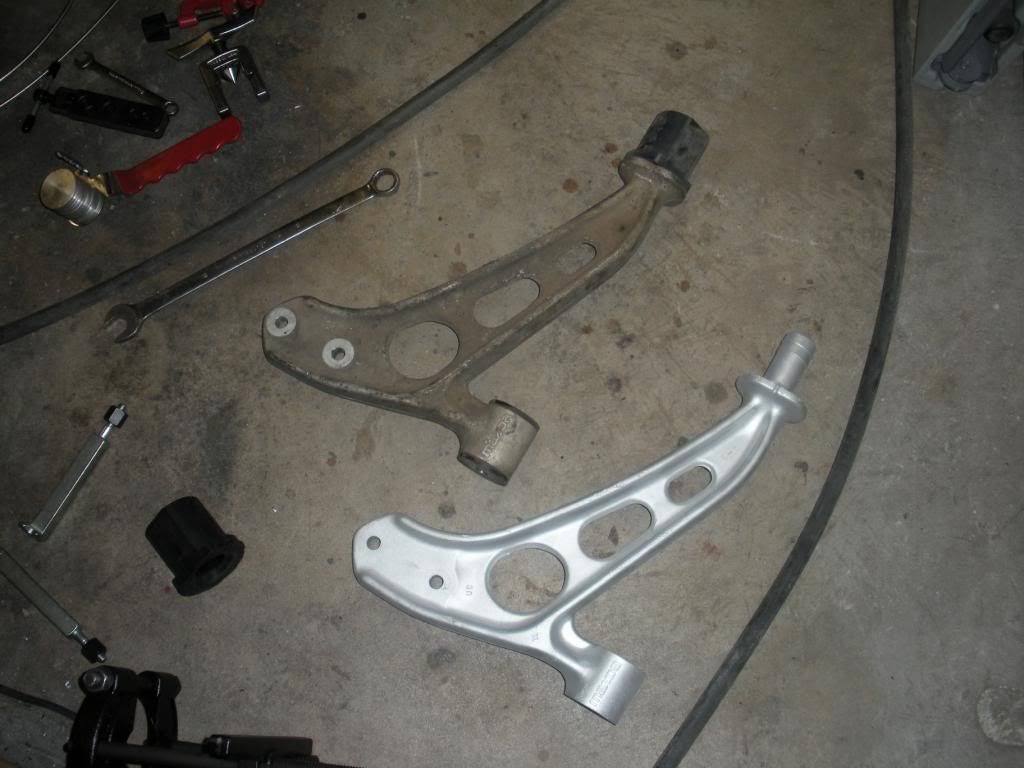 I already had MMR's Delrin bushings in my control arms. They fit so well I had to rig up a bearing puller to get the dam things off so I could sand blast the arms lol. So if you ever wondered, yes they are very nice and fit almost a little to well. Good stuff though. I love the response these bushings add to the car. 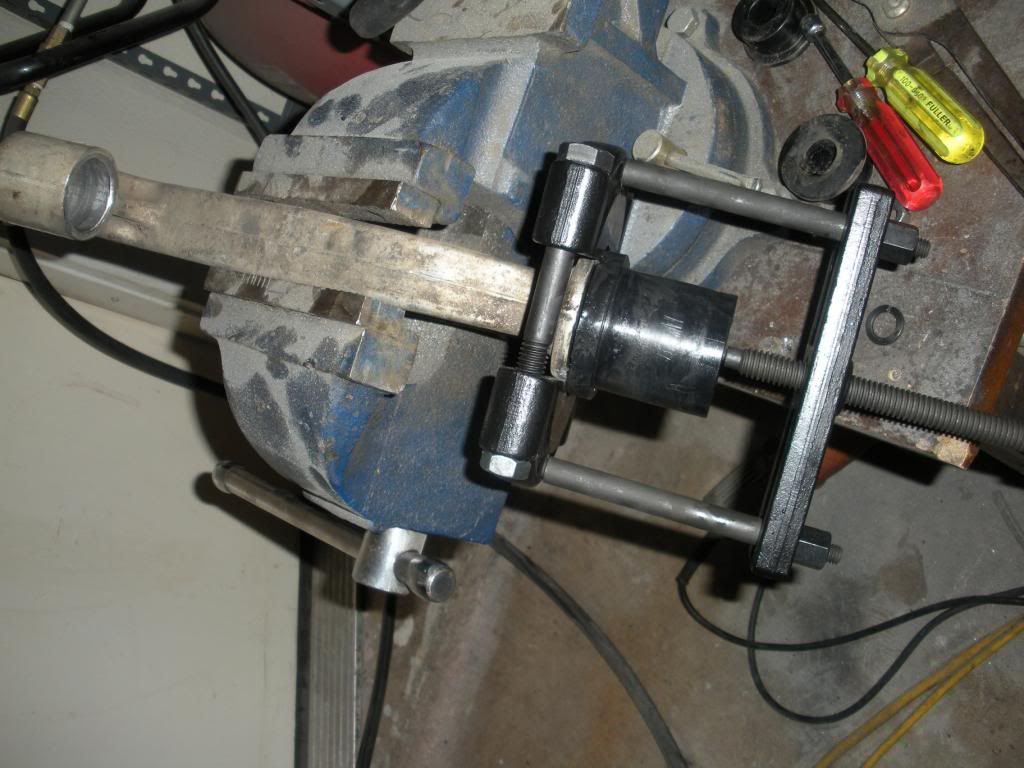 When I was done I clearcoated the arms then reinstalled the bushings. Not sre how the clearcoat will hold up but figured it might be worth a shot. Sexy! 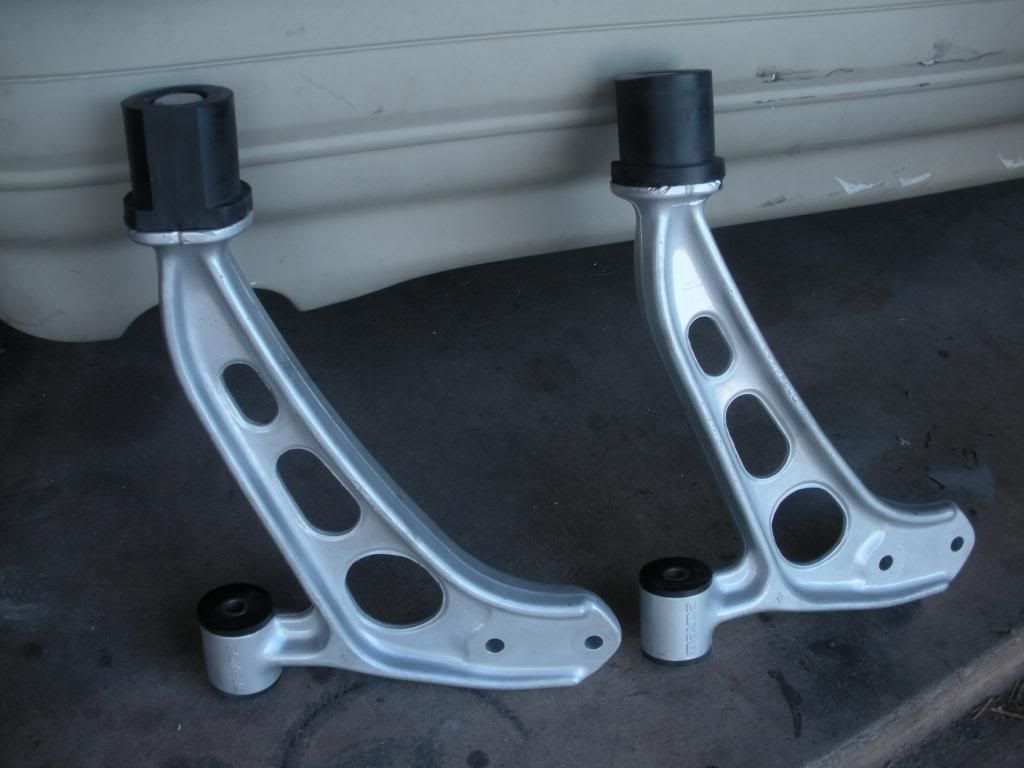 Installed them with new stainless hardware. 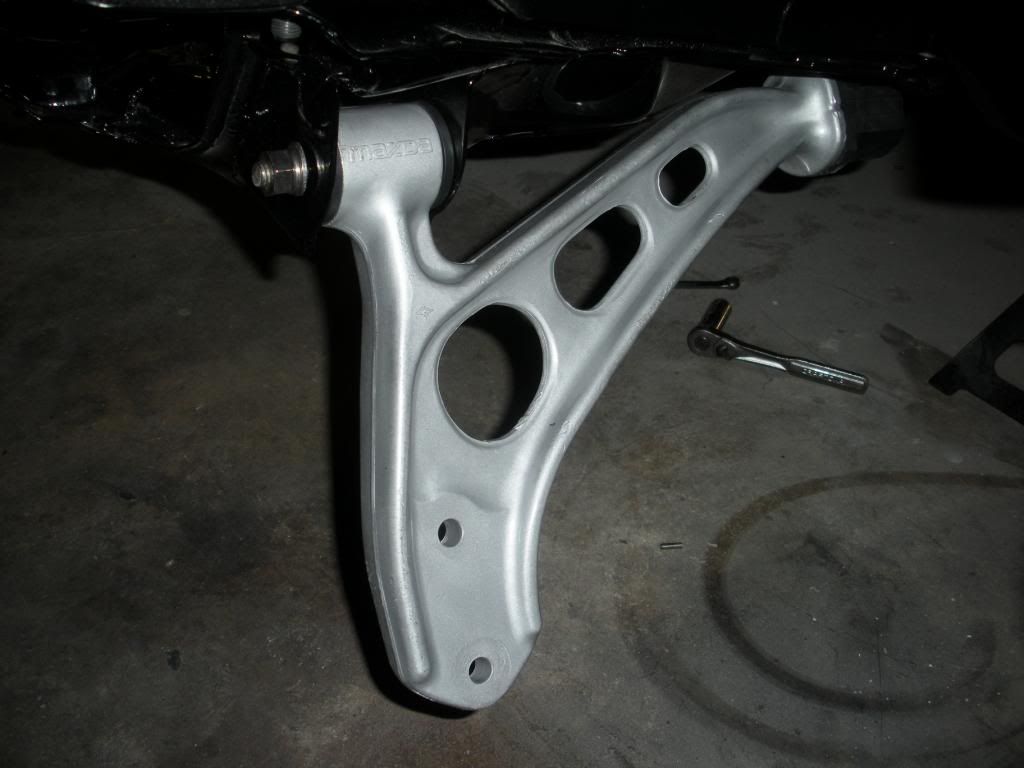 Installed the wiper linkage with new hardware as well. 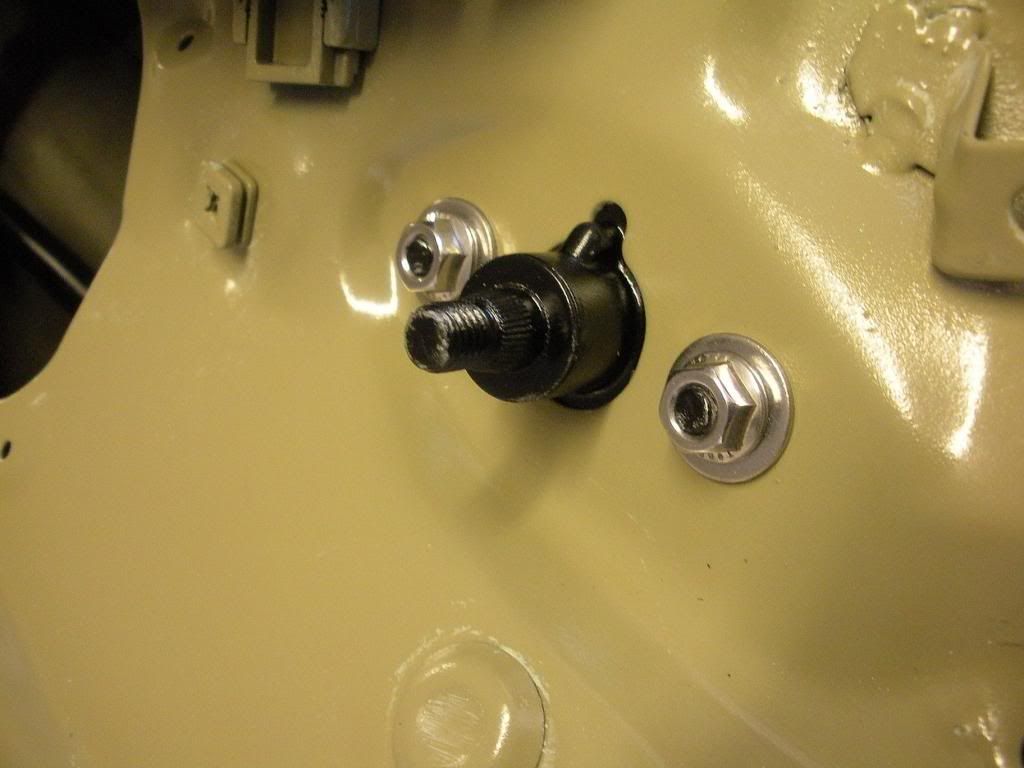 Hung the coilovers with new hardware..............I think you're beginning to notice the trend here. 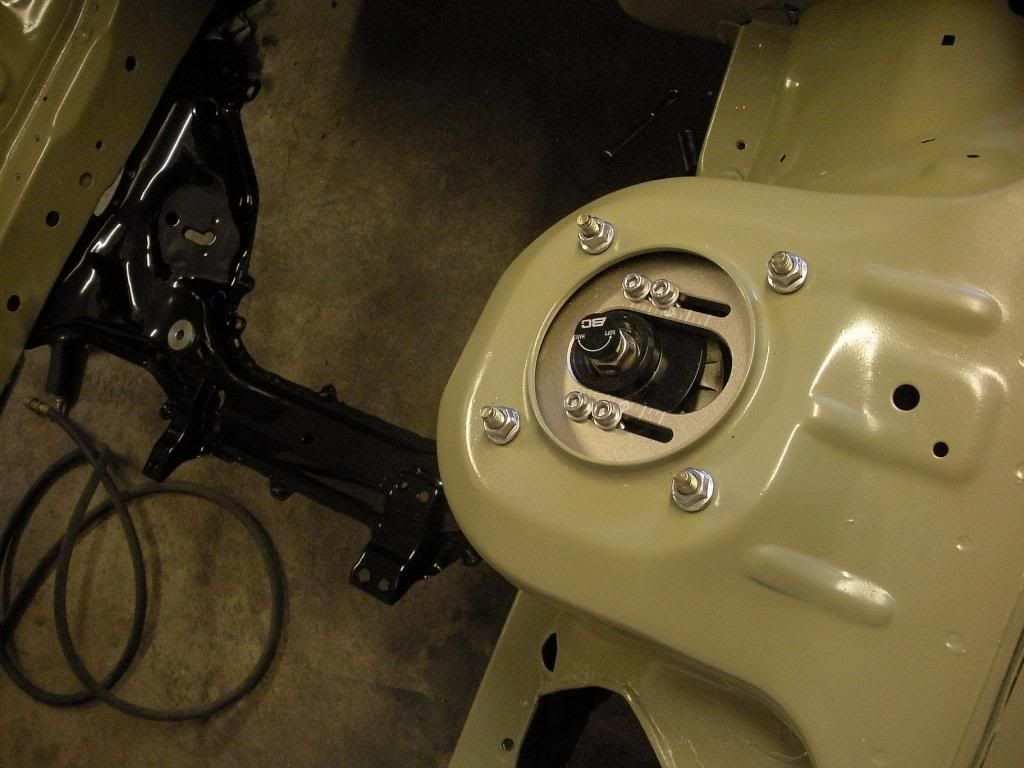 Unbolted my single piston front brakes and tossed them in the trash, time to finally put the 4 piston factory brakes on again. For a low powered car as before though the single piston brakes worked perfectly fine. They would lock up at speeds above 60 mph if you really gave them hell. 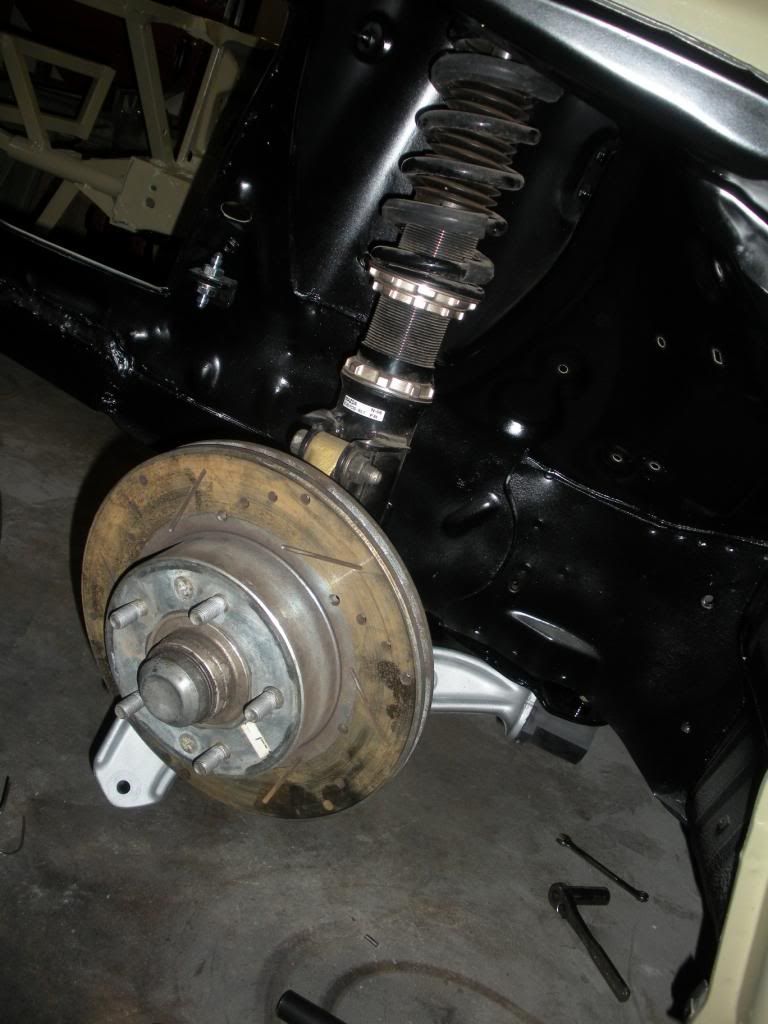 Basically I tore down the wiper motor, cleaned it, sand blasted the body of it. Cleaned everything else and reassembled it. In the picture the top was still drying from repainting so here you can see the little electric motor parts. 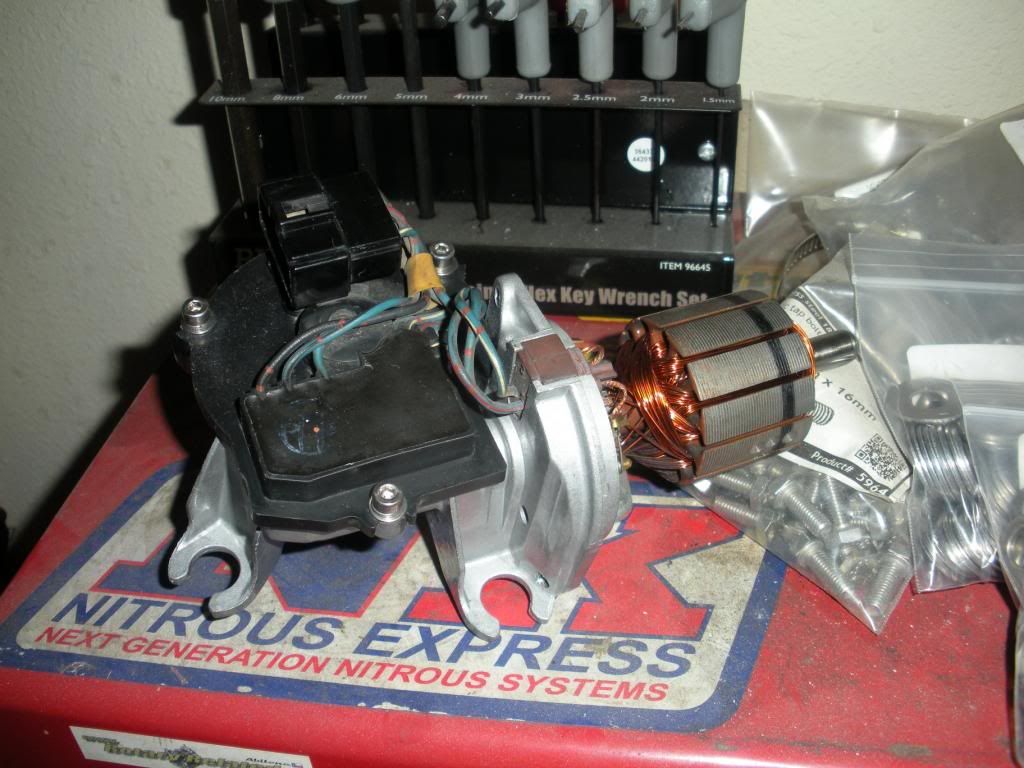 I was going to rebuild a set and sand blast them since I have a few but I think I'm going to go with rebuilt units from a parts supplier to save me some time. They will probably be painted black but I don't care too much what color the calipers are honestly. 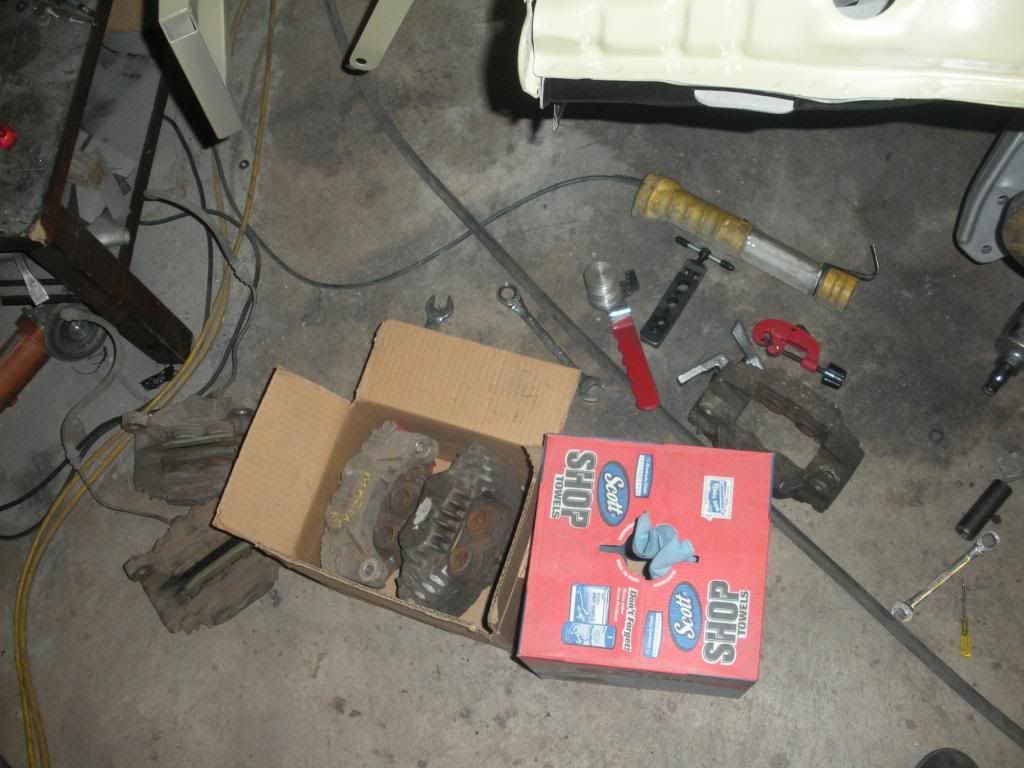 I may still rebuild them myself, I'll see how I feel about it later I guess when i get ready to get that done. |
|
|
|
|
02-25-2013, 02:12 AM
|
#6 |
|
Rotary Fan in Training
Join Date: Nov 2012
Posts: 58
Rep Power: 13 |
I cleaned up the radiator a bunch since it's been in two cars over the last 5 years. Was starting to look a bit beat up and dirty. Installed the bracket after it got back from powdercoating.
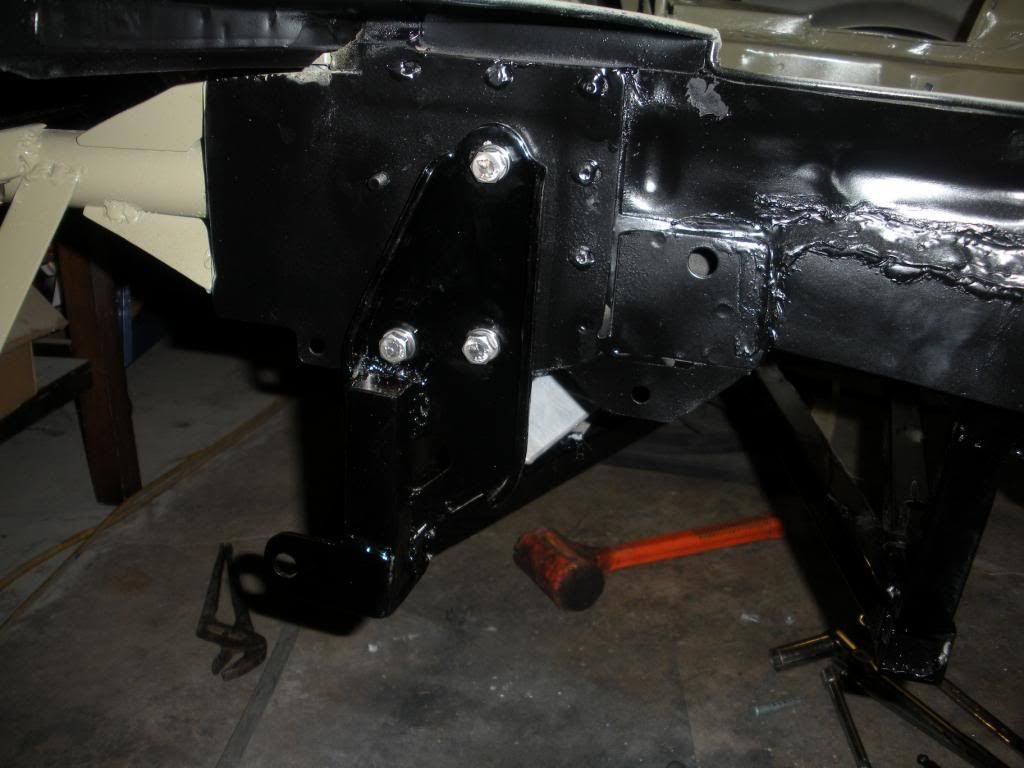
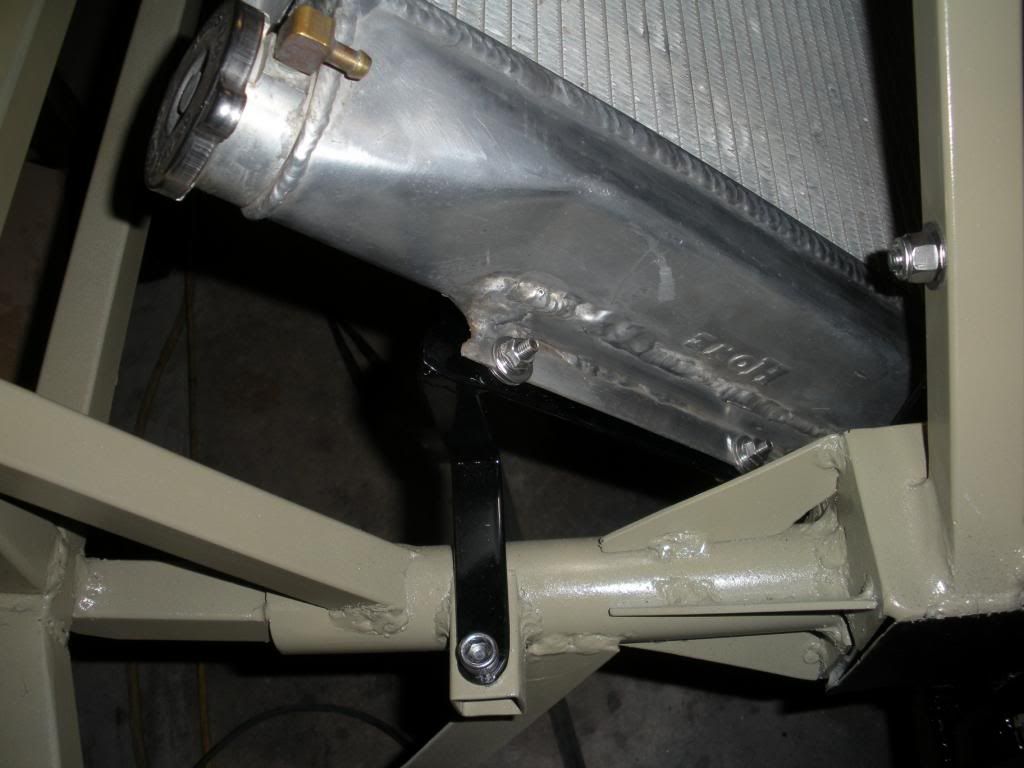  Notice the mounting tabs changed to nuts and bolt for the diagonal square tubes. I used nylocs on the backsides of all these so it could be tight without crushing the tube. 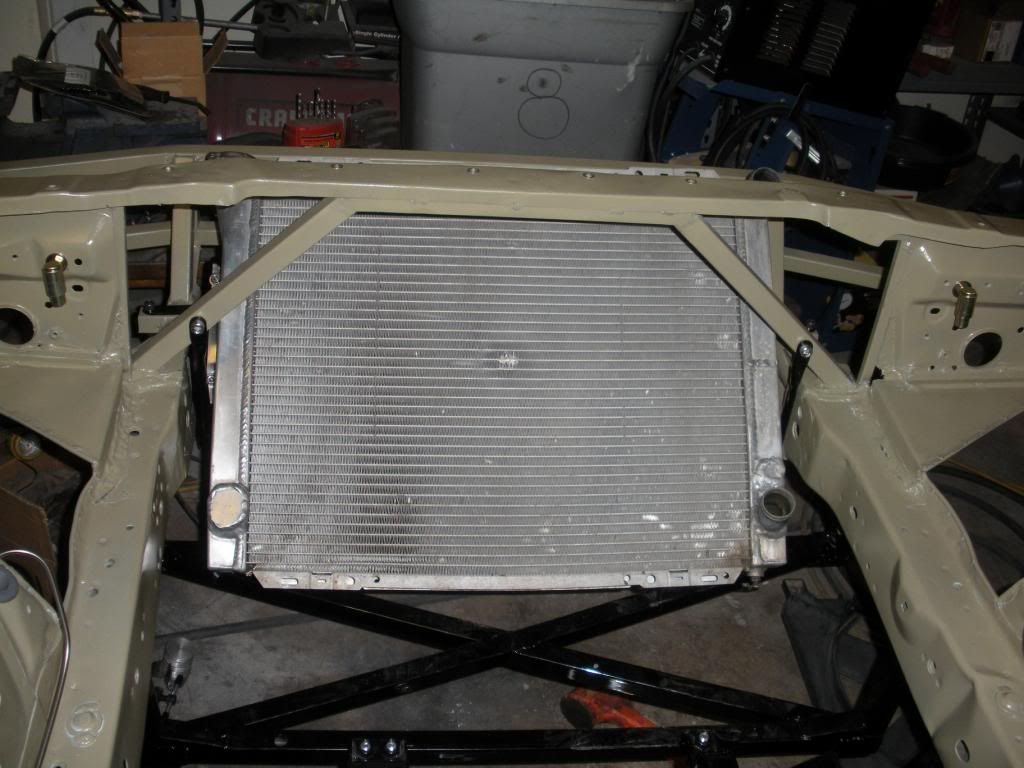 Stuck the clutch master cylinder in there. Basically some of this stuff is being partially assembled for hardware purposes. A lot of it will be final assembled later on as the car comes together. 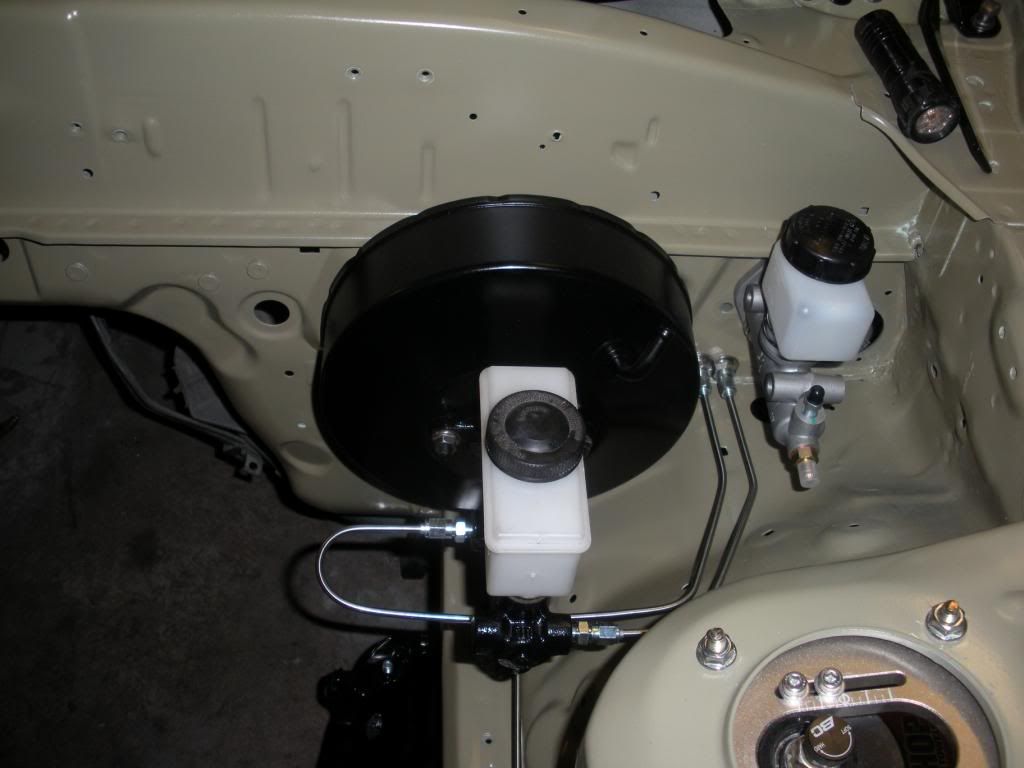 This guy turned out pretty good. 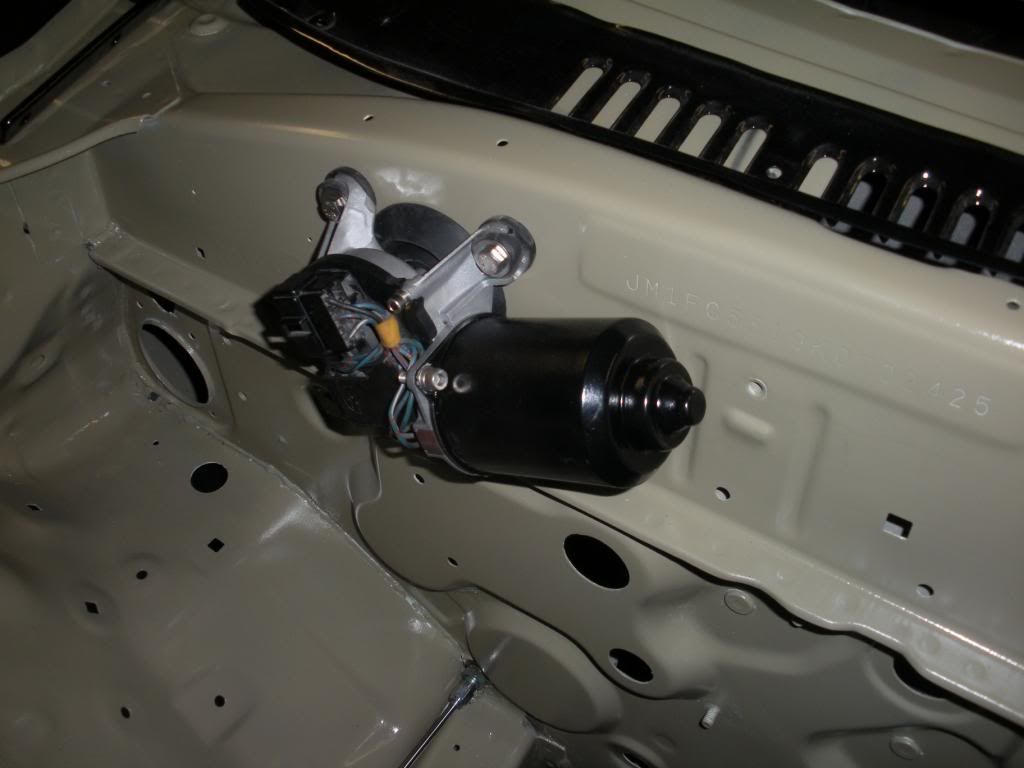 Engine cradle and steering rack brackets and hardware sorted. 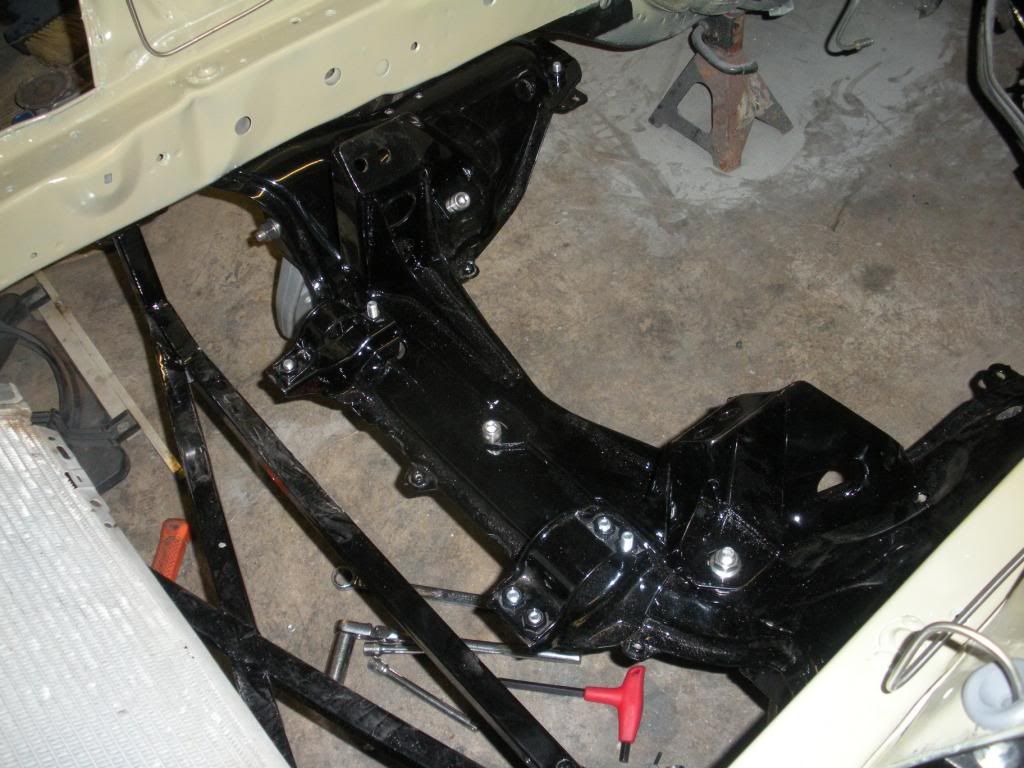 One of my trans bracket factory holes had the threads pulled out of it a while back, which is super awesome so the back one in this pic is a stud and nut now. 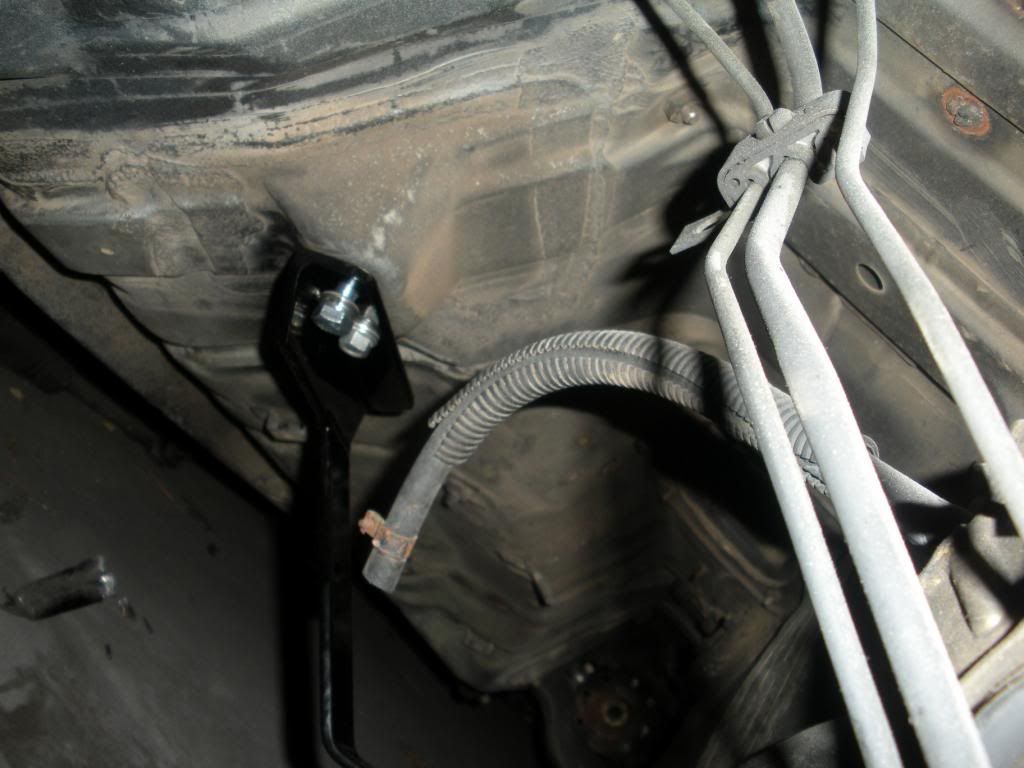 Cut this terrible hole in the passenger floorboard to gain access to the backside so I could weld a bolt in there to fix the pulled thread issue. i'll fix up the hole and make a plate to cover it up later. For now it will look terrible. 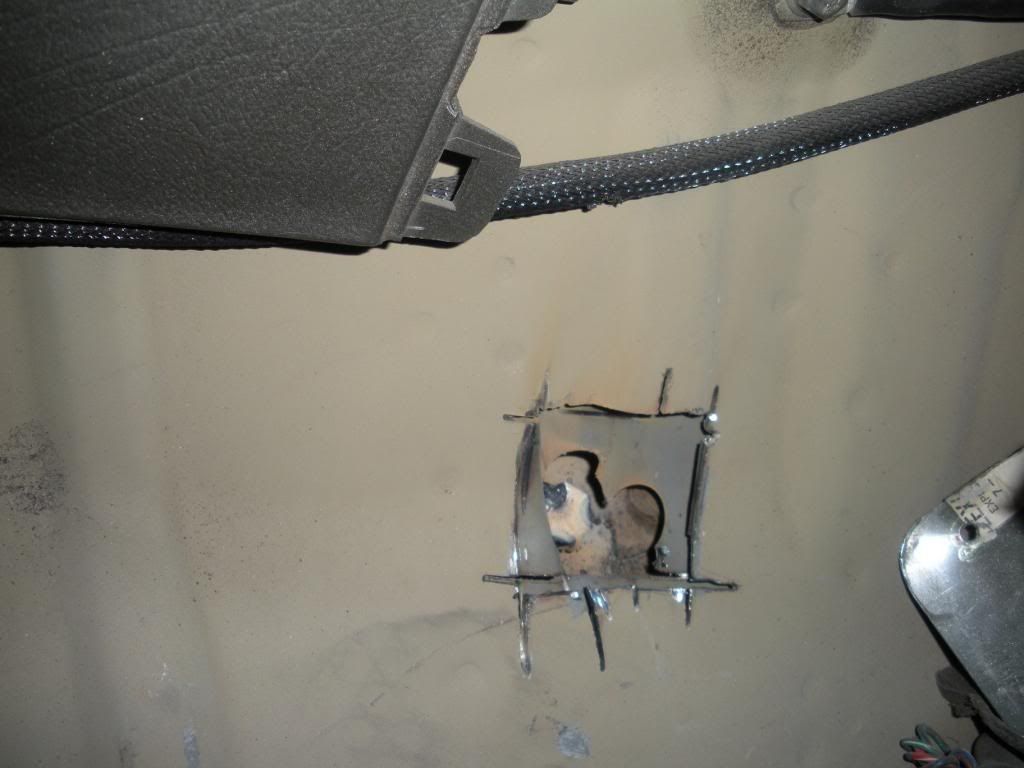 Not sure but yeah there's something to look at lol. 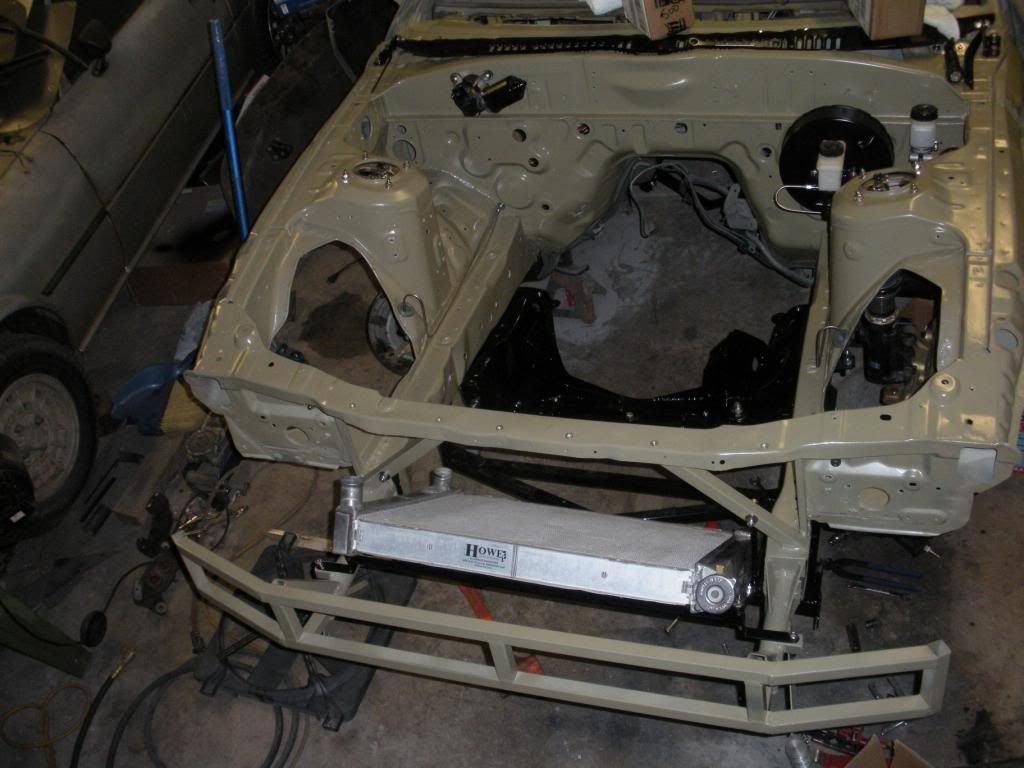
Last edited by StephenSheppard; 02-25-2013 at 02:20 AM. |
|
|
|
|
02-25-2013, 02:30 AM
|
#7 |
|
Rotary Fan in Training
Join Date: Nov 2012
Posts: 58
Rep Power: 13 |
Dat new new
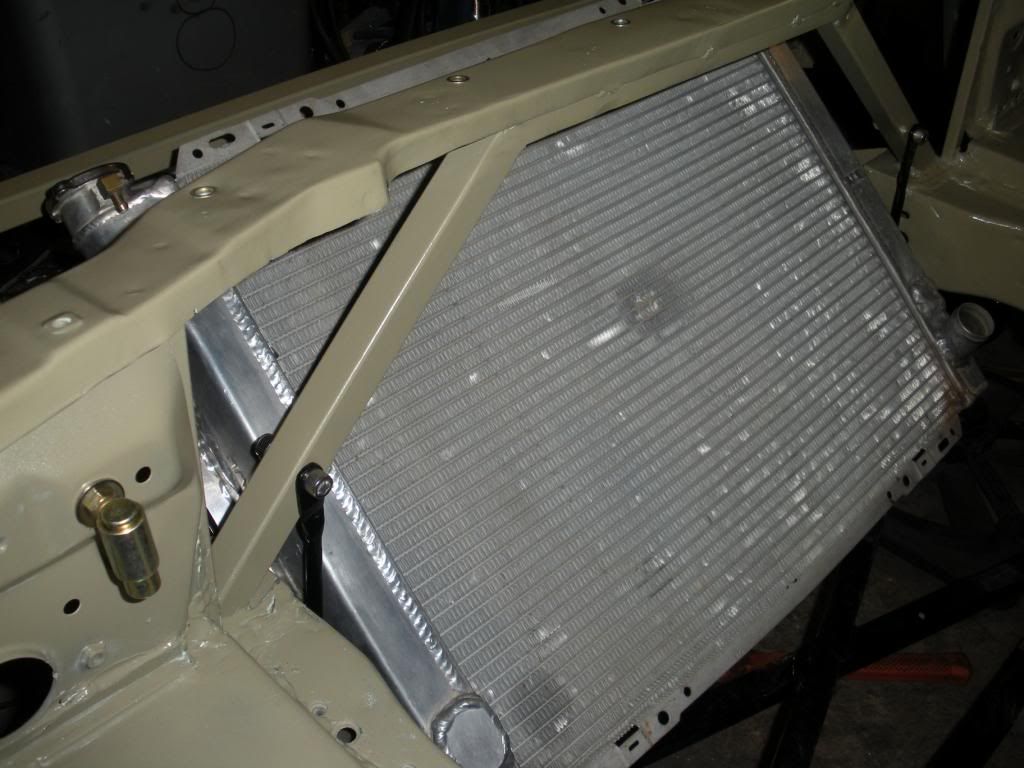
 Radiator clearance 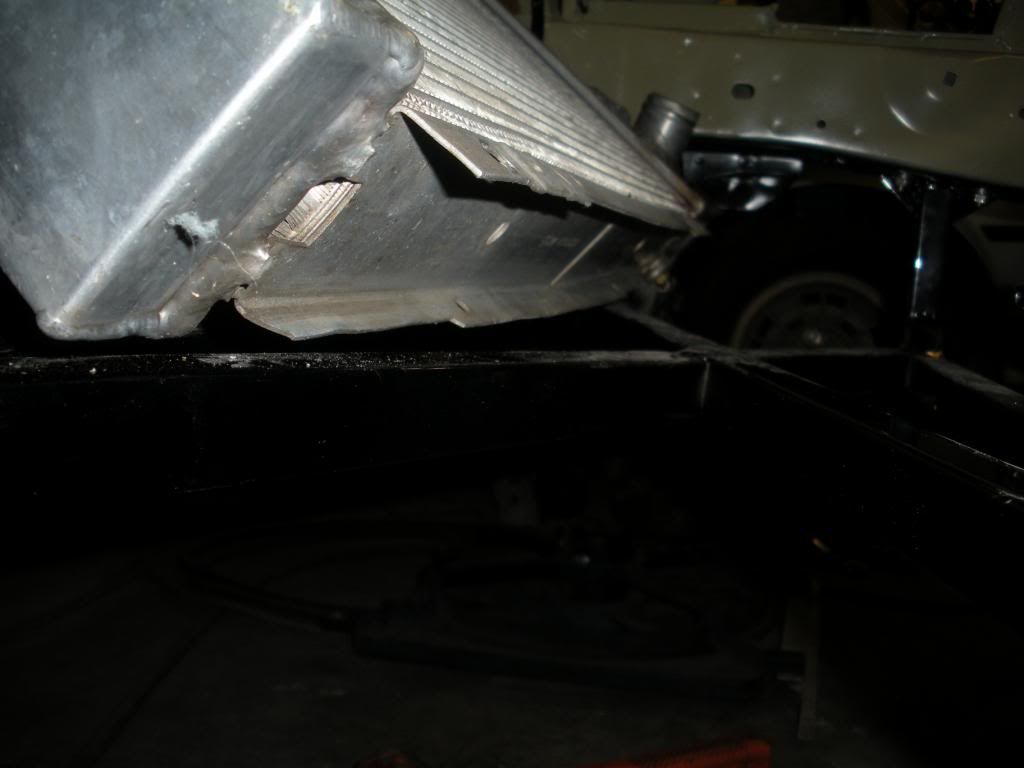 Brakequip plug for the brake mastercylinder I was talkign about earlier. M10x1.0 inverted flare plug. (BQ18 part number I think it was) 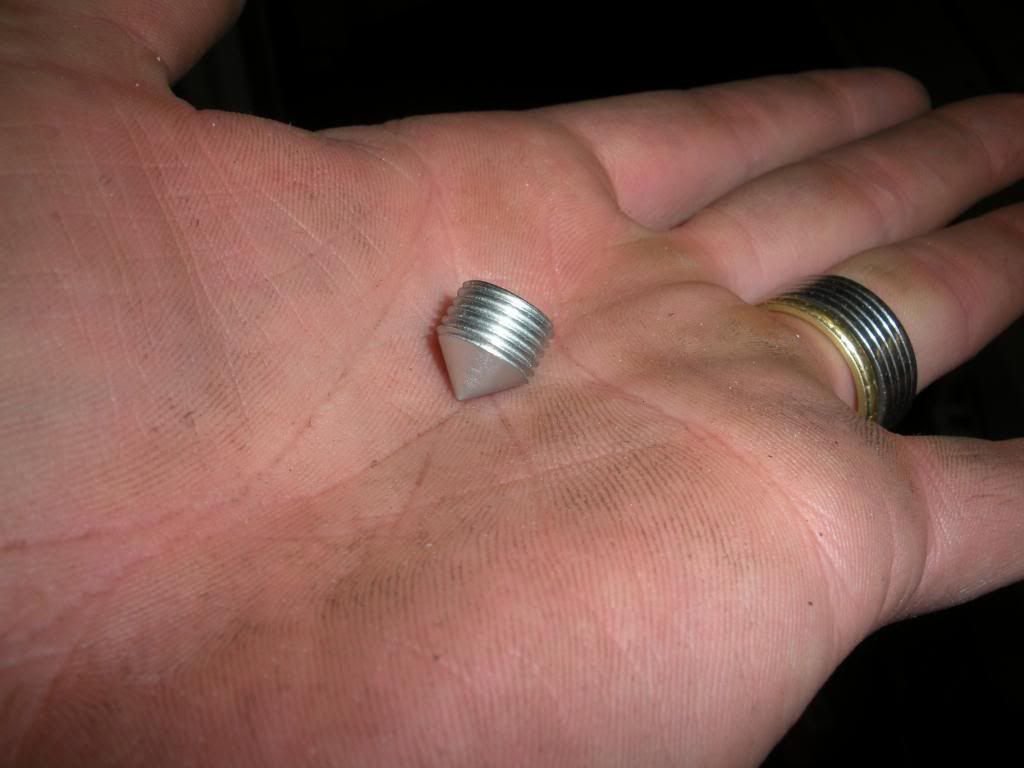 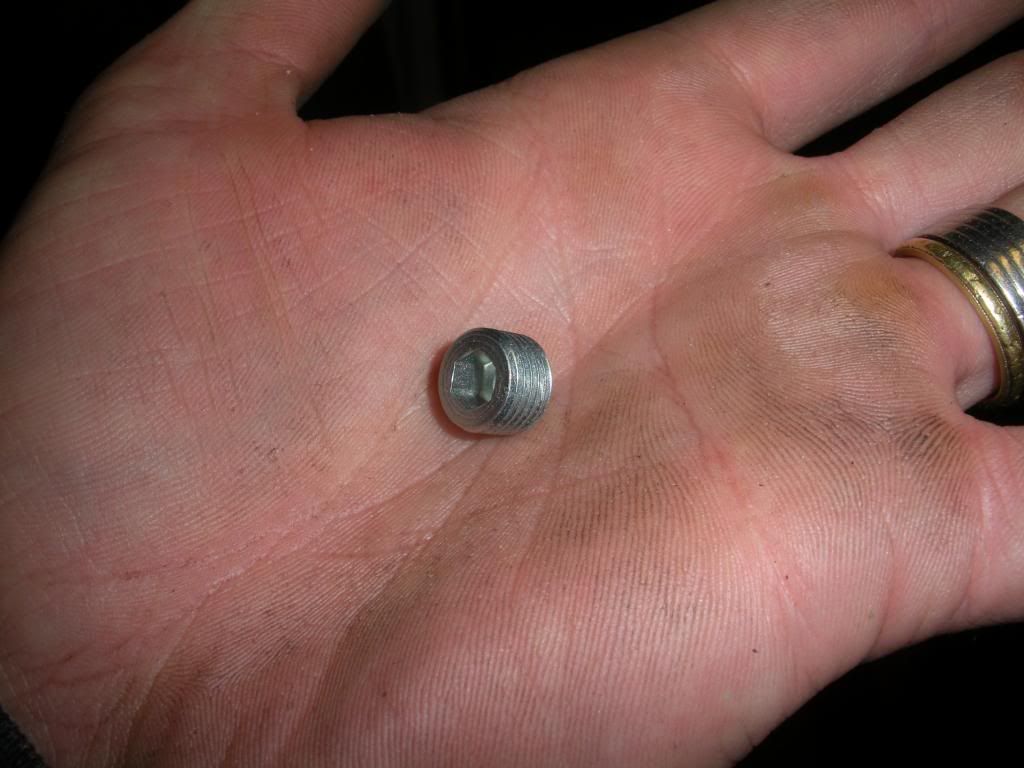 There she is installed 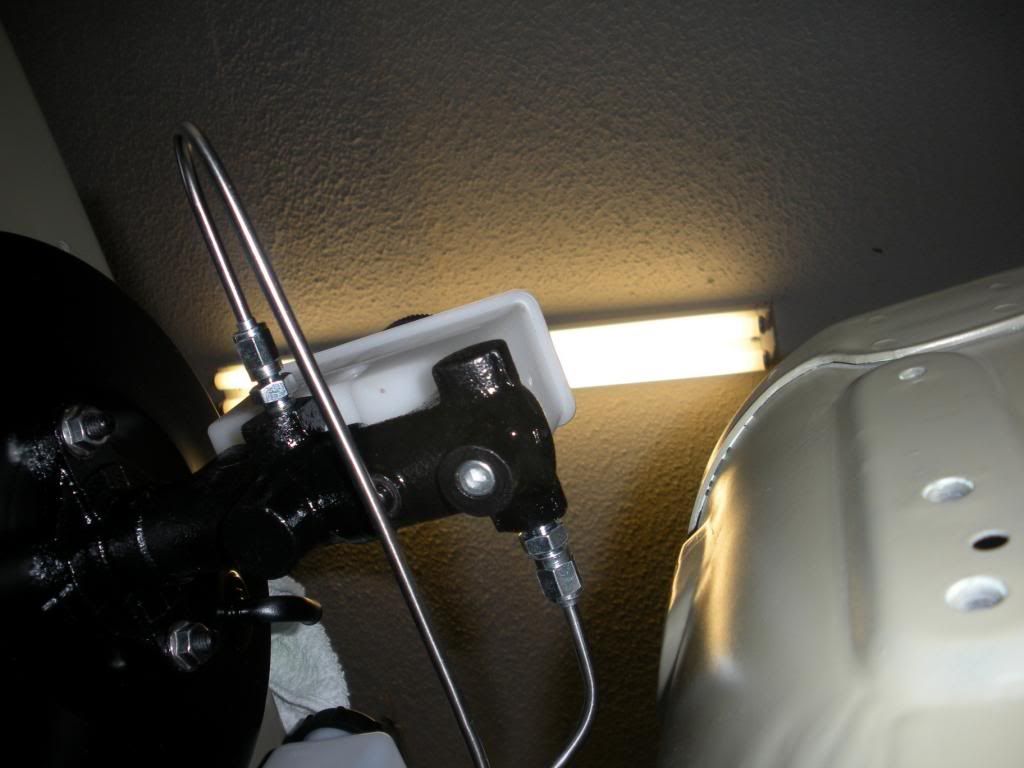 I felt the need to have cool looking clamps for the brake lines. Also I'm pretty sure I hate money. 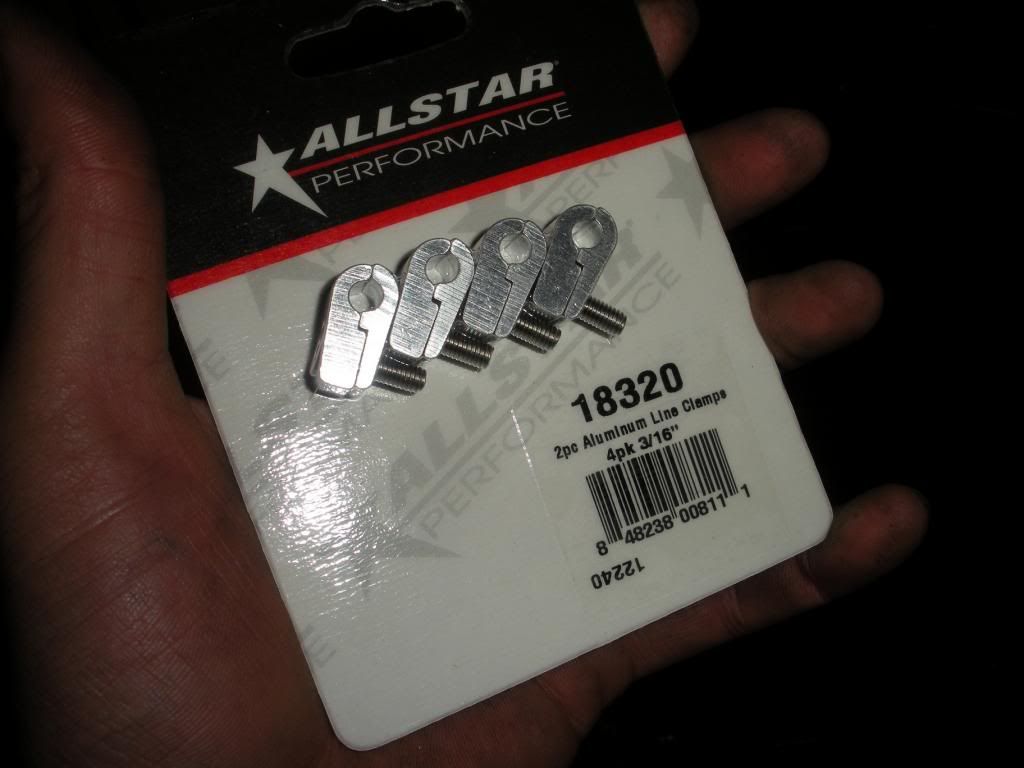 BOOM instant dopeness 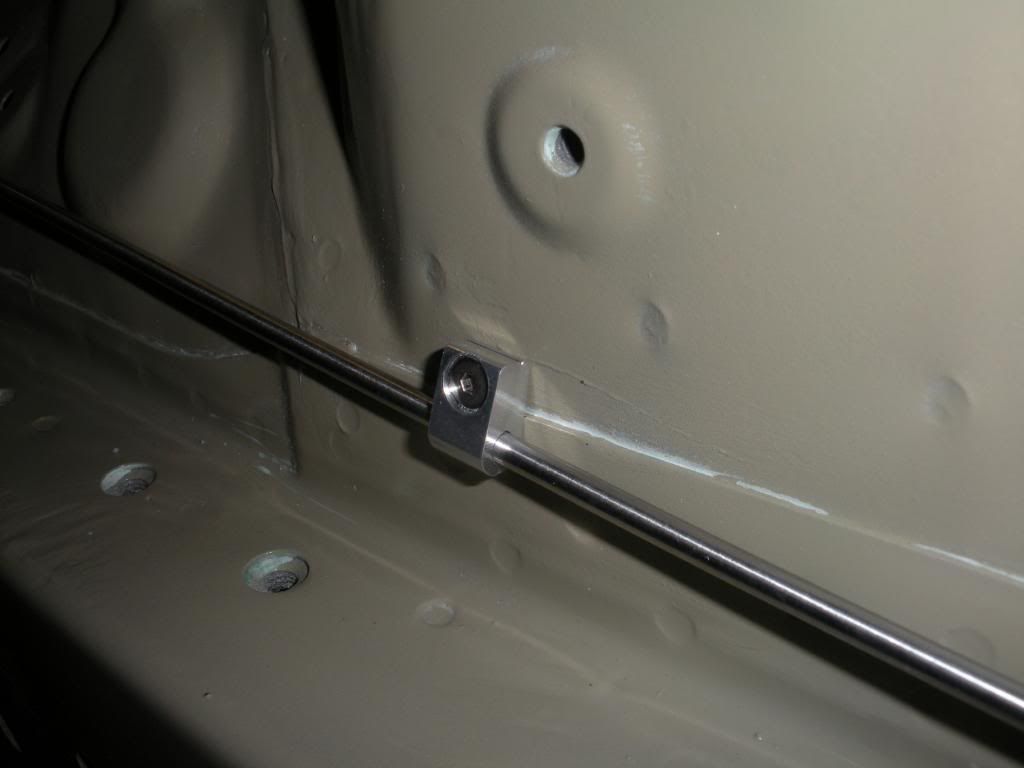 Mounted the proportioning valve here at the lowest point under all the dash stuff so none of these lines will ever have to be removed unless they themselves need to be removed for some reason. Also I can easily reach the biasing valve knob to control the rear brake pressure for various different tire types and sizes. It's a Wilwood component, just flipped over on it's front, then I nerded it up by labeling the inputs and outputs on the backside to make my life easy. Bolted through the tunnel with ..........you guessed it brand new stainless hardware lol. Bent up some hardlines. 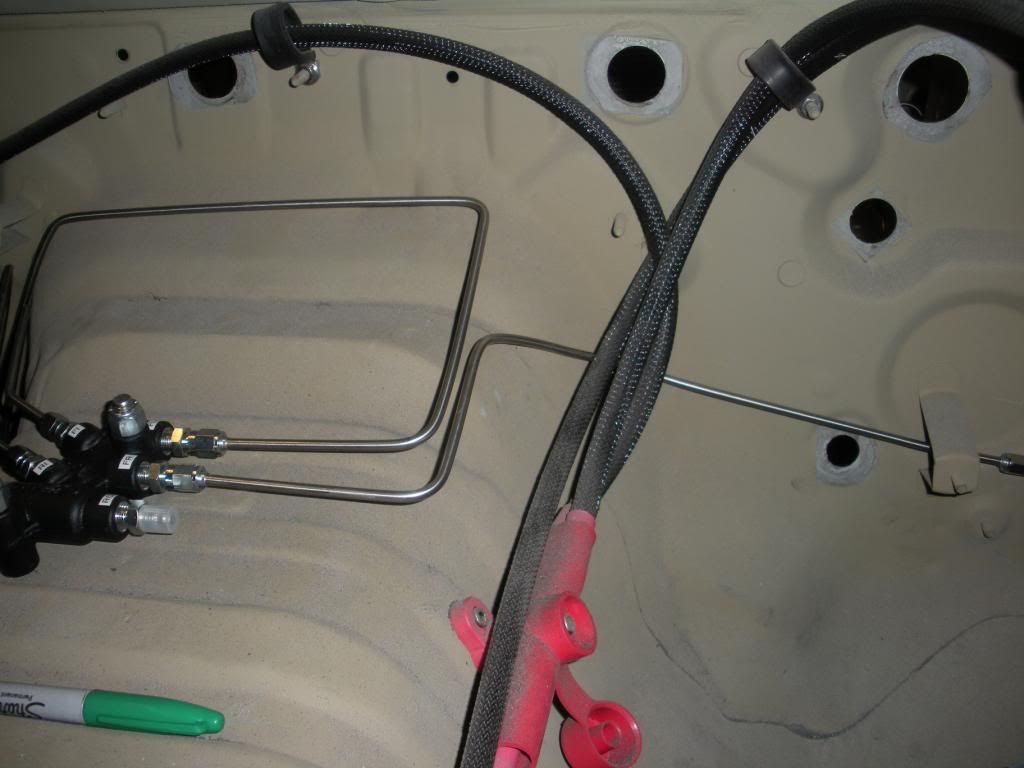 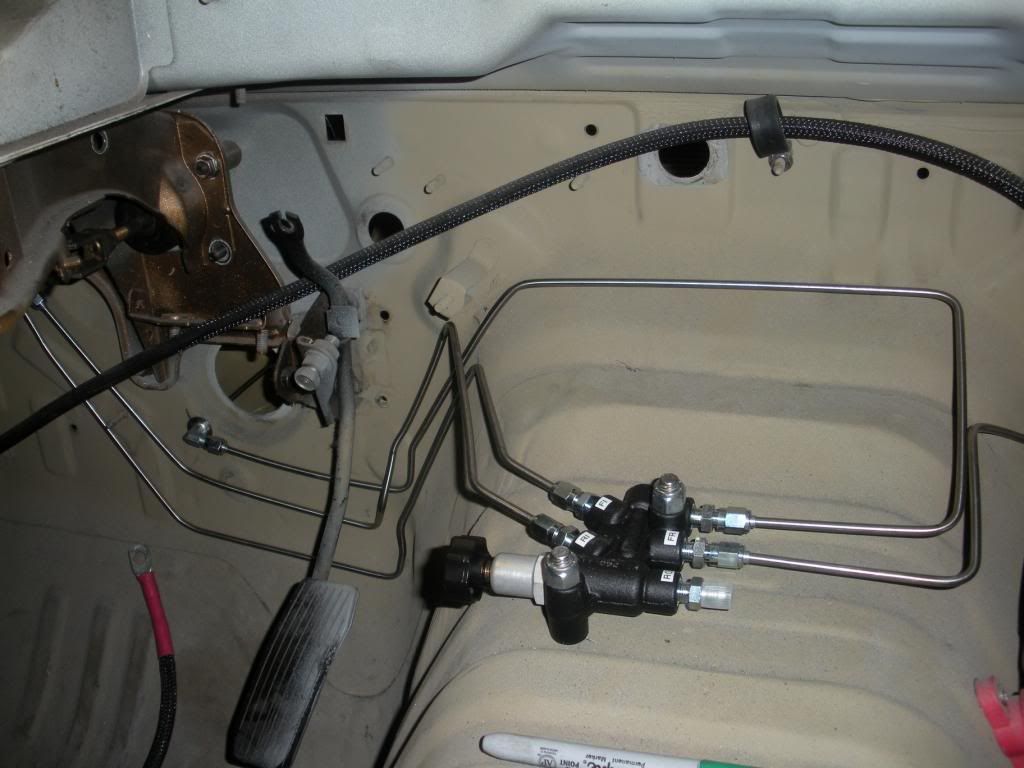 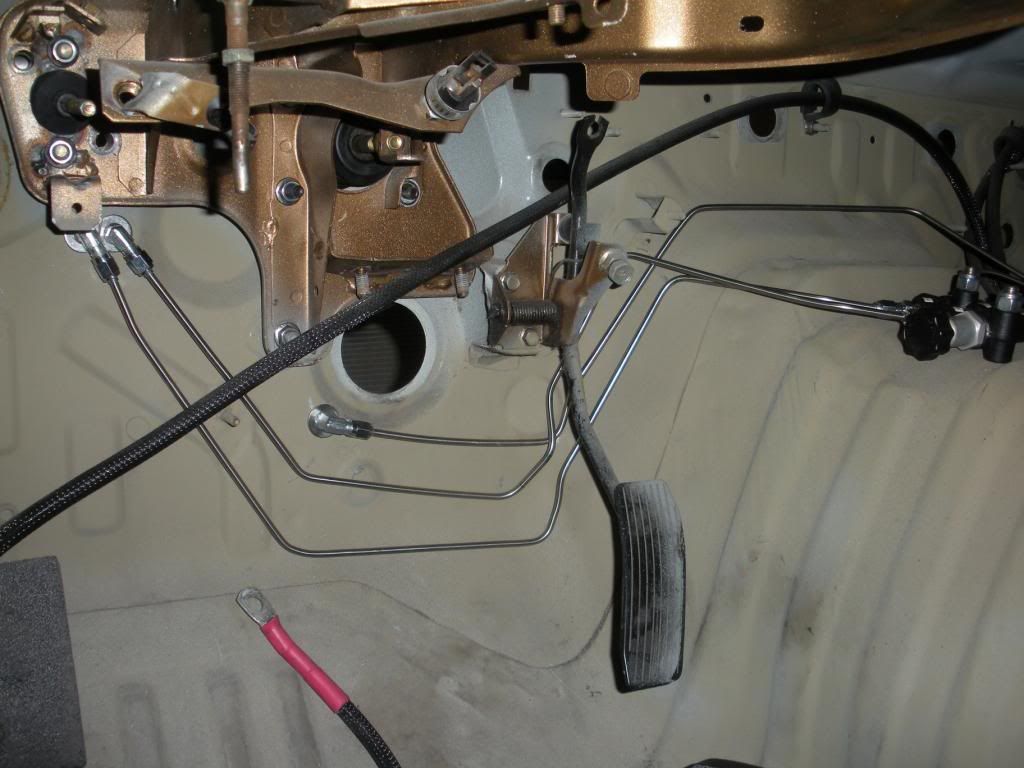 Closer! lol 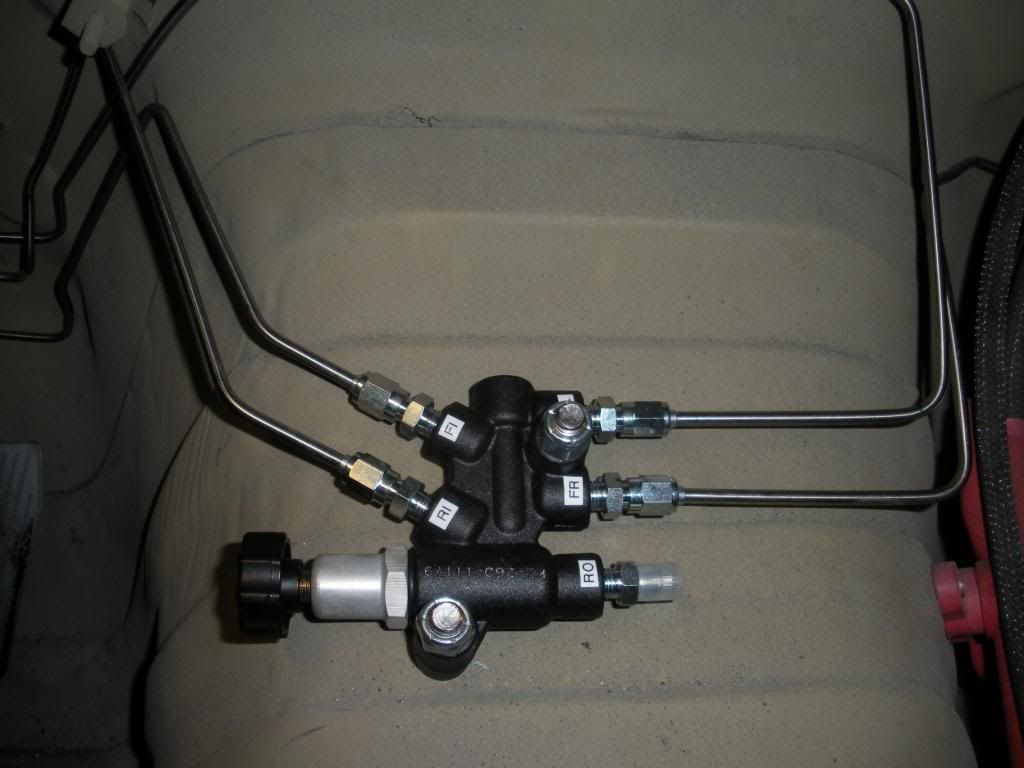 Installed more clamps. 
|
|
|
|
|
03-05-2013, 09:05 PM
|
#8 |
|
Rotary Fan in Training
Join Date: Nov 2012
Posts: 58
Rep Power: 13 |
After getting off work today I took a couple minutes and dropped the rear end/suspension out of the car so I could remove the factory hardline deal that runs under the entire car. It's trapped above teh subframe and differential if anyone doesn't already know that lol.
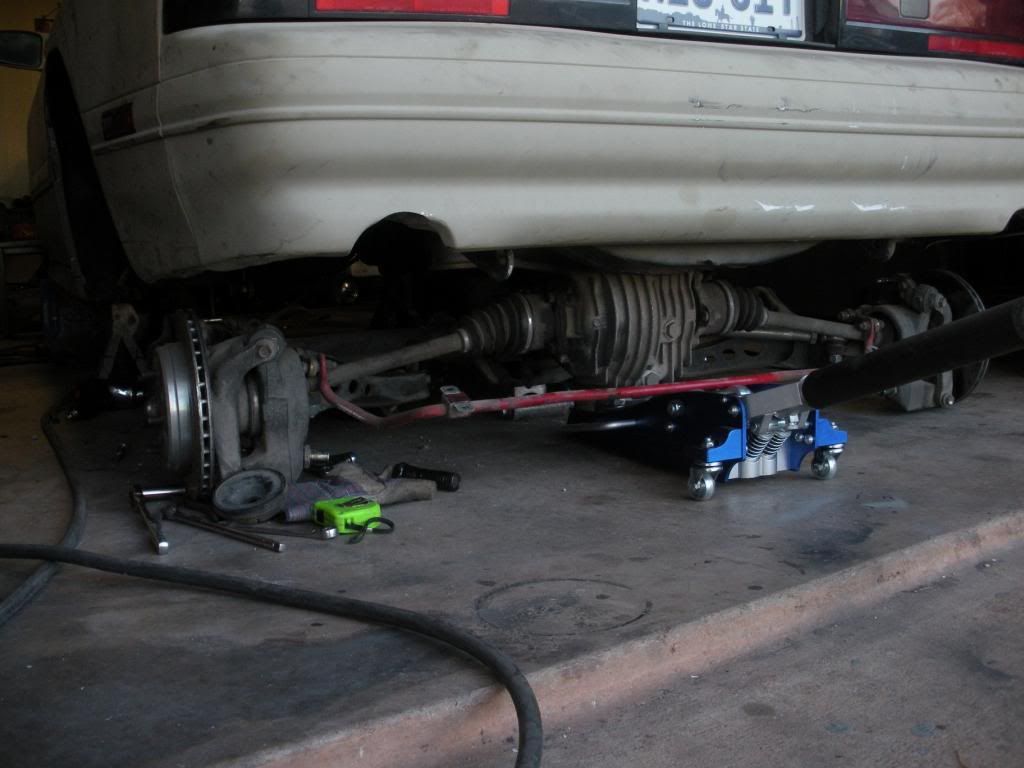 Never let your caliper hang off your soft brake line. Always ziptie them up. When I remove the rear end as an entire assembly I leave the coilovers in and the brakes hooked up. Also I'm going to be sellign the brake lines shown here and the front One's as well. Only the rears have ever been on the car, the front ones are brand new. I'll include the crush washers and banjo bolt as well. Say $50 shipped in the contenital USA? Just holler at me if your interested. I'm building new ones that are AN fitting types so that's the only reason I'm even selling them. 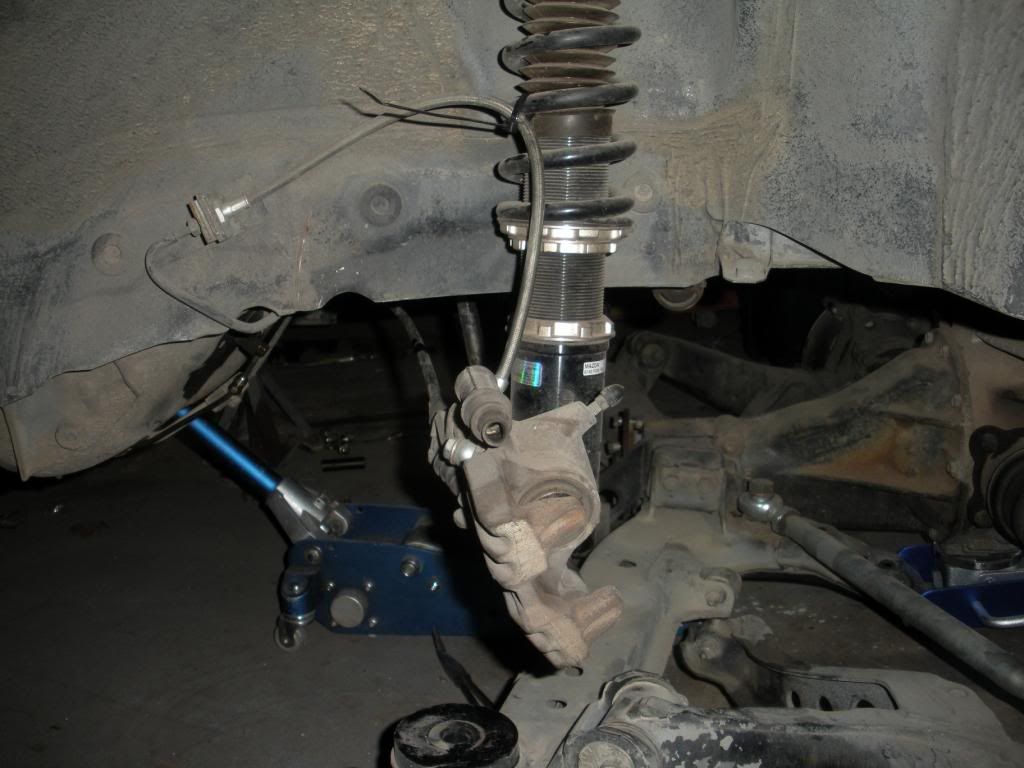 That needs to go 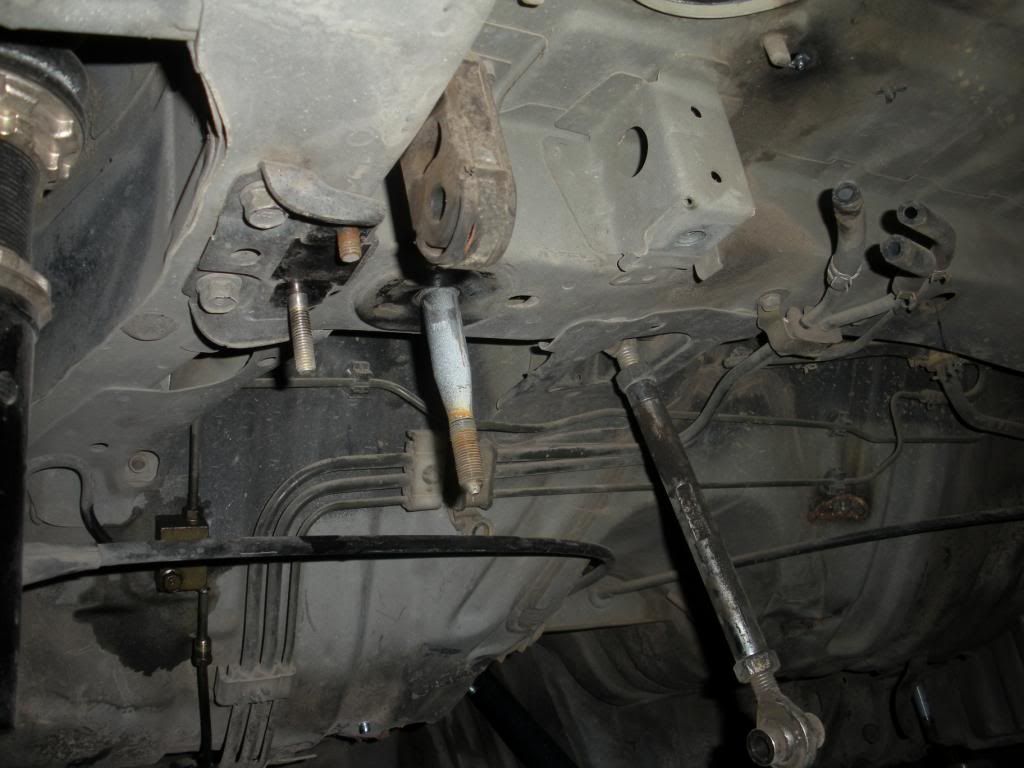 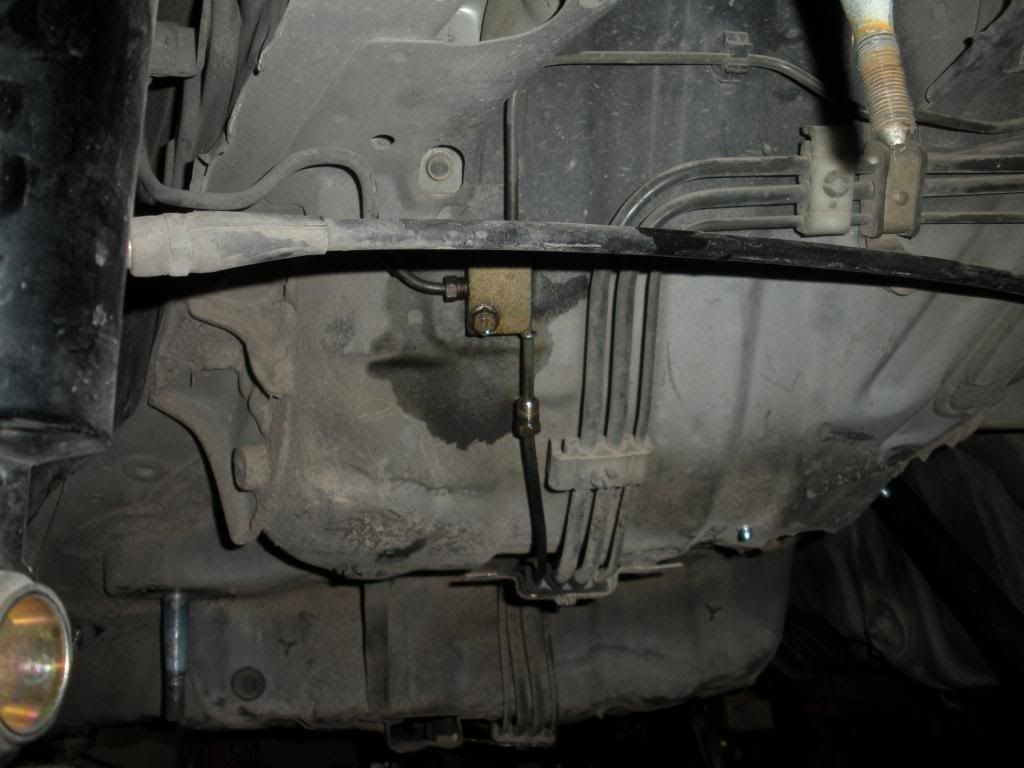 And here it is pulled out ready to go in the garbage. 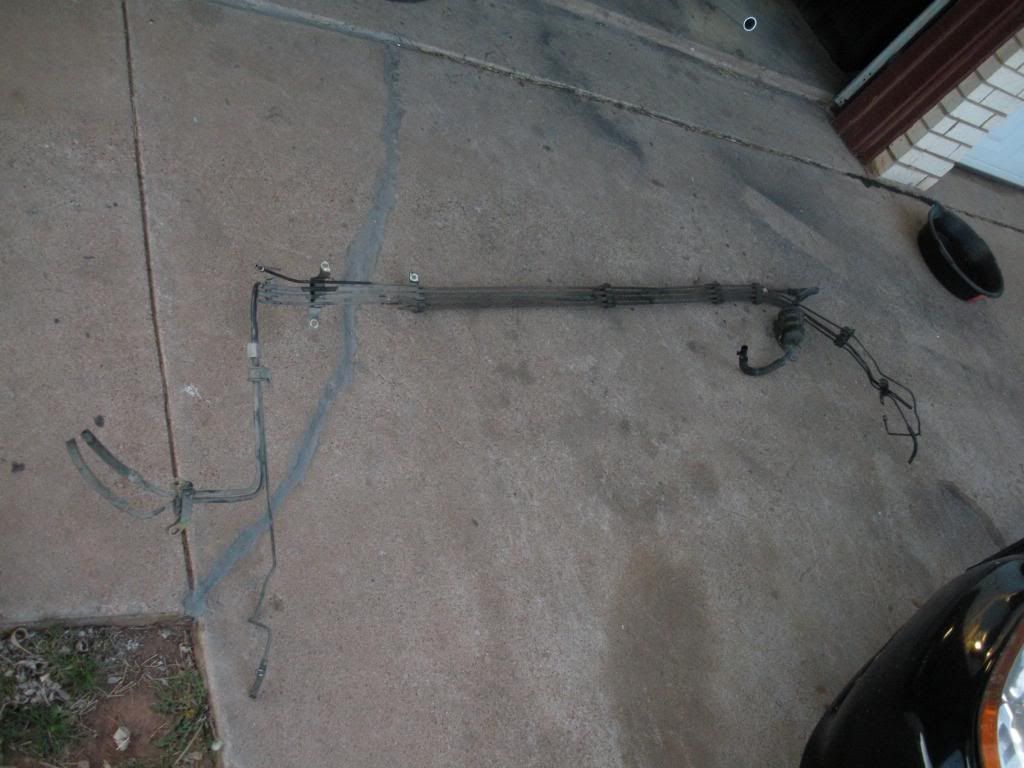 I highly recommend MMR's Subframe and diff bushings. They are Delrin and super solid. I have yet to have any issues with these. Been in the car for a year or two. 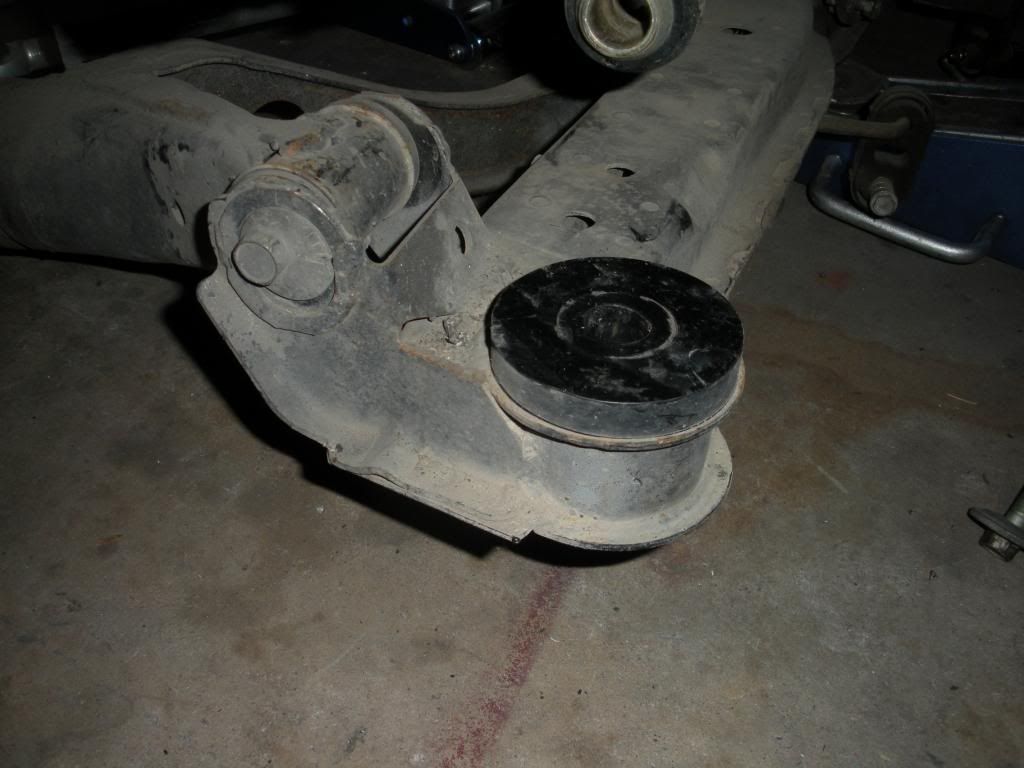 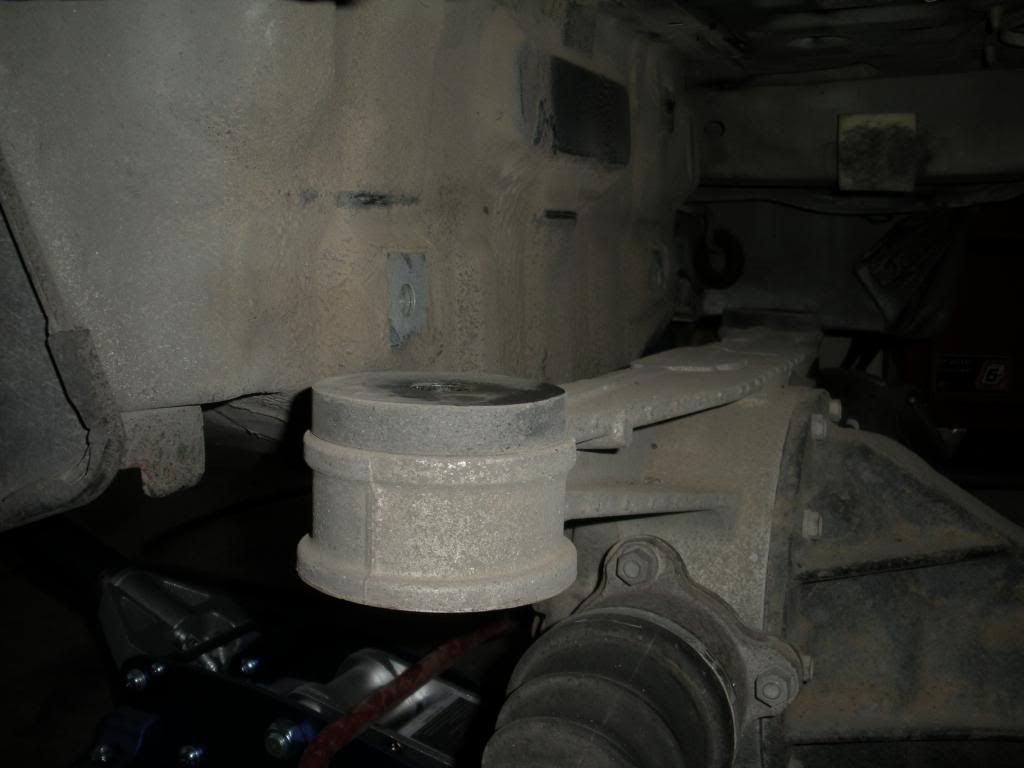 Something that happens a lot on my car. I always seem to get tire shreds stuck in the brake assembly and wrapped around the hubs. 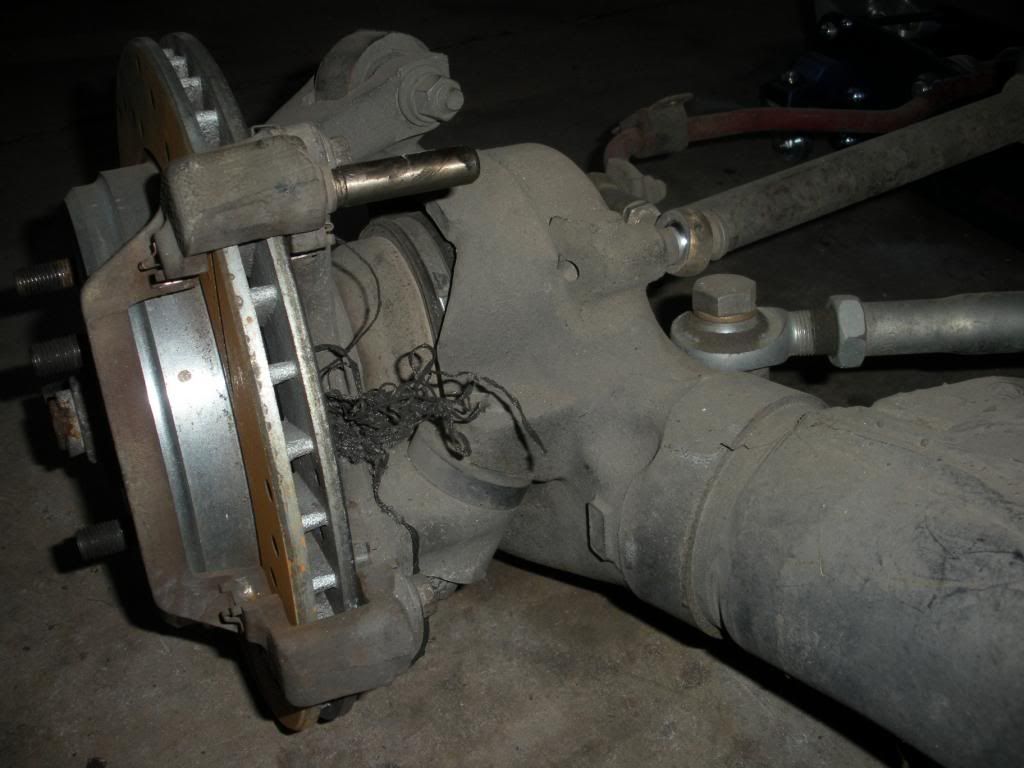 Another reason I recommend the MMR diff bushings. Since I installed them I have yet to break a front diff mount. It looks like there's a tiny crack but it's just the casting or whatever you call it for rubber stuff. I was only making probably 160lbft of torque but this mount has like 1000 clutch kicks on it at least. We will see how it does with the V8.  Waiting on a bunch of stuff to arrive from Summit Racing still, fittings, tube, hardware, bla bla bla |
|
|
|
|
03-06-2013, 04:48 PM
|
#9 |
|
Rotary Fan in Training
Join Date: Nov 2012
Posts: 58
Rep Power: 13 |
So today's my day off and I decided to get some of the rear brake lines done while I'm just sitting around waiting on FedEx and UPS to bring me stuff.
I used -3AN straight bulkheads on each side through the factory brake line holders. Just flat washers, a lockwasher and nut. Bam done. Easiest thing on the whole damn car. 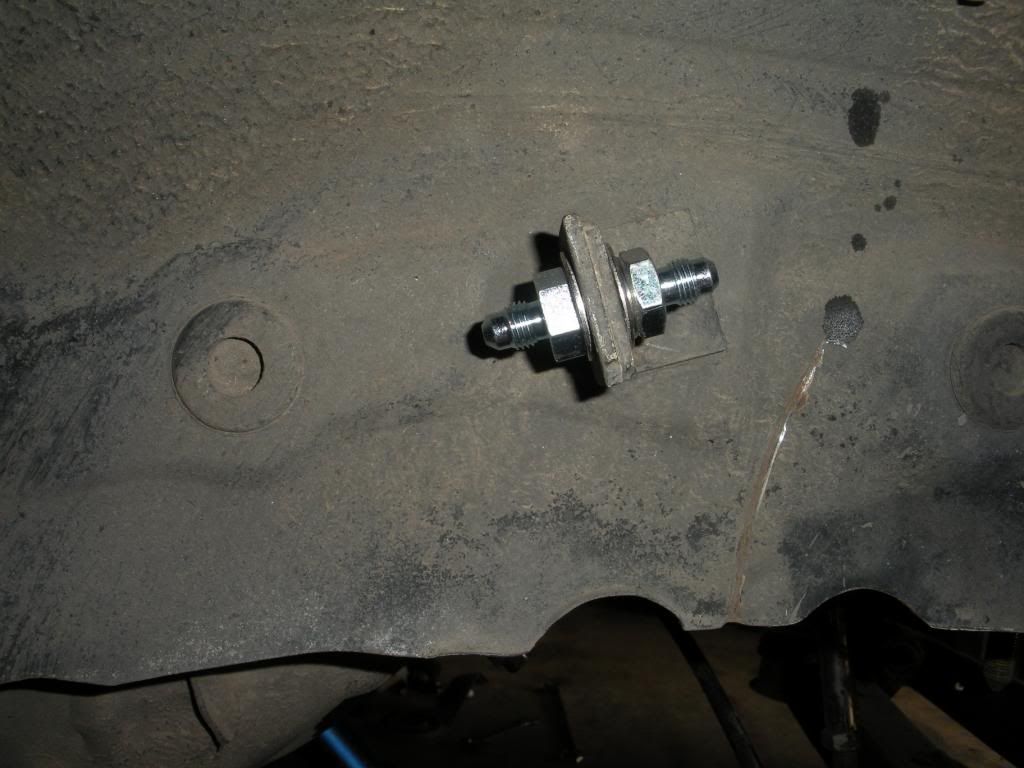 Bent up some more stainless tube for the right rear from the factory junction block to the holder. I'll put the nuts and sleeves on this after i have the fittings for the junction block, which is supposed to come today. 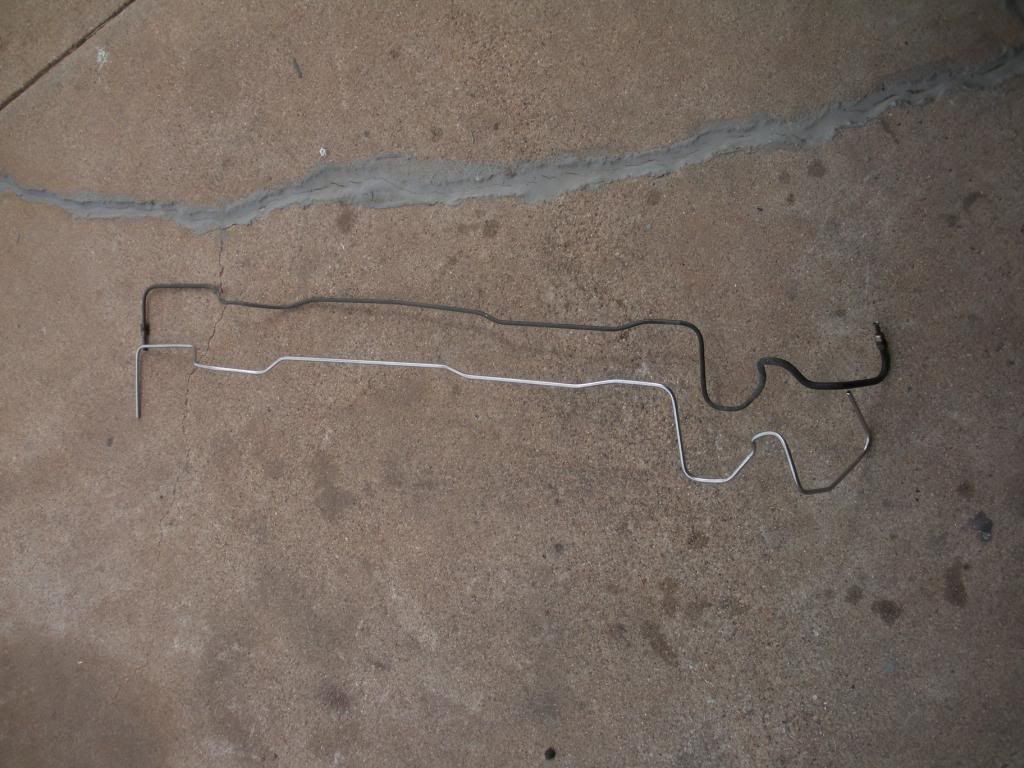 Same deal here. 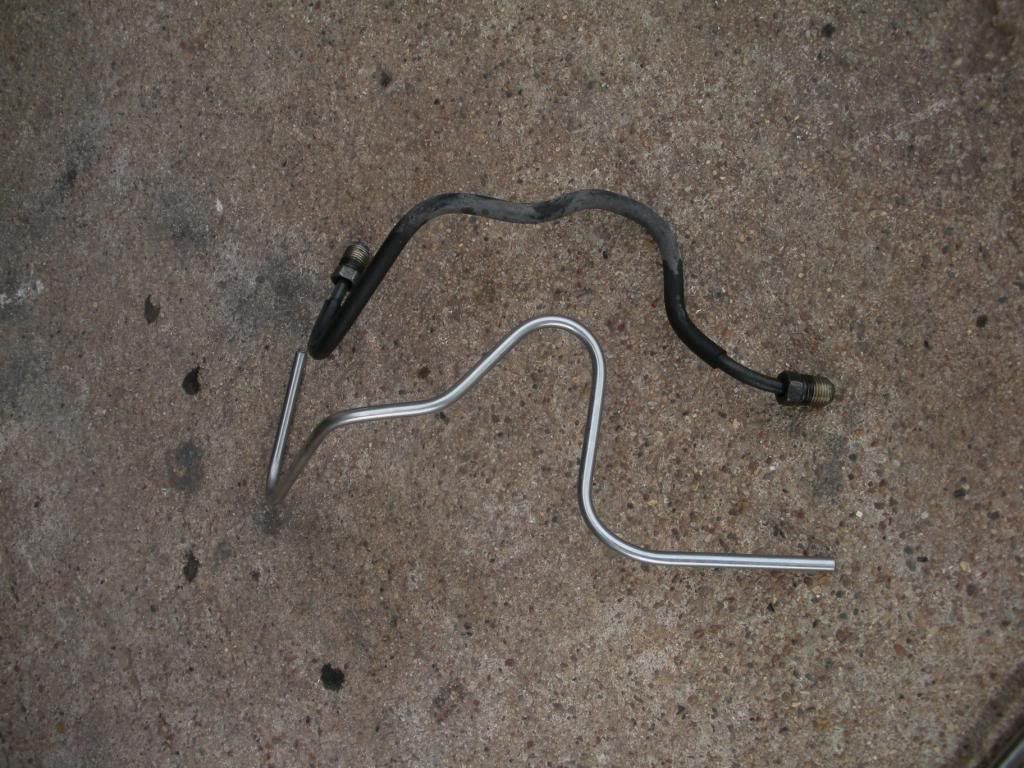 Stuck the new line in the car to get an idea of where I want the new clamps. The factory plastic clamps do fit the 3/16" line just fine if anyone wanted to know. Mine are a bit beat so I'll use new aluminium clamps like the stuff in the front of the car, cause I hate money basically. 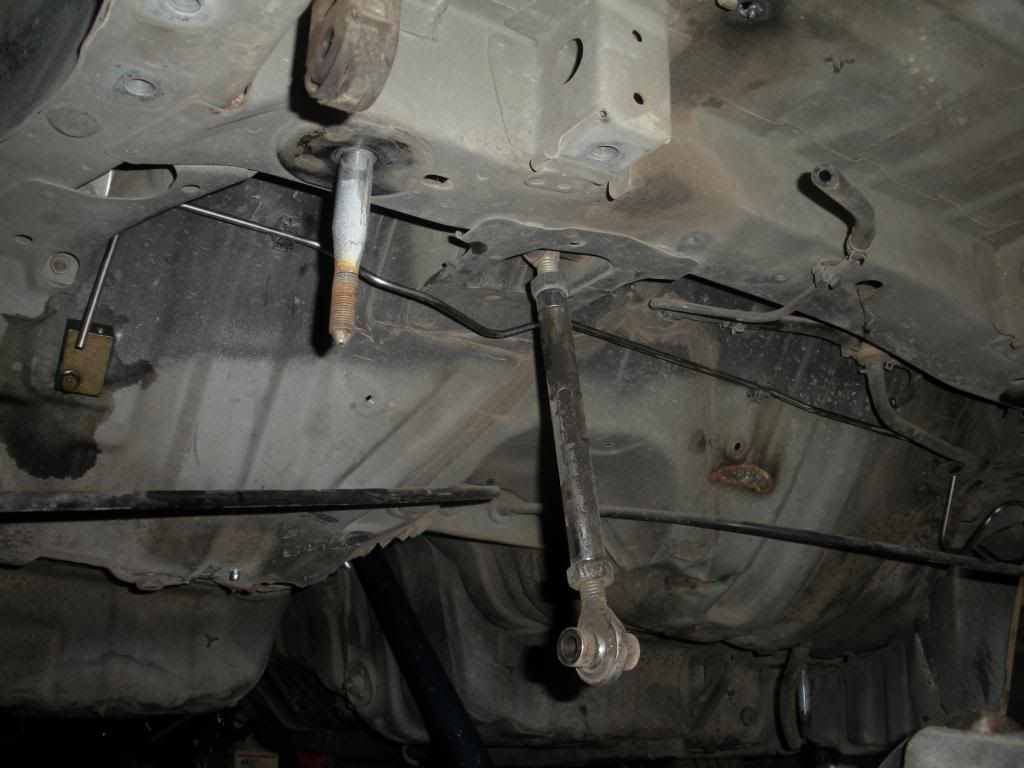 Dat fitment! 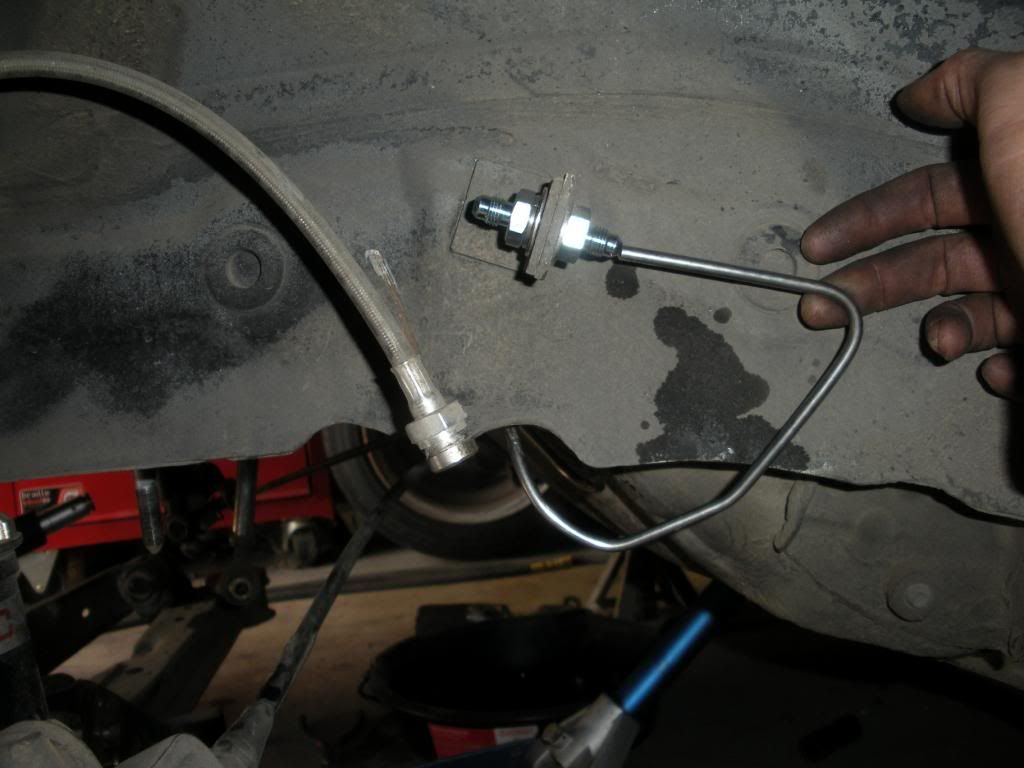 So damn many bends at the end of this thing. PITA to make. 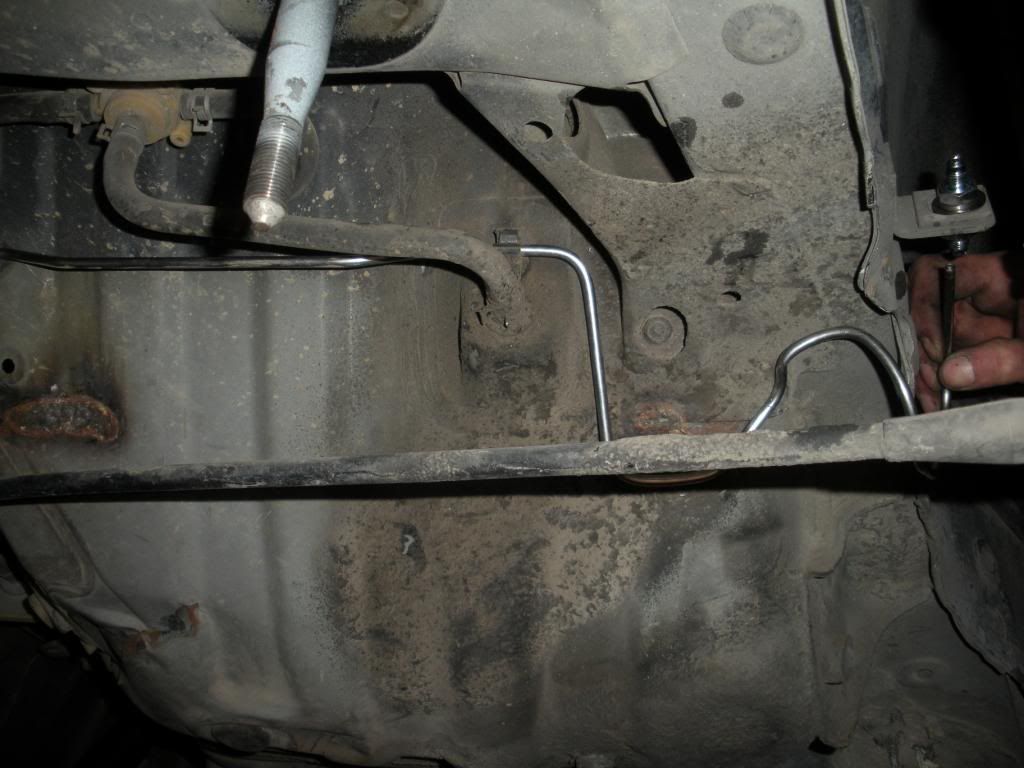 Now if the delivery dudes will get here I can finish this up and build the fuel lines and stuff. Also have some misc stuff coming like a new oil pan and whatever else I bought I can't even remember lol. |
|
|
|
|
03-12-2013, 07:56 PM
|
#10 |
|
Rotary Fan in Training
Join Date: Nov 2012
Posts: 58
Rep Power: 13 |
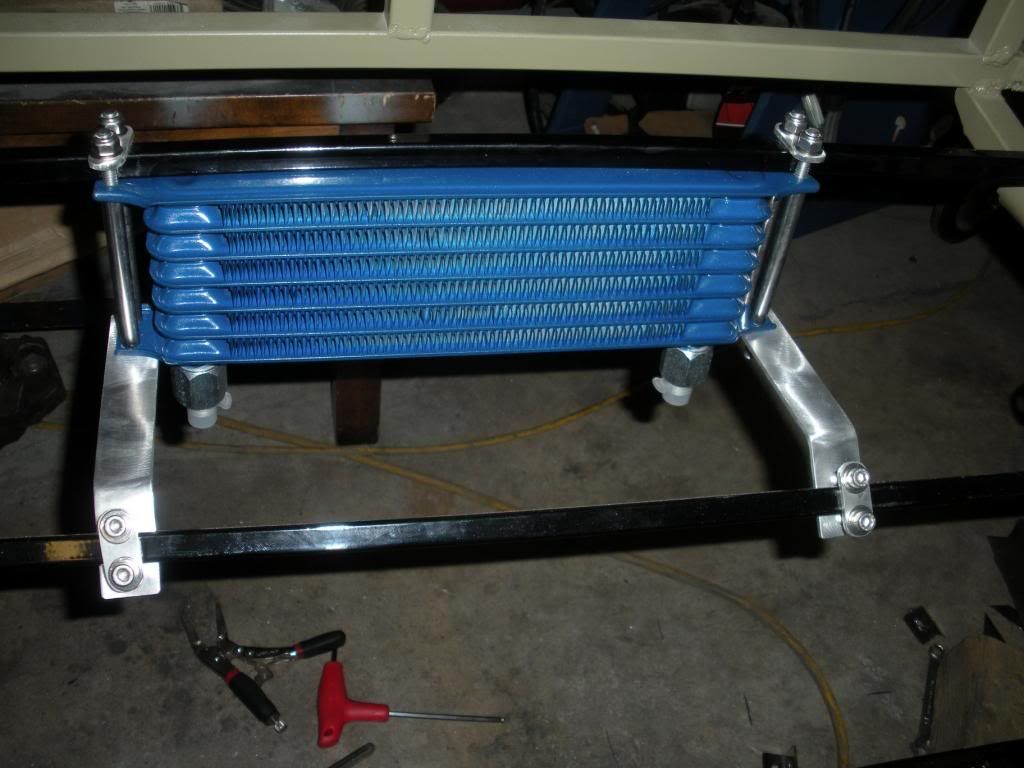
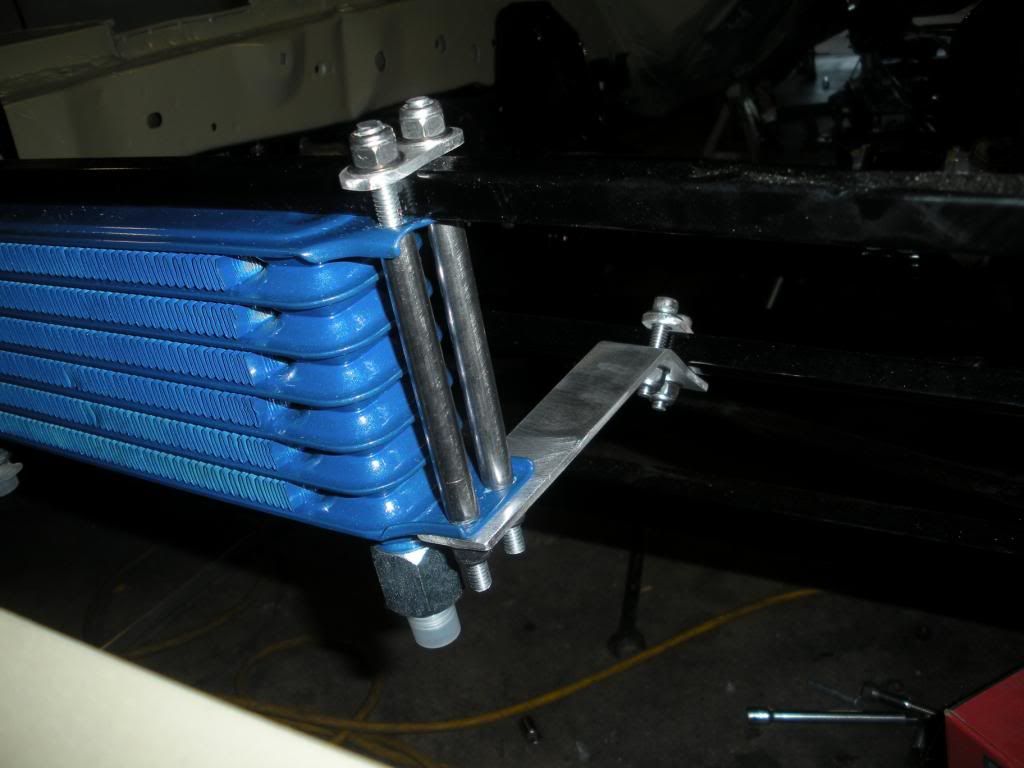
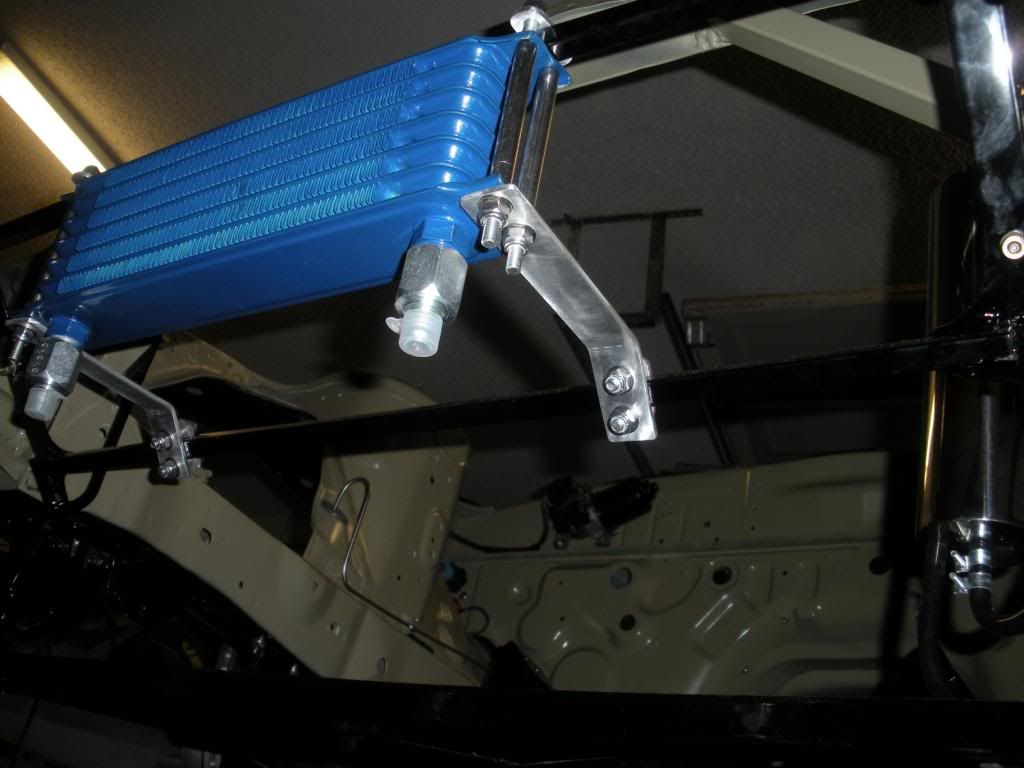
Finished up my power steering brackets finally, due to my Uncle in Canada bugging me about it and how the cooler would shake itself apart. Shit isn't going anywhere now. i can double as a bash bar at this point.
|
|
|
|
|
03-23-2013, 10:36 PM
|
#11 |
|
Rotary Fan in Training
Join Date: Nov 2012
Posts: 58
Rep Power: 13 |
So this happened next? I'm lost lol
 Still had these bad boys new in the packaging lol. The date on them is hilarious. 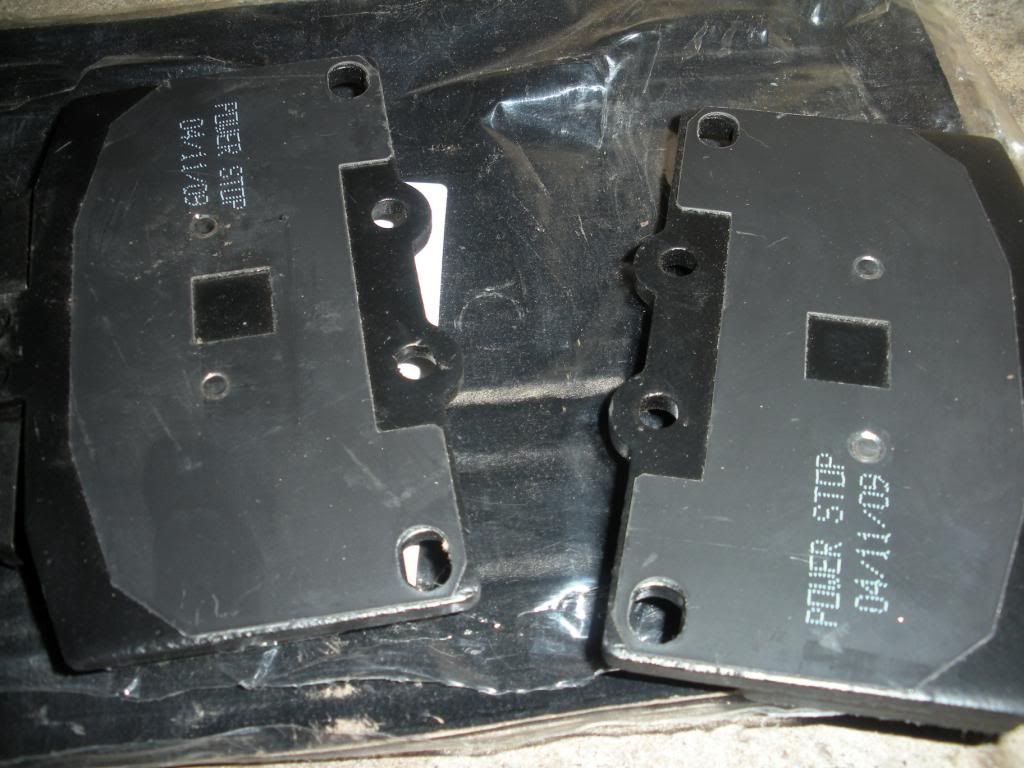 Hung the calipers and put the AN fiittngs in them. Does anyone know if the big spring goes on the bottom or top???? I can't even remember lol. Probably doesn't matter, but damn these are sexy with all new hardware and stuff. 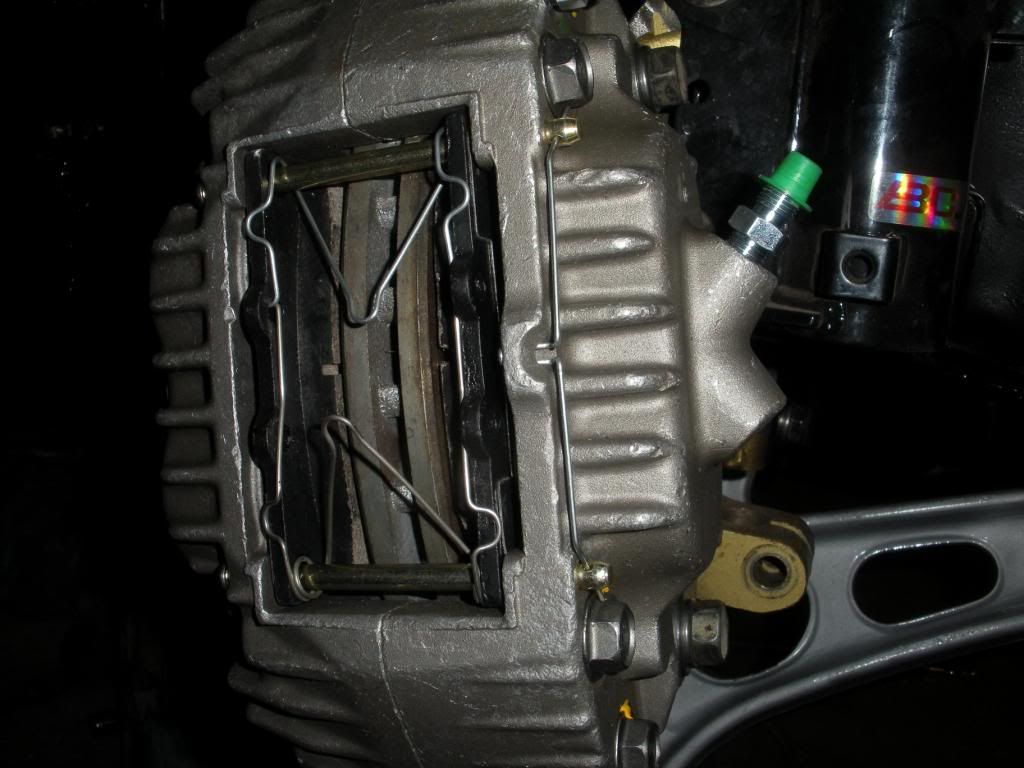 Dat new new 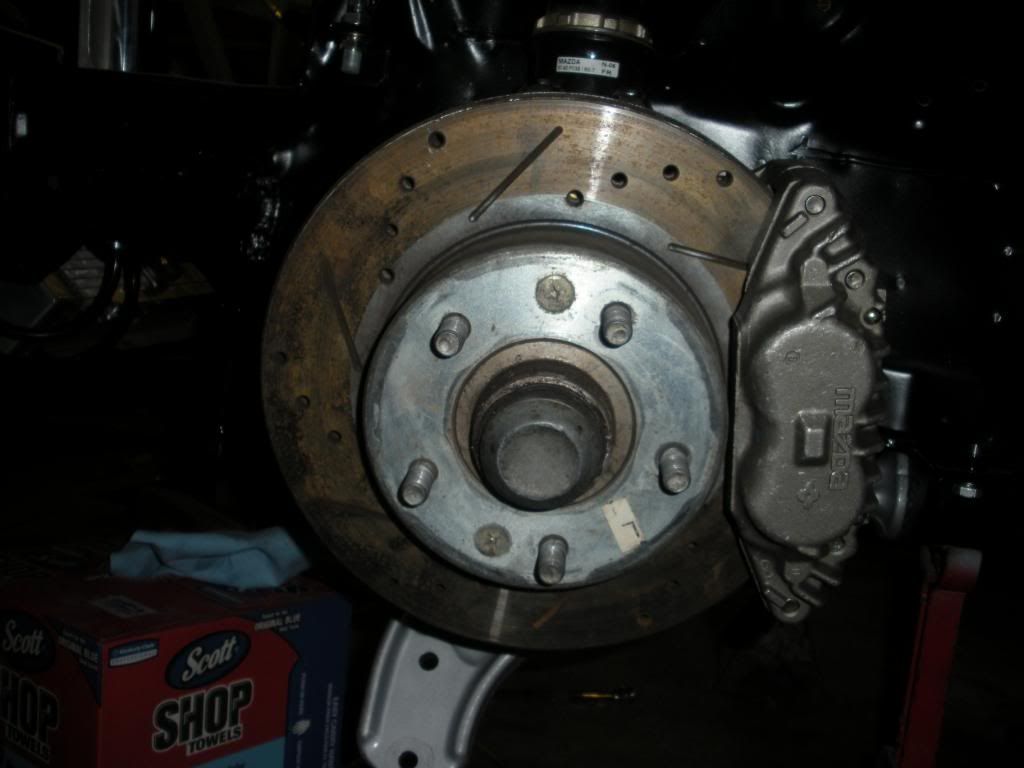 Tore this thing all apart, got rid of the ignition cylinder. 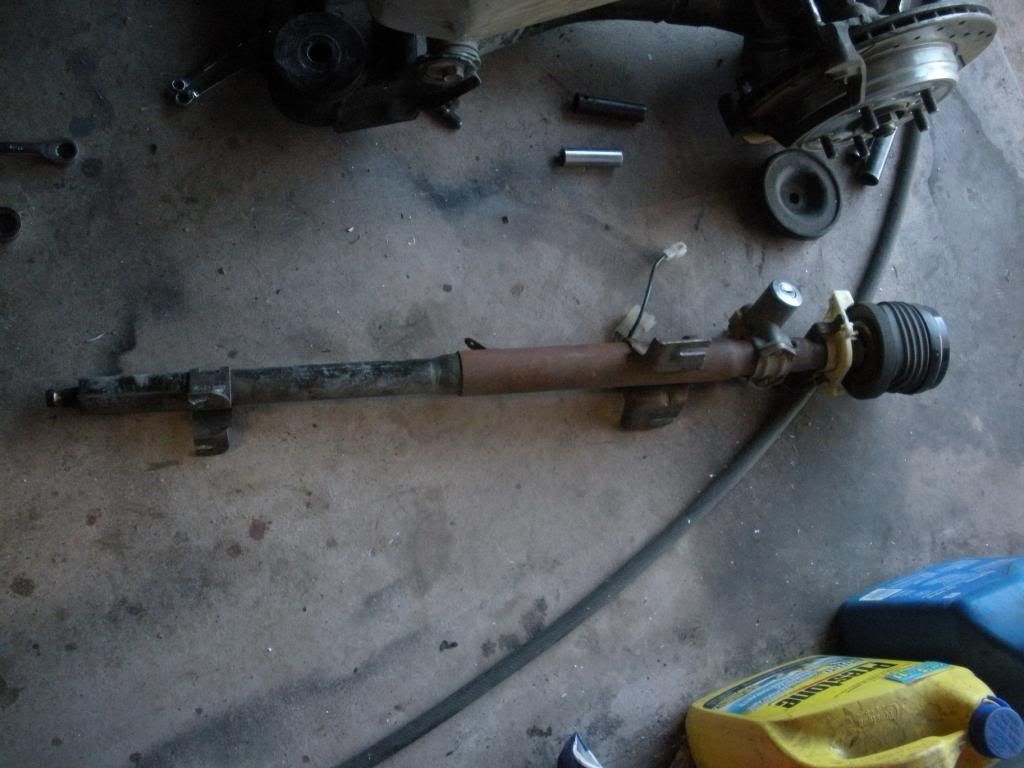 Painted and installed my headlight stuffs. Came out pretty cool, ain't mad at it.  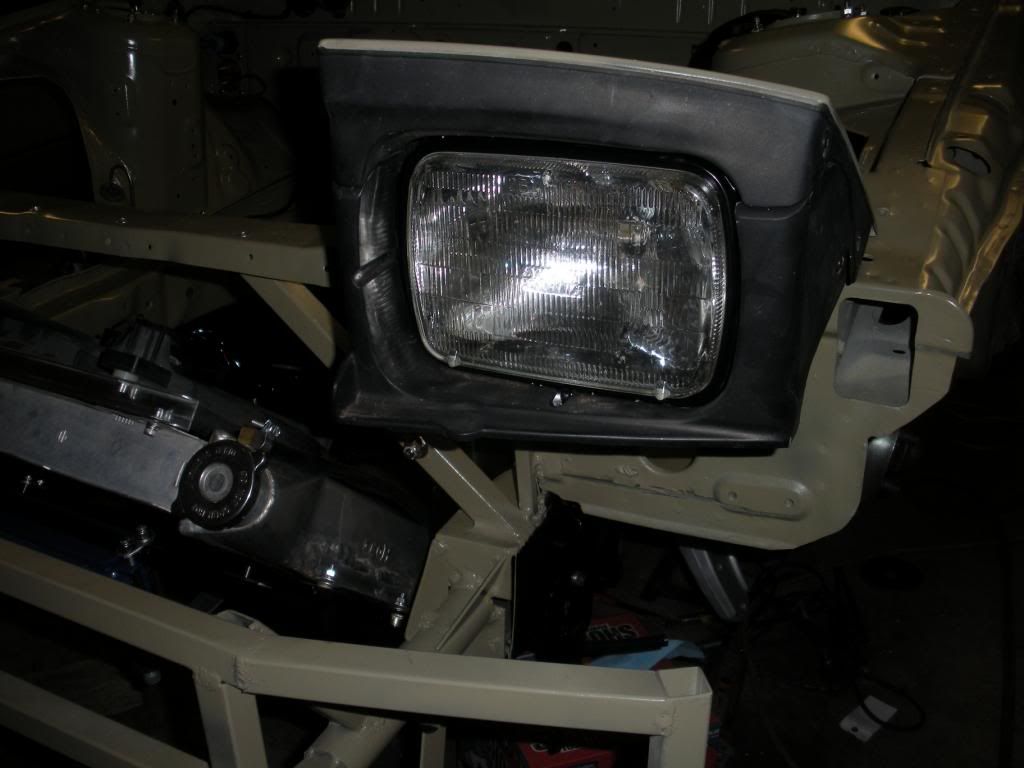 This is terrible and went in the trash can. I can't roll like that. A new one or substitute will be ordered. It's the grommet for the steering column. 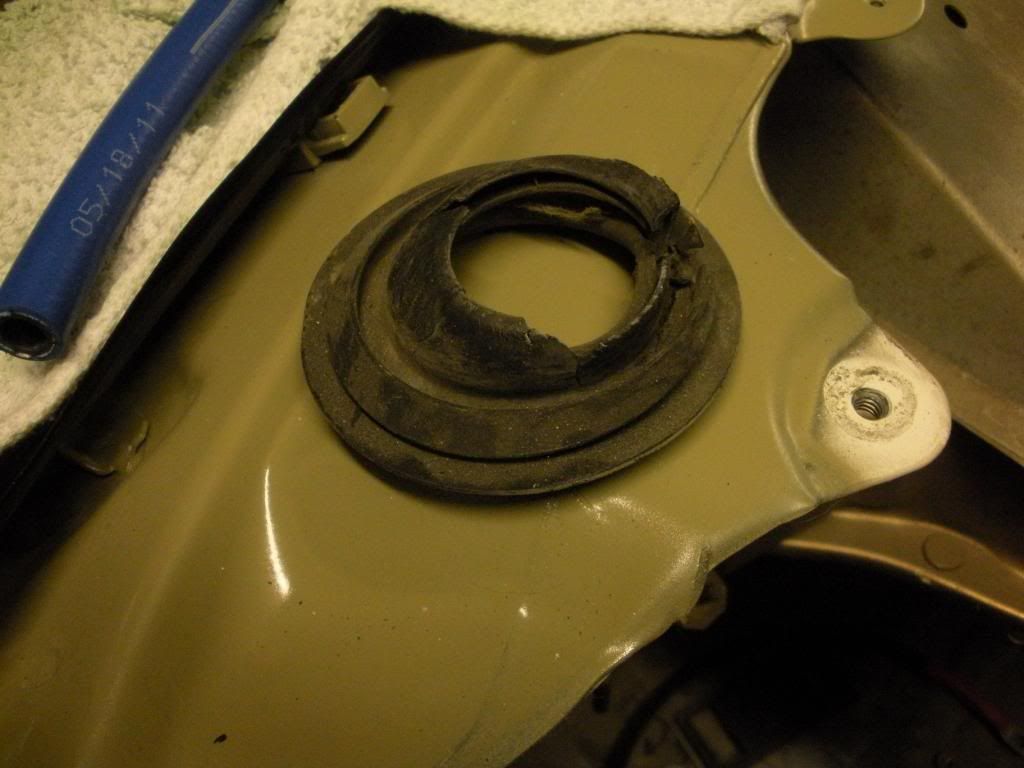 Steering column stripped down and repainted. Color looks super wierd in this picture. Might go black anyways after all. 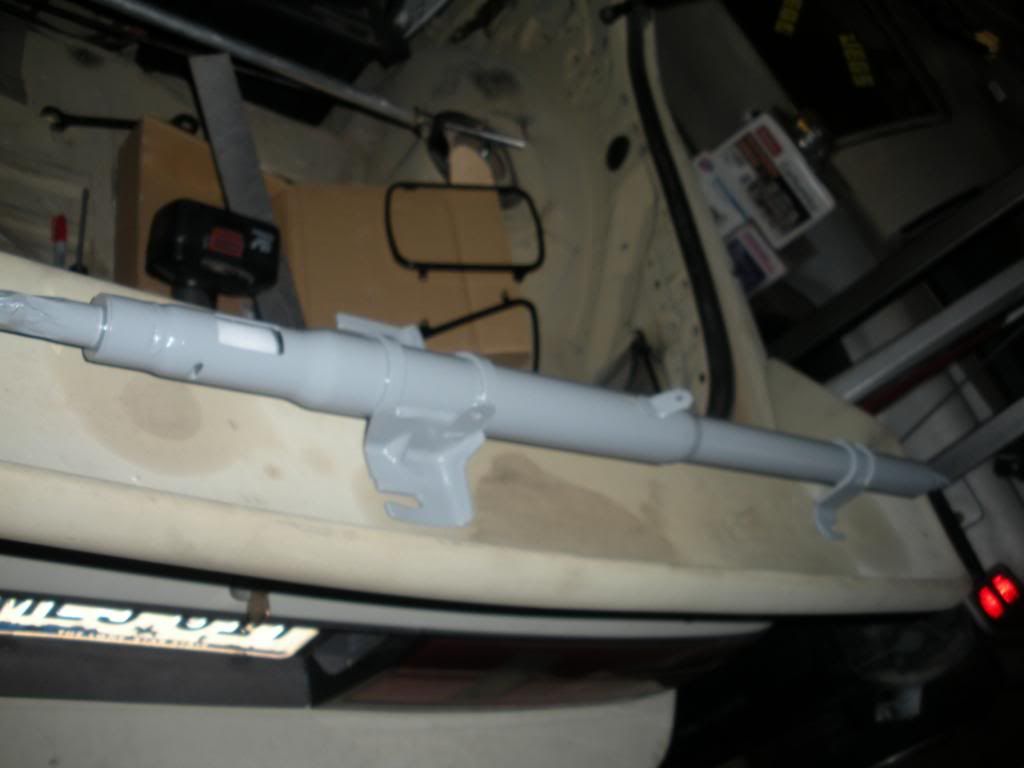 Messing with these almost perfect fenders I got from a buddy. Just thinking and getting ideas. 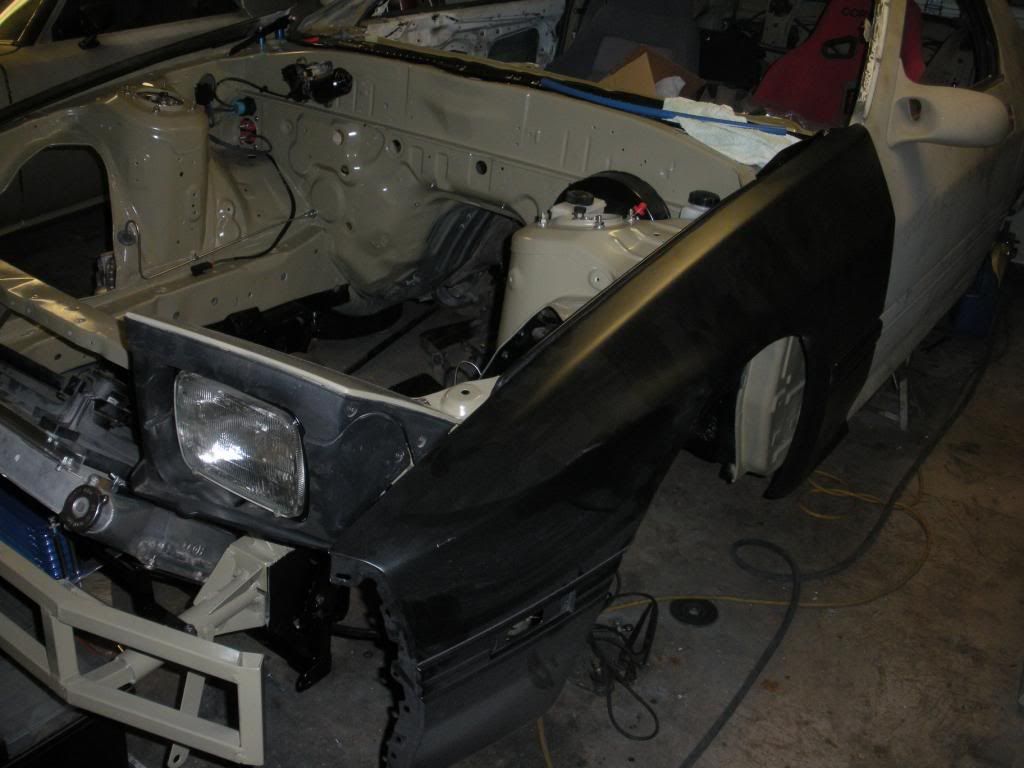
|
|
|
|
|
| Bookmarks |
| Thread Tools | |
| Display Modes | |
|
|


 Hybrid Mode
