Go Back   Rotary Car Club > Tech Discussion > Piston Engine Conversion

Piston Engine Conversion Have you replaced your rotary with a V8 or any other type of piston engine? Tell us about it!

Reply
 
Thread Tools Display Modes
Old 11-12-2012, 07:11 AM   #1
StephenSheppard
Rotary Fan in Training
 
Join Date: Nov 2012
Posts: 58
Rep Power: 13
StephenSheppard is on a distinguished road
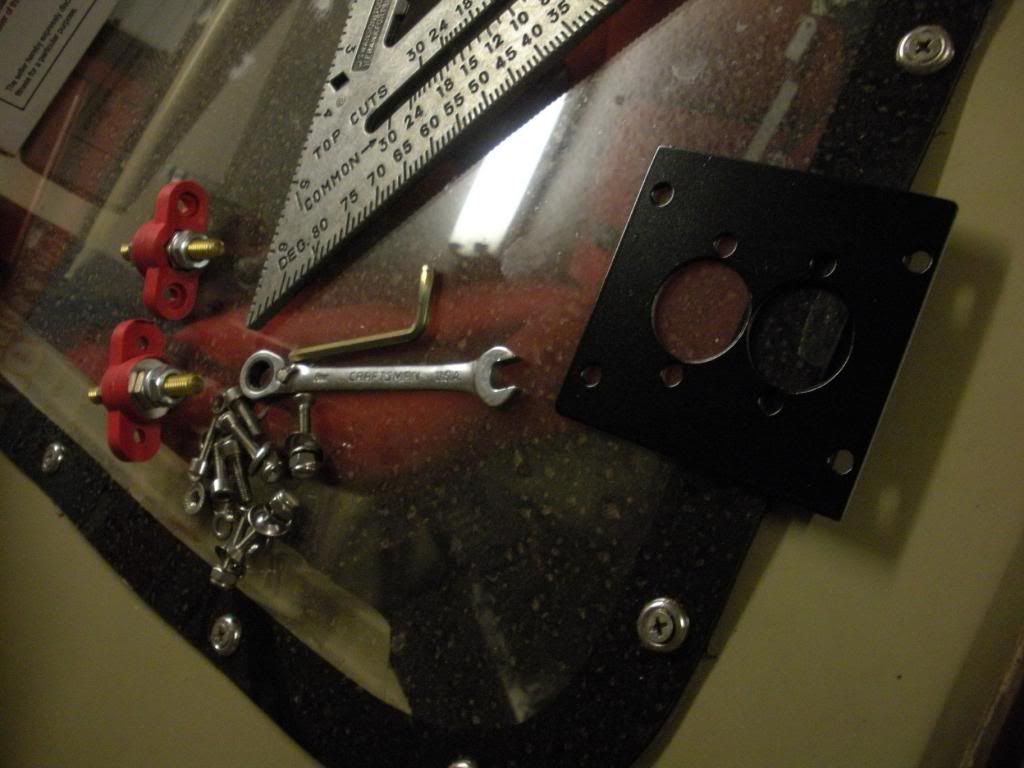
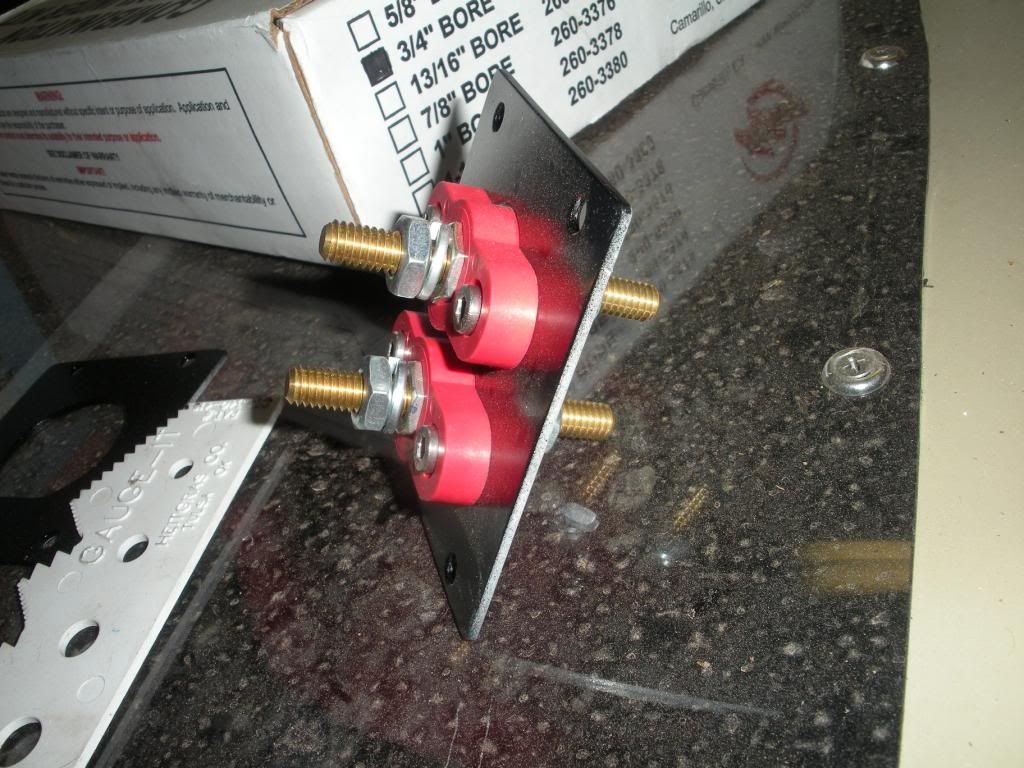
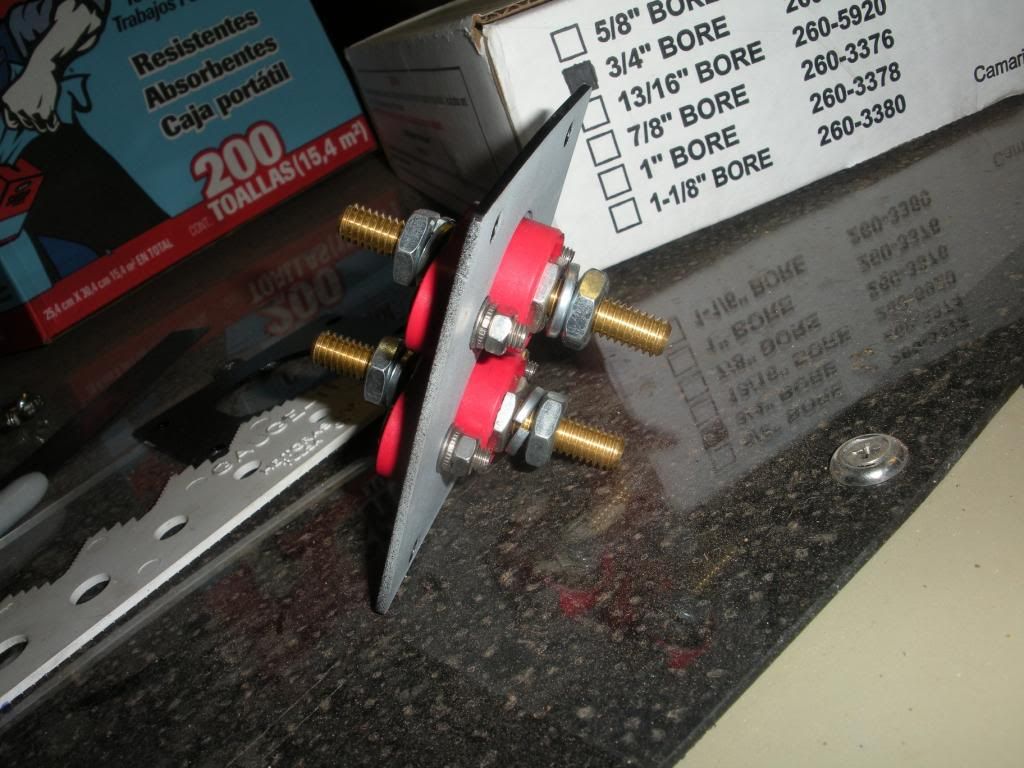
The other day I was sanding and cleaning and got bored with that. So I wandered off and started building this pass thru deal for the starter and alternator cables. It will mount on the inside of the firewall where the factory engine harness passes through the grommet hole. More on that later as the car progresses.


Btw you can buy those at VTE Warehouse, just Google them. They have lots of useful stuff.

Normally I wouldn't share that but like I said the company is closed so full disclosure.

Also my website is purely informational now and has a ton of cool stuff on it. Still in progress as there is so much stuff to upload yet. If you need to know part numbers for factory connectors and stuff for some of the Fc stuff you can find them here at the bottom of the page, the links under parts lists. Then look through the PDFs for what you need. Some of the connectors don't have links to purchasing locations due to the volume needed to buy them, but the part numbers are provided so you can Google them should you be lucky enough to find a few loose items out there in the interwebz.

http://www.rotaryrelated.com/FC%20Race%20harness.html
StephenSheppard is offline   Reply With Quote
Old 11-12-2012, 07:18 AM   #2
StephenSheppard
Rotary Fan in Training
 
Join Date: Nov 2012
Posts: 58
Rep Power: 13
StephenSheppard is on a distinguished road
Also made this dude for the driver's side grommet hole where the front wiring harness will pass through. It's painted black now like the one for the other side just no picture, I think you get the idea though. It's for a Molex XRC connector set. Has the anti rotation jam built in. The hole was achieved with a printed paper template, a drill bit, and a die grinder. It's just aluminium so it took like 5 minutes to make. Bolts up to holes I put in the chassis already like the other side.


You can find those at www.waytekwire.com and lots of other websites. The hole is cut for the 31 position connector. Which is more than adequate for the little amount of stuff I'm using.


Scraped all the chaulking from the engine bay. I can't stand how it looks. I know I'm wierd and my car will probably rust in half because of it, whatever.


The interior is a train wreck right now. So much stuff to change, build, fix. New gauge cluster, new electrics for the whole chassis, cleaning, etc. At some point a roll cage has to get in here. So I'll have to notch the dash for that as well. I'm not sure what will come first. Still trying to figure out who's going to build what on this thing. Pretty much everything in that picture goes in the trash lol.


Last edited by StephenSheppard; 11-12-2012 at 07:23 AM.
StephenSheppard is offline   Reply With Quote
Old 11-12-2012, 07:49 AM   #3
StephenSheppard
Rotary Fan in Training
 
Join Date: Nov 2012
Posts: 58
Rep Power: 13
StephenSheppard is on a distinguished road
So my old sunroof plug was leaking a bit. So I fixed it.


Still need to trim off the excess silicon and finish painting the roof. The reason there's over spray on the windshield is because it's cracked and being replaced so there was no reason to care really.

Last edited by StephenSheppard; 11-12-2012 at 07:57 AM.
StephenSheppard is offline   Reply With Quote
Old 11-12-2012, 08:04 AM   #4
StephenSheppard
Rotary Fan in Training
 
Join Date: Nov 2012
Posts: 58
Rep Power: 13
StephenSheppard is on a distinguished road
I don't like the door panels in my car because they are terrible, plus they had to go to make room for the roll cage. Here is my journey:

Started here with a modified T2 panel for window roller duty. has a hole cut in it due to the door not unlocking one time lol.


Everything must go!


Rivenuts for attaching the cards.


A crushed one. Basically they just clamp the material like a rivet. They are very secure if installed properly.


I used a piece of acrylic (Plexiglass) for the door card template, because it's cheap and transparent.


Temporary hardware for fitting. Yes my temporary hardware is stainless steel. I told you I have a problem


Cut the template up some more. The band saw works pretty good on this stuff. Oh I forgot to mention the sunroof is Lexan (Polycarbonate) not Acrylic. You'd have to have a death wish to use Acrylic there. If it shatters which it probably would it could saw your head off. No biggie, moving on.


Attempting to get the door release handle hole situated.


Window roller hole looks about right.


Giant piece of aluminium for the actual door cards. I was originally going to use ABS plastic but then I remembered I didn't want to be sliced to pieces if it shattered so I didn't.


The next bunch of pics were off my cell phone because the camera battery died, sorry.

Here's a nearly finished door card fitted.


Then I was coming up with possible door handle pull options. this ones pretty simple and very sturdy. I may go with it, but I still haven't decided yet.


The passenger door is super easy because the template is already made. Punched out the factory clip holes to the size for the rivenuts, bolted up the template, marked the other holes. drilled those, put the rest of the rivenuts in. Boom! done.


Passenger door just before drilling the second set of holes. Also all this gooey black stuff needs to be removed so I can repaint the door. Plus I don't want it to get all over everything.


Last edited by StephenSheppard; 11-12-2012 at 08:17 AM.
StephenSheppard is offline   Reply With Quote
Old 11-12-2012, 08:21 AM   #5
StephenSheppard
Rotary Fan in Training
 
Join Date: Nov 2012
Posts: 58
Rep Power: 13
StephenSheppard is on a distinguished road
I'll have to post pictues of the finished door cards when I get them squared away. They will be covered in Di-Noc or painted with black wrinkle finish paint. Still undecided. Had an issue with some "Di-Noc" I bought from a dude on ebay. It was not 3M Di-Noc and it was junk so, I'll order some real shit and see what it's like instead.

Plan B isn't bad looking either. I've done a couple cars with the wrinkle finish black and it looks really good.
StephenSheppard is offline   Reply With Quote
Old 11-12-2012, 08:30 AM   #6
StephenSheppard
Rotary Fan in Training
 
Join Date: Nov 2012
Posts: 58
Rep Power: 13
StephenSheppard is on a distinguished road
The plan so far is this:

BCL Wing
rear diffuser
30mm garbage ass fiberglass front fenders
same for the rear over fenders
new sideskirts (MOAR lower)
carbon fiber hood that will clear stuff in the engine bay
Might keep my factory S5 bumper, corksport lip and build a new splitter
repaint the car
repaint the engine bay
repaint everything really
fabricate a bash bar system or some sort
tub the front end more than likely
roll cage (Mentioned that already)
Probably new wheels 17x9.5 0 or 12 offset

I think that about covers it, then on to the drive train stuff. I already have a T2 clutch type rear end under the car and a dual 3" exhaust for the new engine. There's not much left to buy for the suspension. I may make some new knuckles with more steering angle since the front swaybar is coming off now. I'd be pretty happy with 60 degrees I have around 51 or so right now. Which is probably good enough. But with more power from the engine I'll be able to use more angle all the time so I may add some more.

Tons of stuff to do and buy.
StephenSheppard is offline   Reply With Quote
Old 11-12-2012, 09:30 PM   #7
StephenSheppard
Rotary Fan in Training
 
Join Date: Nov 2012
Posts: 58
Rep Power: 13
StephenSheppard is on a distinguished road
So got a bit more done today. Ground down the cross tube brackets and got rid of them so I have all the room I want/need to mount the radiator. It took awhile, I'm pretty sure those damn things are forged in the fires of Mordor.


Much better now. And it looks better as well.


Thinking about mounting senarios for the radiator now.

First option like factory but moved forward. Makes ducting the nose of teh car super easy. I am leaning towards this option. It doesn't afford the radiator much protection though.


Option 2 is just inverted compared to the factory mounting. A bit more protection offered since the radiator is only near the front of the car at a very low point where cars usually don't get crushed.


Option 3 although most people would think this wouldn't work. It would indeed work quite well. Offers the most protection again bashing since it's so low but allows other damage to maybe happen from cones, tires, debris, etc. Basically laying flat in the nose of the car. I did have it tilted a bit upward in the picture though.


We shall see. I'm not sure what I like most yet.
StephenSheppard is offline   Reply With Quote
Reply

Bookmarks


Posting Rules
You may not post new threads
You may not post replies
You may not post attachments
You may not edit your posts

BB code is On
Smilies are On
[IMG] code is On
HTML code is Off

Forum Jump


All times are GMT -5. The time now is 06:09 PM.


Powered by vBulletin® Version 3.8.4
Copyright ©2000 - 2025, Jelsoft Enterprises Ltd.
Hosted by www.GotPlacement.com