 03-18-2009, 12:05 AM
|
#61 |
|
Respecognize!

Join Date: Jul 2008
Location: Δx = ħ/2Δp
Posts: 3,190
Rep Power: 21  |
Today was more of a lateral movement, but for sure worth mentioning.
I cleaned some of the engine up, removed the oil injectors and plugged them with the Pineapple Racing plugs i got. Then i decided to get the radiator in and removed the studs from the water pump. Little stuff sure. But needed. Next came installing the Atkins side mount alternator kit. Was extremely easy to do. Very well designed. I am going to be running an S5 alternator with a double pulley. Still need to buy two belts though. Next i want to tackle the brake project. I had my two good hubs obtained. So i was ready. So i thought. Hubs went on fine. Rotors the same. But when i tried to get the calipers on, it was a no go. No matter how i oriented the mounting plate, spacers, etc, the caliper always hit the rotor somewhere. No good. Lots of vulgar words. Im talking with Billy with RE Speed looking for a why. Im thinking the plates might be warped. The picture below you can the mounting bracket. Turns out i had it backwards and need the other one i had on the other side to be proper. Else the top bolt wont clear the sturt. Still having the caliper hit though. You can see that in the last picture. 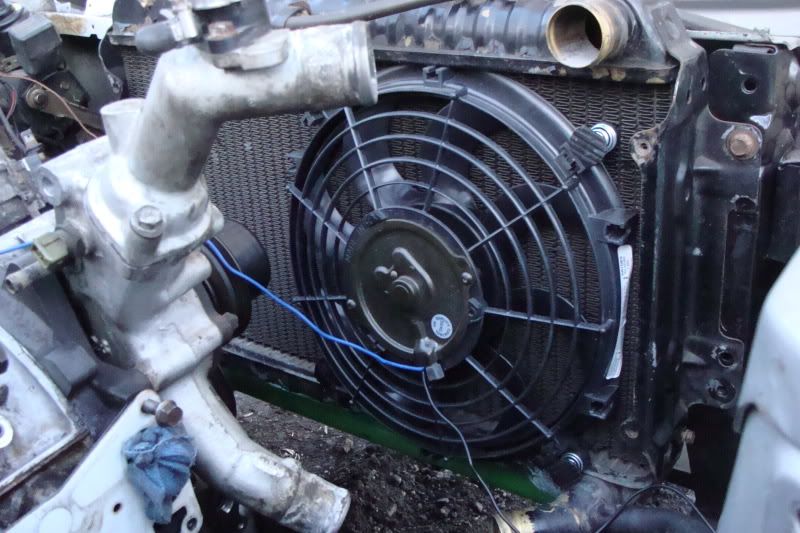 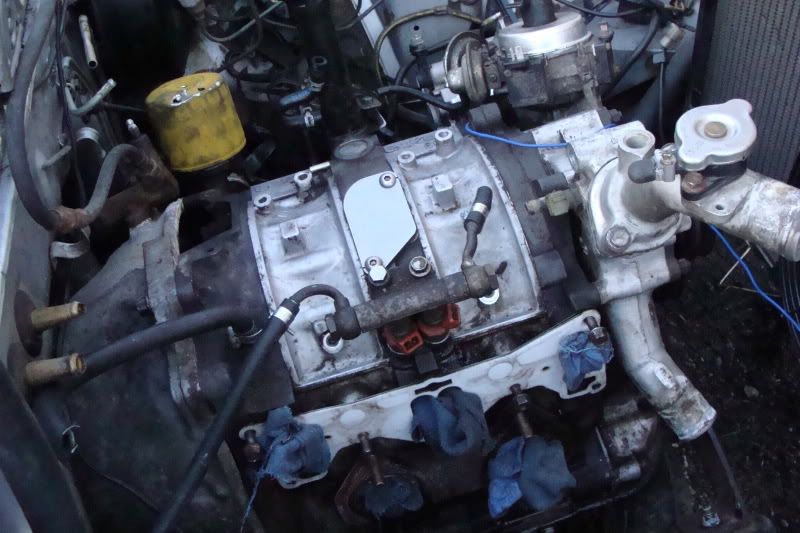 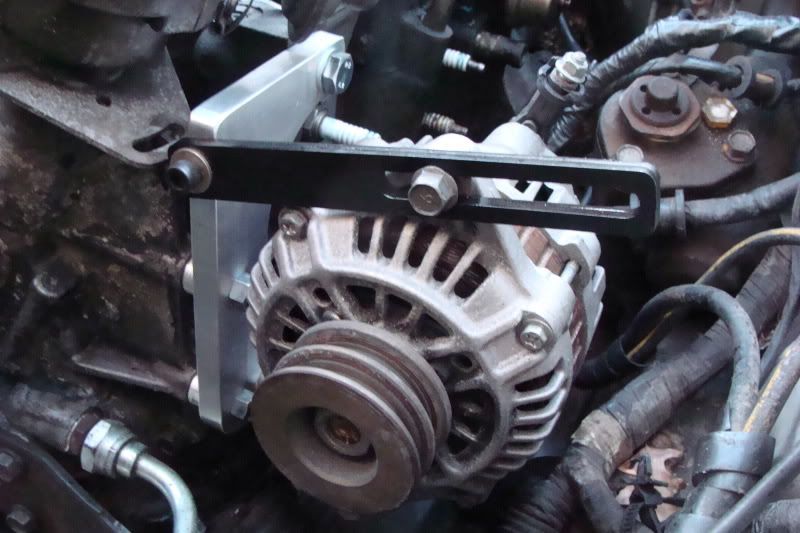 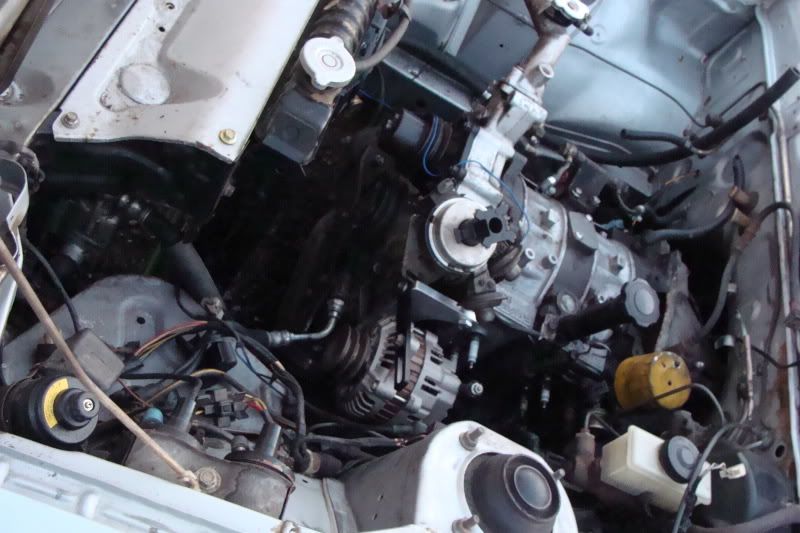 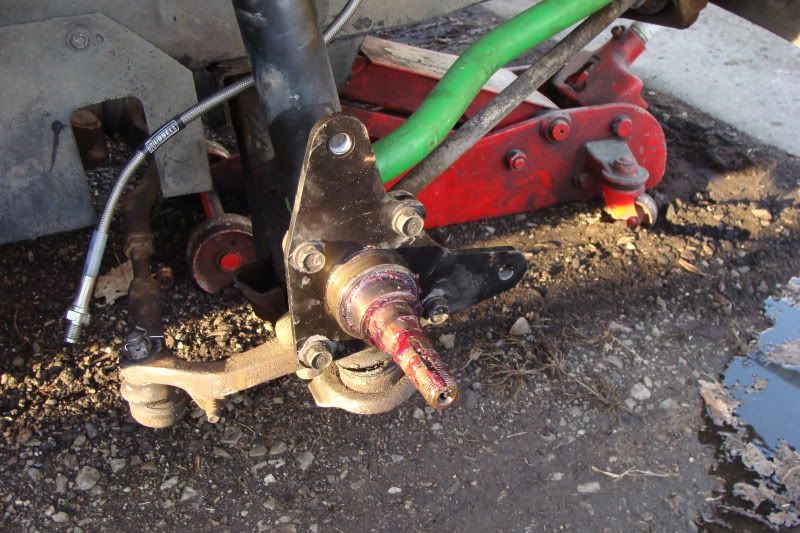 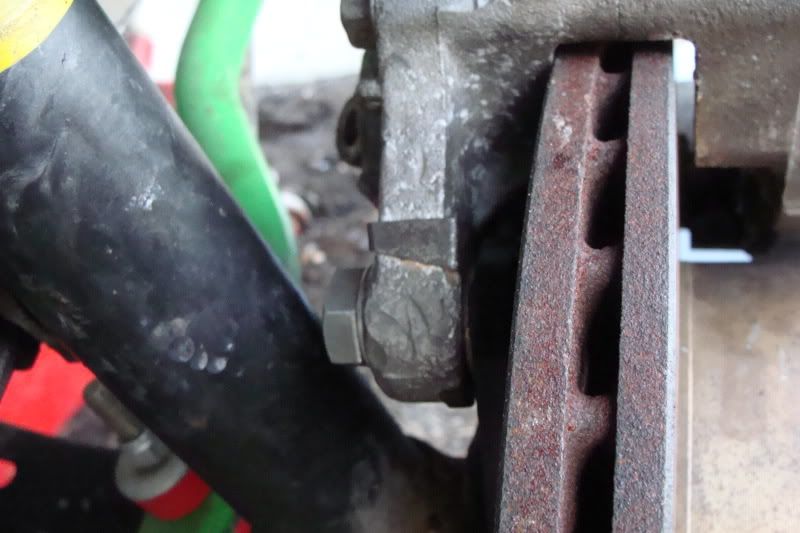
__________________
For current updates and event coverage check out Follow on Twitter! @WhizbangRally Whizbang Rally's Webpage | Facebook |

|

|
|
03-18-2009, 12:08 AM
|
#62 |
|
Respecognize!
Join Date: Jul 2008
Location: Δx = ħ/2Δp
Posts: 3,190
Rep Power: 21 |
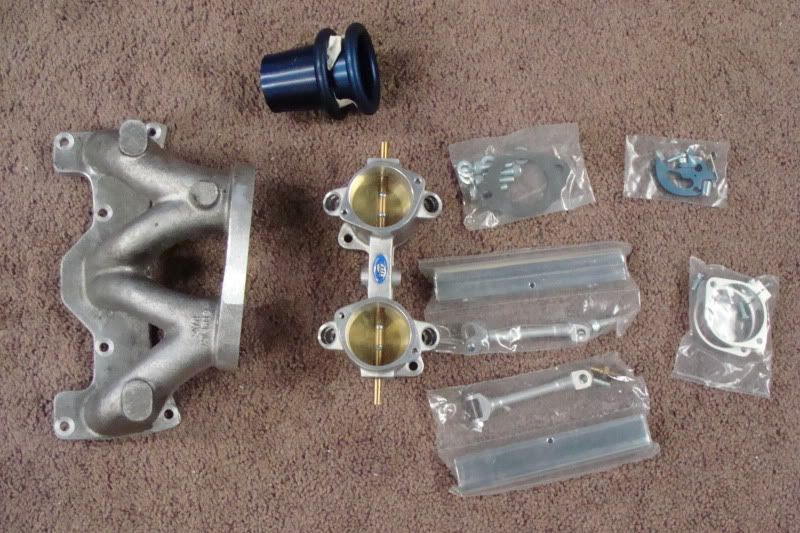
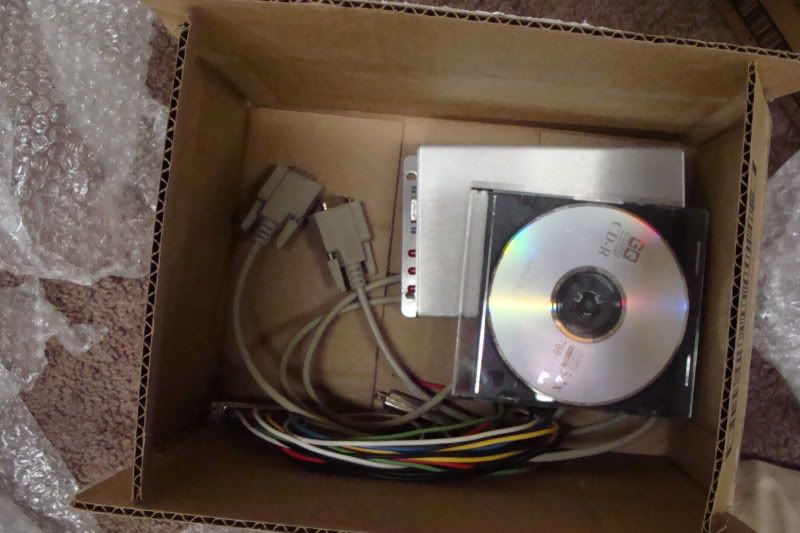
in more good news, my individual throttle bodies, downdraft 13B 6PI manifold and megasquirt arrived today!
__________________
For current updates and event coverage check out Follow on Twitter! @WhizbangRally Whizbang Rally's Webpage | Facebook |
|
|
|
|
03-19-2009, 07:50 AM
|
#63 |
|
Respecognize!
Join Date: Jul 2008
Location: Δx = ħ/2Δp
Posts: 3,190
Rep Power: 21 |
well the brakes have finally been figured out. Brian (Driver216) came out (denote picture below) to lend a hand for a while. Took a lot of tinkering but ii got the caliper to clear the rotor. Then came the brake line issues. The calipers are forward of the spindle so the stock FC brake lines didnt just "work". I tried rebending the hardline piece but that proved futile. Ended up using the stainless FB ones i already had. Got everything bleed and holy crap, the pedal feel. The thing is gonna stop good.
Next i just wanted to see what the Primes looked like. Well they for sure clear, but once i get tires on them i am going to HAVE to run fender flares. Since the intake manifold, throttle bodies etc came in i wanted to get the mounted up. But the intake manifold need some work. Had to port match the hell out of the primary runners. They were way off. Then drilled and tapped for the brake booster vacuum nipple. From here assembly the intake and throttle bodies was pretty straight forward. I believe it uses Bosch injectors, so i am going to have to obtain a set. I also need to figure out how i am going to run the TPS. 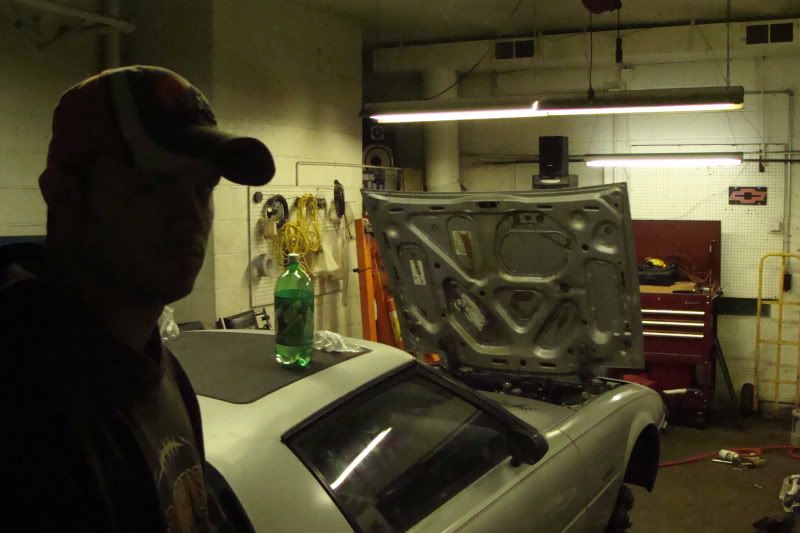 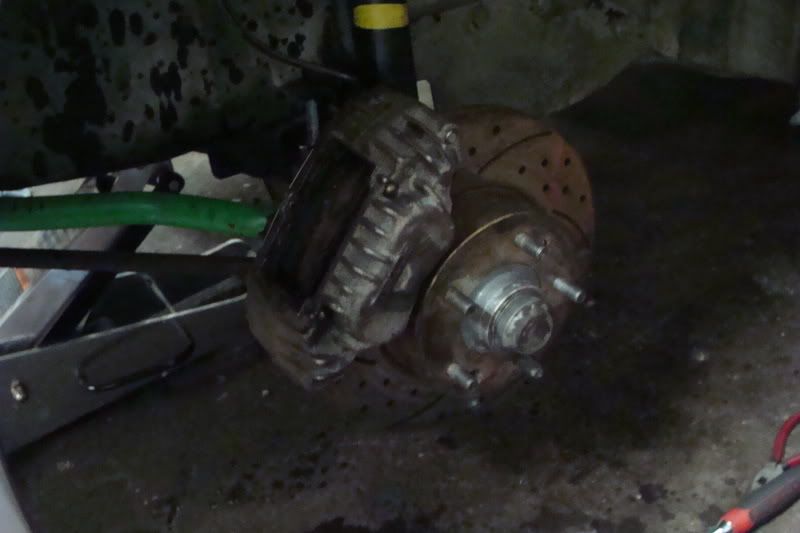 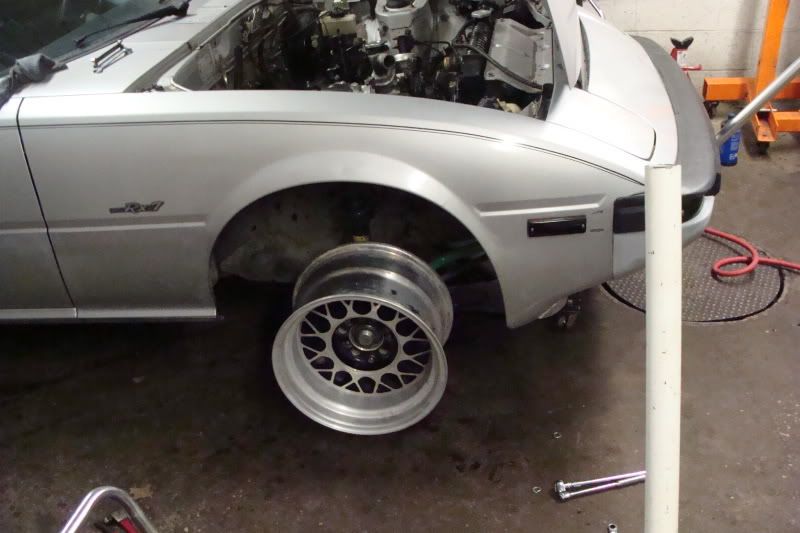  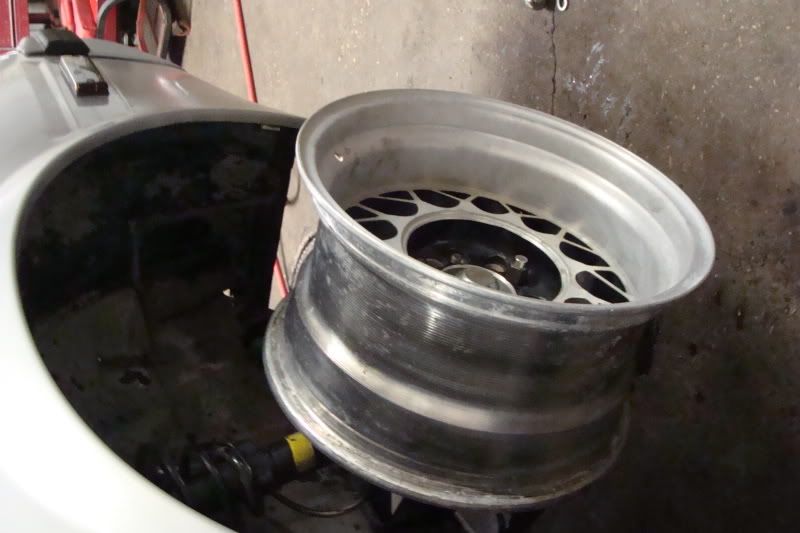 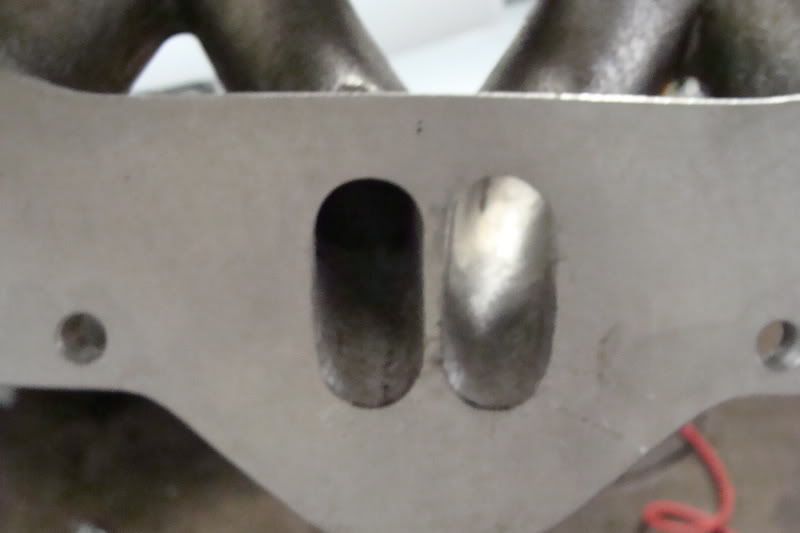  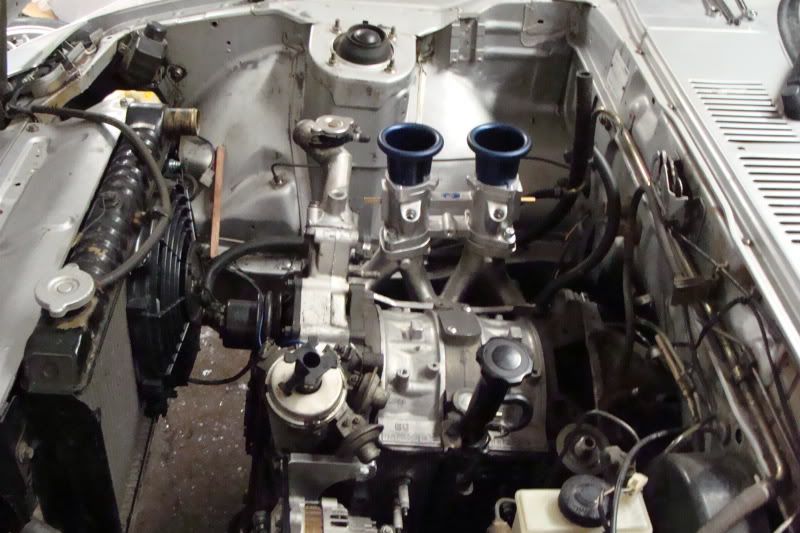
__________________
For current updates and event coverage check out Follow on Twitter! @WhizbangRally Whizbang Rally's Webpage | Facebook |
|
|
|
|
03-20-2009, 10:15 AM
|
#64 |
|
Respecognize!
Join Date: Jul 2008
Location: Δx = ħ/2Δp
Posts: 3,190
Rep Power: 21 |
went to the junkyard yesterday and snagged a FC spare and an FB tailight for 5 dollars. I had one aluminum fC spare and one DSM spare on the car before i got the calipers on. Well now the DSM spare hits the caliper so i could move the car around when i got done last time. Second FC spare will be fixing that issue. And the tail light is to replace the ones the previous owner painted. Still need another passenger side one.
__________________
For current updates and event coverage check out Follow on Twitter! @WhizbangRally Whizbang Rally's Webpage | Facebook |
|
|
|
|
03-22-2009, 01:36 AM
|
#65 |
|
Respecognize!
Join Date: Jul 2008
Location: Δx = ħ/2Δp
Posts: 3,190
Rep Power: 21 |
Got the 4.78 LSD 3rd member installed tonight with Mobil 1 synthetic due to the tightened backlashing. Also dropped the tank and may have figure out the issue with the low fuel output it had previously and got the tank back up. Removed all the old fuel lines. Removed the A/C and heater core. Going to start the wiring process tomorrow.
__________________
For current updates and event coverage check out Follow on Twitter! @WhizbangRally Whizbang Rally's Webpage | Facebook |
|
|
|
|
03-24-2009, 11:48 AM
|
#66 |
|
Respecognize!
Join Date: Jul 2008
Location: Δx = ħ/2Δp
Posts: 3,190
Rep Power: 21 |
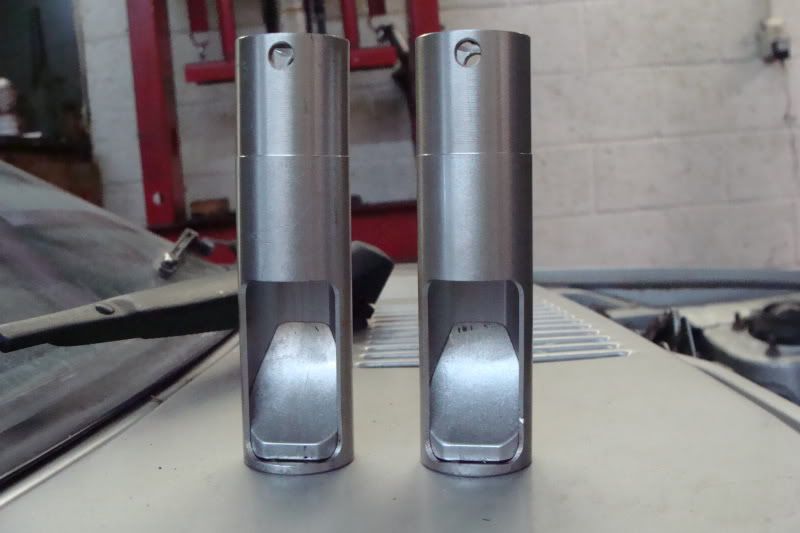
Tonight was pretty productive as well. I elected to remove the HVAC out of the car. Which was easily up until the heater core. That thing is a pain. This allow for a ton of space under the dash. I then assembled the Aux port sleeves with the Pineapple racing inserts.
 The owner of the Marathon i have been doing this work at has some nifty tools, so just to see how the sleeve lined up inside i used this cool video camera with an LED on the end of it thing. I was surprised by how much the casting of the iron when passed the opening of the sleeve. 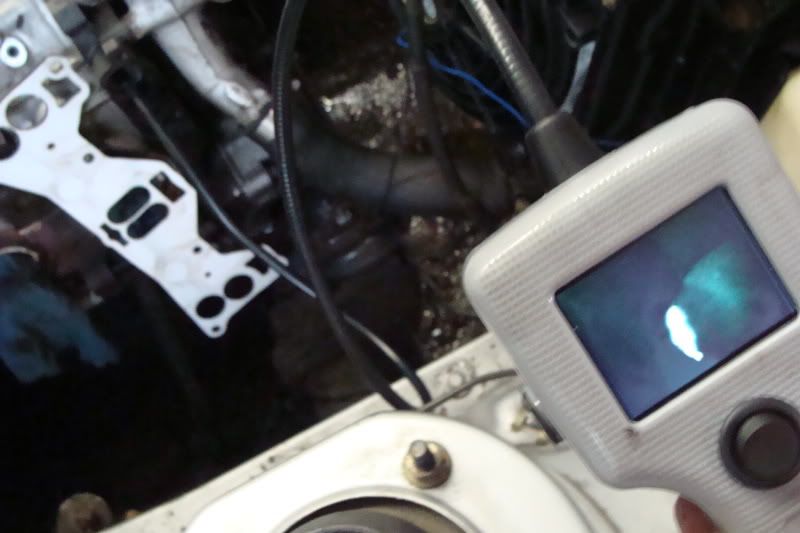 Next i mounted the CDI box on the back side of the glove box. There is plenty of room under there now for wiring and to give the box some air flow. Plus there is no chance of rain getting to it. Im trying to keep the engine bay clean. I also mounted the Megasquirt in place of the little pocket under the radio. Going to be running all the wires out of the one of the former heater core holes in the firewall.  Next up, i finally wanted to install the leading coils somewhere. Figured out that the side of the radiator would be the best place to do so. The things are pretty big so there were not too many options that looked good. Ended up making a bracket. Pictures will explain the rest. 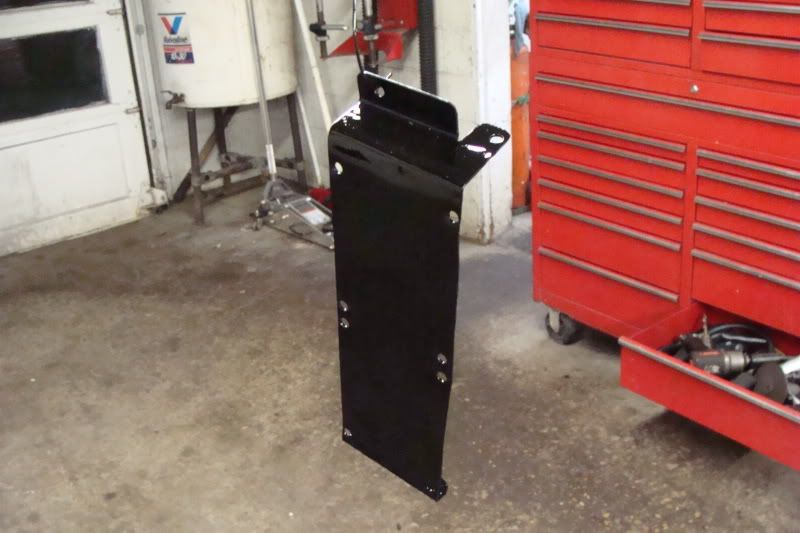 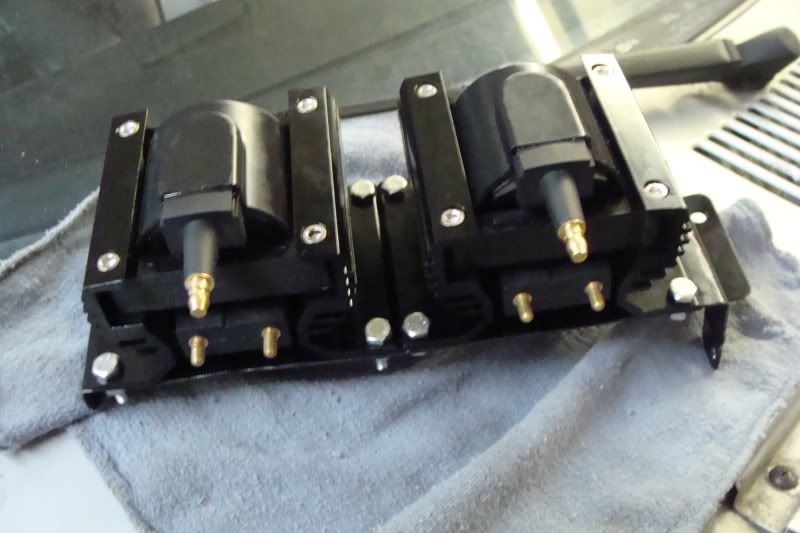 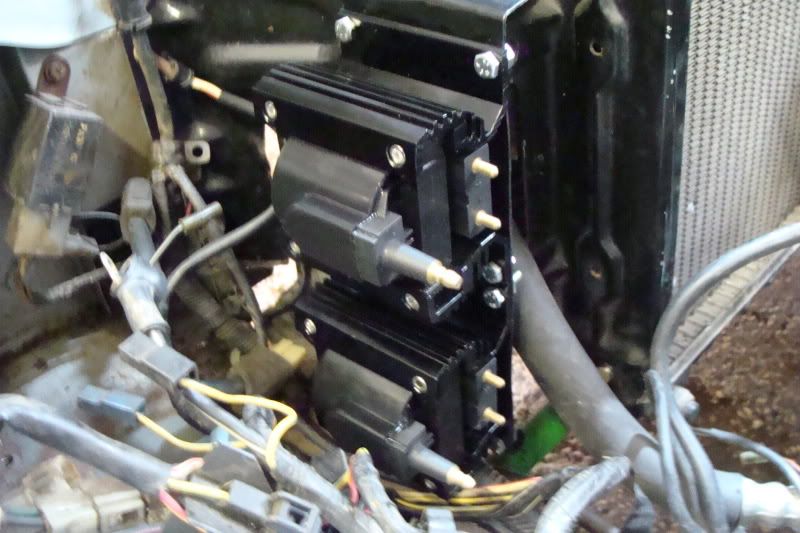 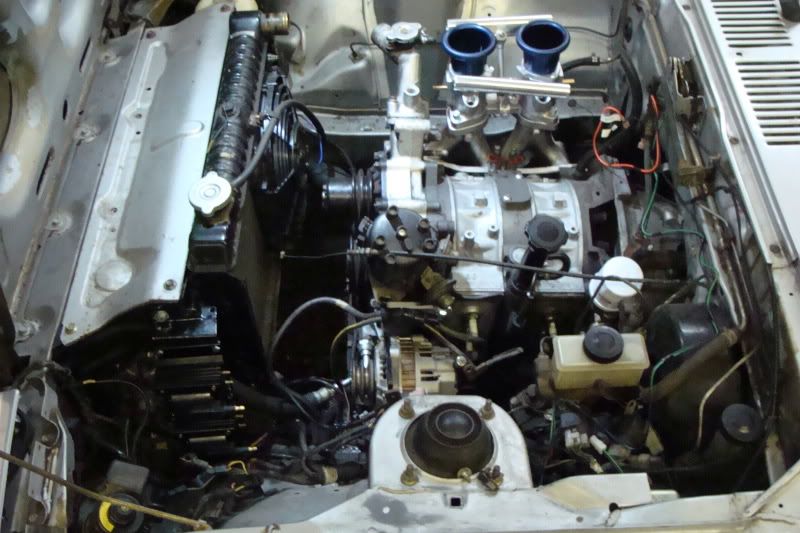
__________________
For current updates and event coverage check out Follow on Twitter! @WhizbangRally Whizbang Rally's Webpage | Facebook Last edited by Whizbang; 03-24-2009 at 11:51 AM. |
|
|
|
|
03-24-2009, 01:12 PM
|
#67 |
|
Pirate

Join Date: Mar 2008
Location: Central IL
Posts: 1,323
Rep Power: 19 |
Are those ITB's from Nopis10? I never actually saw them in person back when he had them, so it's nice to finally see what they look like!
__________________
Rotaries:They are NOT that complicated! |
|
|
|
|
03-24-2009, 02:32 PM
|
#68 |
|
Respecognize!
Join Date: Jul 2008
Location: Δx = ħ/2Δp
Posts: 3,190
Rep Power: 21 |
got them off of someone on Rx7club. Not sure if it could be him on there though. SidewaysGTU or something like that.
__________________
For current updates and event coverage check out Follow on Twitter! @WhizbangRally Whizbang Rally's Webpage | Facebook |
|
|
|
|
03-24-2009, 05:43 PM
|
#69 |
|
Respecognize!
Join Date: Jul 2008
Location: Δx = ħ/2Δp
Posts: 3,190
Rep Power: 21 |
Just for giggles, here is a running list of expenses thus far.
Chassis 1982 Rx7 (first buy): -$600 1982 Rx7 (sold for CO move): +$1100 1982 Rx7 (bought back again): -$550 Chassis Cost Total: $50 Driveline 13B 6PI engine: No Cost (Vert got totaled) Exedy OEM replacement clutch: No cost (had on hand for long time) Stainless braided clutch line: No cost (from vert) Total Driveline Cost: $0 Electrical / Ignition Summit CDI Box: -$120 (3) Summit Coils: -$150 Megasquirt: -$150 S5 alt w/ double pulley: -$50 Atkins Side Mount Alt. Kit: -$95 Haltech TPS: $50 Electrical / Ignition Total: $565 Intake EFI Hardware ITBs and 13B 6PI manifold: -$600 Pineapple Racing Aux Port Sleeves: -$50 Total Intake System Cost: $650 Wheels / Tires (2) 215/45 R16 and (2) 224/45 R16 Ventus RS-2 $450 Fuel System Summit EFI Fuel Injection Pump: -$80 Aeromotive 13109 FPR: No cost (old on hand part) Atkins EFI / EGR Block off: $50 Total Fuel System Cost: $80 Suspension / Braking RE Speed Big Brake Front Kit: -$200 Russel Stainless Steel Brake Line Kit: -$90 GSL-SE Suspension and rear axle: No Cost (hand on hand for sometime) Kia Sportage 4.78 3rd member: -$75 ST Sway bars (front and rear): -$300 Eibach Springs: No Cost (got on parts car) Tokico Adjustable Front dampers: No Cost (Got on a parts car) Rear dampers: -$80 Total Suspension Cost: $735 Then figure probably another $200 in misc. fluids, sealants and cleaners.
__________________
For current updates and event coverage check out Follow on Twitter! @WhizbangRally Whizbang Rally's Webpage | Facebook Last edited by Whizbang; 03-27-2009 at 12:01 AM. |
|
|
|
|
03-25-2009, 11:24 PM
|
#70 |
|
Respecognize!
Join Date: Jul 2008
Location: Δx = ħ/2Δp
Posts: 3,190
Rep Power: 21 |
Got some things done tonight. Drago would have known this but he doesn't show up EVER B^Oh^o
Got the trailing coil bracket made, painted and mounted. Wired up the leading coils, signal from the CDI box to the coils and ran the wires from the fan to the under dash so i can add a switch in soon enough. Have the trailing spark plugs wires all sorted out and installed. painted the top of the radiator shroud black to replace that nasty silver. I also got the aeromotive FPR installed. Also also managed to remove some more of that old crusty yellow rustproofing shit. Forget the camera though....
__________________
For current updates and event coverage check out Follow on Twitter! @WhizbangRally Whizbang Rally's Webpage | Facebook |
|
|
|
|
03-26-2009, 05:30 PM
|
#71 |
|
The Newbie
Join Date: Feb 2009
Posts: 10
Rep Power: 0 |
Looks good man.
|
|
|
|
|
03-27-2009, 12:02 AM
|
#72 |
|
Respecognize!
Join Date: Jul 2008
Location: Δx = ħ/2Δp
Posts: 3,190
Rep Power: 21 |
on a parts ordering binge. Car should be done asap.
__________________
For current updates and event coverage check out Follow on Twitter! @WhizbangRally Whizbang Rally's Webpage | Facebook |
|
|
|
|
03-28-2009, 01:35 PM
|
#73 |
|
Respecognize!
Join Date: Jul 2008
Location: Δx = ħ/2Δp
Posts: 3,190
Rep Power: 21 |
Wheels, tires, fender flares are ordered.
Haltech TPS is ordered Atkins EFI/ EGR block off is ordered Racing beat 3" universal presilenser and muffler are ordered. Fuel system is sitting in my car and probably going in today.
__________________
For current updates and event coverage check out Follow on Twitter! @WhizbangRally Whizbang Rally's Webpage | Facebook |
|
|
|
|
03-30-2009, 01:31 AM
|
#74 |
|
Respecognize!
Join Date: Jul 2008
Location: Δx = ħ/2Δp
Posts: 3,190
Rep Power: 21 |
The entire fuel system went in today less the injectors. (the ones shown were for fitting the lines). All the stainless braided was done with the help of Peejay. The stainless 3/8" underneath the car was finished albeit tons of profanity was used. Stuff is hard as hell to bend and even harder to cut. Actually ate up one of the pipe cutting tools.
Fuel pump and filter went on shortly after. Ill get underside pics at a later time. Also acquired a nice Sparco seat to replace the Isuzu seats (which now live in Driver's car). Behold the power of a much nicer camera! 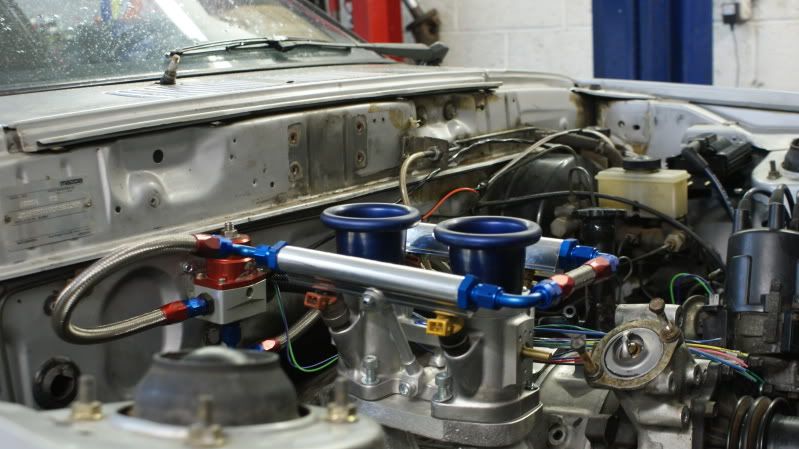 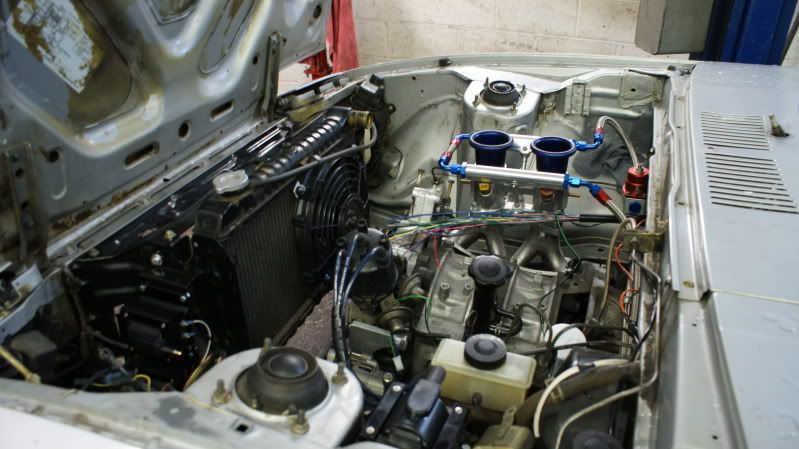 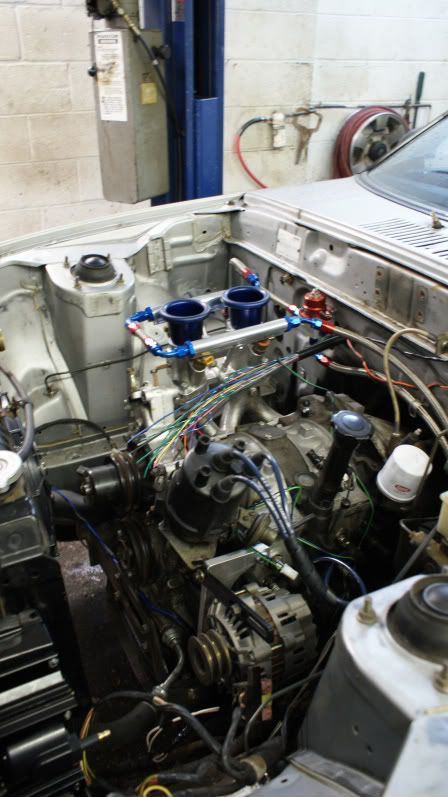 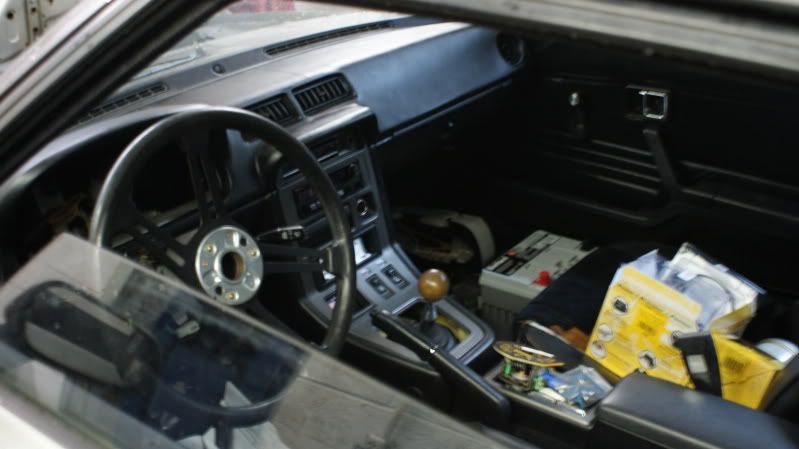 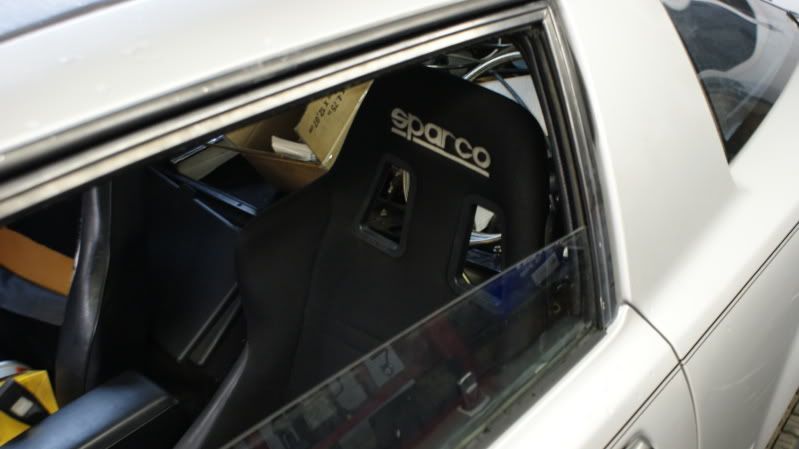
__________________
For current updates and event coverage check out Follow on Twitter! @WhizbangRally Whizbang Rally's Webpage | Facebook |
|
|
|
|
03-31-2009, 11:42 PM
|
#75 |
|
Respecognize!
Join Date: Jul 2008
Location: Δx = ħ/2Δp
Posts: 3,190
Rep Power: 21 |
sparco seat mounting stuffs, injectors and some other stuff ordered.
__________________
For current updates and event coverage check out Follow on Twitter! @WhizbangRally Whizbang Rally's Webpage | Facebook |
|
|
|
 |
| Bookmarks |
|
|


 Linear Mode

